


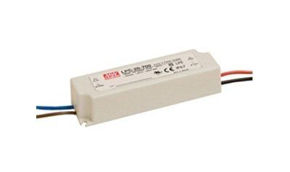


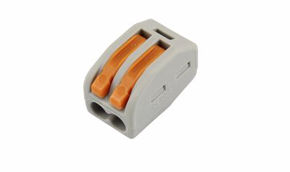
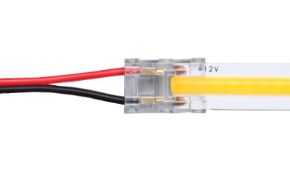

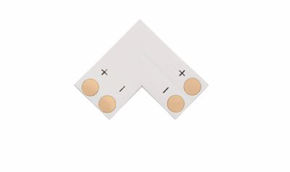


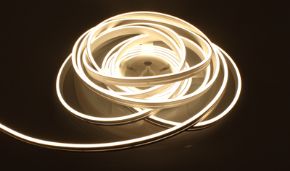


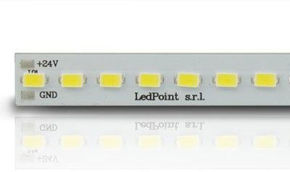


Wiring diagrams for LED systems
Designing and implementing a professional LED lighting system requires expertise that goes far beyond simply choosing strips and power supplies; it primarily involves setting up electrical diagrams. This operation is the foundation of every reliable, safe, and code-compliant installation. Unfortunately, the electrical diagram is a document that is often underestimated but absolutely indispensable. In a sector where LED technology evolves rapidly and system configurations become increasingly complex (with multi-channel controllers, wireless protocols, presence sensors, and domotic buses), the ability to read, draw, and correctly interpret electrical diagrams for LED systems represents a distinguishing competence between an occasional installer and a qualified professional. This guide stems from the direct experience of ledpoint.it with hundreds of electricians, designers, and system installers who daily face the challenge of translating a lighting design project into a functioning system. From the simplest residential installations—such as a single strip of LED under a kitchen cabinet with a touch sensor—to multi-zone DALI systems for the commercial sector, passing through spectacular sequential stair lighting with dozens of steps, every project has its operational DNA in its electrical diagram. Without a clear and complete wiring diagram, even the most experienced installer risks wiring errors that can compromise not only the system's functionality but also the safety of the entire building. The objective of this article is to provide a comprehensive and in-depth technical guide covering every aspect of electrical diagrams applied to LED systems: from defining the different types of diagrams (functional, wiring, single-line, topographical, power) to standardized symbology, from reading and interpreting diagrams to creating them with professional software, from real wiring diagrams with components (Mean Well power supplies, Skydance controllers, PIR and microwave sensors) to the regulatory references that every installer and designer must know. Whether you are electricians with years of experience, electrical engineering students, designers seeking innovative solutions, or maintenance technicians who need to diagnose a fault, you will find in these pages the technical answers, comparative tables, practical examples, and electrical installation drawings you need to work with competence and safety. Before delving into electrical diagrams for LED systems, it is fundamental to build a solid conceptual foundation on what exactly an electrical diagram is, what its purpose is in the system context, and why it represents an irreplaceable document for every professional in the electrotechnical sector. Understanding the nature and function of these graphical documents is the first step to being able to use them effectively in daily practice, both during the design phase and during the installation and maintenance of systems. An electrical diagram is a coded graphical representation of an electrical circuit or system that uses standardized symbols to indicate components, connections, current flows, and functional relationships between the different parts of the system. Unlike a simple illustrative drawing, an electrical diagram follows precise rules defined by international (IEC, ISO) and national (CEI in Italy, ANSI in the United States, DIN in Germany) standardization bodies, ensuring that any qualified technician anywhere in the world can interpret it unambiguously. In the context of LED systems, an electrical diagram documents the path of electrical energy from the distribution network (typically 230V AC in Italy) through protections (magnetothermal and differential circuit breakers), the constant voltage power supply (which converts 230V AC to 12V or 24V DC), controllers and dimmers (which manage light intensity and color), to the lighting load consisting of LED strips. In parallel, the diagram can also document signal and control circuits: buttons, RF remote controls, WiFi/Zigbee/Bluetooth connections, DALI buses, and inputs for presence or motion sensors. Electrical diagrams fulfill multiple functions that make them indispensable tools in every phase of an LED system's lifecycle. Analyzing them individually allows us to understand why no serious professional can afford to work without them. In the design phase, the electrical diagram is the tool with which the designer translates lighting requirements (illumination levels, color temperatures, independent control zones) into a concrete system configuration. The technical drawing allows precise definition of the number and type of power supplies needed, the distribution of controllers in different zones, sensor placement, protection selection, and cable sizing. Without an accurate diagram, the risk of undersizing the power supply, confusing polarities, or creating unnecessarily long cable runs is extremely high. The electrical diagram is the universal language through which designer, installer, client, and maintenance technician communicate unambiguously. When a designer delivers the diagram to an electrician, the latter must be able to understand exactly which components to purchase, how to connect them, with which cables, and in what sequence. Standardized symbology ensures that a wiring diagram drawn in Milan is interpreted the same way by an installer in Palermo or Bolzano, eliminating the risk of misunderstandings that could result in costly and dangerous wiring errors. In Italy, Ministerial Decree 37/2008 (formerly Law 46/90) requires that a Declaration of Conformity (Di.Co.) accompanied by technical documentation be issued for every electrical system, which must obligatorily include the system diagram. The single-line diagram of the system, in particular, is one of the mandatory attachments of the Di.Co. and represents the document proving that the system was installed according to best practices as prescribed by standard CEI 64-8. Without this documentation, the system is formally non-compliant, with all the legal and insurance consequences that entails. When an LED system malfunctions (a zone that won't turn on, a dimmer that doesn't respond to commands, a sensor generating false positives), the maintenance technician has the electrical diagram as a solution map. Following the circuit path on the diagram, the technician can quickly isolate the faulty section, identify the defective component, and plan the repair intervention without unnecessarily dismantling portions of the system that are functioning correctly. For complex systems with dozens or hundreds of LED strips, controllers, and sensors, working without an updated electrical system diagram is equivalent to looking for a needle in a haystack in the dark. An often underestimated advantage of well-drafted electrical diagrams is the ability to replicate a system in similar contexts with minimal design effort. An electrician who has successfully installed an LED lighting system in an office can reuse the wiring diagram for similar projects, adapting only dimensional parameters (strip length, power supply capacity) without having to redesign the entire circuit topology. This function is particularly valuable for companies managing repetitive projects such as retail chains, hotels, or residential buildings with standardized housing units. LED lighting systems have specific technical characteristics that make the use of electrical diagrams even more critical compared to traditional mains-voltage systems. Here are the main reasons that every professional must keep in mind. Dual voltage in the circuit: a typical LED system operates on two voltage levels: the 230V AC of the distribution network and the 12V or 24V DC that powers the LED strips. The electrical diagram must clearly document the separation between the primary circuit (mains side) and the secondary circuit (LED side), highlighting the transformation point constituted by the power supply. Confusing the two circuits during wiring can have catastrophic consequences for both components and personal safety. Critical polarity: unlike AC circuits where reversing phase and neutral has no immediate effects on loads (although it is still a code violation), in DC LED circuits, reversing polarity (+/−) can instantly damage LED strips, controllers, and even power supplies. The wiring diagram must unequivocally indicate the polarities of every connection, using standardized color codes (red/black or red/blue for +/−) and appropriate symbology. Separate signal circuits: in modern LED systems, alongside the power circuit that feeds the strips, one or more signal circuits coexist: the connection of buttons to Push-Dim controllers, the two-wire DALI bus, PIR sensor wiring, 0-10V or 1-10V connections for analog dimming. The electrical diagram must distinctly represent these circuits, preventing the installer from confusing them with power lines. Critical power supply sizing: LED strips have specific power consumptions expressed in Watts per meter (W/m) that vary enormously depending on the model: from 4.8 W/m for decorative strips up to 30 W/m and beyond for high-power strips. The electrical diagram is the document where it is verified that each power supply is correctly sized relative to the connected load, with the recommended 20-30% safety margin to guarantee reliability and longevity. In the world of electrical system design and installation, there are different types of diagrams, each designed to communicate a specific level of information. The choice of which type of diagram to use depends on the context (design phase, construction site, maintenance) and the recipient (designer, installer, client, inspection body). For professional LED systems, it is fundamental to know and be able to use at least the six main types that we will analyze in detail in the following paragraphs, understanding for each the purpose, informational content, advantages, and limitations. The functional diagram, also known as the schematic diagram, is the most abstract and conceptual representation of an electrical circuit. Its primary purpose is to describe the operating principle of the system without going into the physical details of wiring, component placement, or real connections. In a functional diagram for an LED system, for example, you will see logical blocks such as "230V AC Mains", "24V CV Power Supply", "Dimmer Controller", "LED Strip" connected by lines indicating the flow of energy and control signals, but without specifying exact terminals, cable cross-sections, or distances. What is the functional diagram for in the context of LED systems? It is used primarily in the initial design phase, when defining the system architecture: how many independent zones to provide, which control protocol to adopt (RF, WiFi, DALI), how to organize the hierarchy between master and slave, where to position sensors. The functional diagram is also the ideal tool for communicating with clients who do not have in-depth technical expertise: by showing functional blocks and flows, one can explain the system's operating principle without overwhelming non-technical stakeholders with details. From a regulatory standpoint, the functional diagram corresponds to what standard IEC 61082 (adopted in Italy as CEI EN 61082) defines as a "functional diagram" or "operation diagram". It does not contain sufficient information for on-site wiring, but it is the starting point from which all other types of diagrams are derived. The main characteristics that distinguish the functional diagram from other types of diagrams are multiple. First, components are represented as rectangular blocks with descriptive labels (e.g., "Power Supply HLG-150H-24A" or "Controller V1-L") rather than with detailed circuit symbols. Second, connections are indicated with simple lines showing the logical flow of information and energy, without distinction between number of conductors, cable cross-section, or connector type. Third, the graphical arrangement of elements follows a functional logic (typically left to right, from source to load) and not the actual physical arrangement of components in the building. Consider a simple LED system for an office: a 5-meter run of 14.4 W/m LED strip controlled by a wall button for switching on and brightness adjustment. The functional diagram of this system consists of four blocks connected in linear sequence. The first block is the 230V AC Mains with protections (magnetothermal + differential). The second block is the 24V Power Supply (for example a Mean Well HLG-100H-24A, where the "A" indicates adjustable output). The third block is the Skydance V1-L Controller with indication of the Push-Dim input connected to a NO (Normally Open) button. The fourth block is the 24V 14.4 W/m LED Strip with indication of length (5m) and total consumption (72W). A power line connects the blocks in series, while a dashed signal line connects the button to the controller. The wiring diagram, also called the connection diagram, is the most detailed and operational technical representation of an electrical circuit. Unlike the functional diagram which shows "what the circuit does", the wiring diagram shows "how to physically connect" the components. This type of diagram is the fundamental document that the installer uses on-site to physically execute connections between devices, and is therefore the most important type of diagram for those who work with their hands on real LED systems. In the wiring diagram for LED systems, each component is represented with its own detailed circuit symbol, complete with terminal numbering. Conductors are represented individually, with indication of cross-section (e.g., 1.5 mm²), insulation color (blue for neutral, brown/black/gray for phases, yellow-green for PE, red for +24V, black for −24V) and, where necessary, maximum allowable length. Every terminal-to-terminal connection is explicitly indicated, eliminating any ambiguity in executing the wiring. The wiring diagram is the operational tool par excellence and serves multiple practical purposes. For the installer on-site, it is the step-by-step guide indicating exactly which wire to connect to which terminal, in what sequence and with what color code. For the inspector who must verify system compliance, it is the reference document against which to compare the actual wiring to identify any discrepancies. For the maintenance technician, it is the map that allows following each individual conductor from its origin point to its destination, facilitating fault location. A particularly critical aspect in LED systems is the correct representation in the wiring diagram of the separation between primary and secondary circuits. The Mean Well HLG power supply, for example, has input terminals (L, N, PE for 230V AC) and output terminals (+V, −V for 24V DC) that must be clearly distinguished in the diagram. The installer must be able to immediately see which part of the wiring operates at dangerous mains voltage and which operates at extra-low safety voltage (SELV or PELV), adopting appropriate precautions in each case. The single-line diagram (or "single-line schematic") is a simplified representation of the electrical system in which all conductors belonging to the same circuit are depicted with a single line, regardless of the actual number of wires (phase, neutral, ground, positive, negative). The number of conductors is indicated by transverse tick marks on the line or by a number next to it. This graphical convention allows representing even very complex systems in a compact and readable way, providing an overview of electrical distribution that no other type of diagram can offer with the same immediacy. What is the single-line diagram for in an LED system? The single-line diagram is the central document in system design and legal documentation. It is the mandatory attachment of the Declaration of Conformity according to DM 37/2008 and contains essential information for evaluating the correctness of the system from the standpoint of protections and sizing. In a single-line diagram for an LED system you find: the energy delivery point, the meter, the main switch, protection devices (magnetothermal and differential circuit breakers), distribution lines with cable cross-sections and dedicated protections for each circuit, and final loads including LED power supplies with absorbed power. In the single-line diagram of an LED system, the energy flow is typically represented from top to bottom or left to right. At the upper level is the power source (energy delivery point or main panel), followed by switching and protection devices (main switch, SPD for surge protection), then by derived circuits with their respective protections (bipolar or multipolar magnetothermal circuit breakers, differential circuit breakers) and finally by the loads, represented in this case by LED power supplies with indication of nominal power. Each line in the single-line diagram reports the following essential information: the circuit identifier (e.g., "L1-led-Office", "L2-led-Corridor"), the cable type and cross-section (e.g., "FG16OR16 3×1.5 mm²" for the 230V side, "H07V-K 2×1.0 mm²" for the 24V DC side), the protection type (e.g., "C10 Idiff 30mA" for a 10A curve C magnetothermal differential with 30 mA differential protection), the load power and the run length. This information allows any professional to verify correct system sizing without having to examine the detailed wiring diagram. The topographical diagram, also known as the planimetric diagram or "system layout", is a representation of the electrical system superimposed on the architectural floor plan of the building or room. Unlike other types of diagrams that are logical or circuit representations, the topographical diagram shows the actual physical arrangement of electrical components in space: the position of LED strips along walls or in suspended ceilings, the location of power supplies in the technical room or ceiling void, the position of buttons and switches on the wall, the routing of cables in conduits. What is the topographical diagram in the practice of LED systems? It is the drawing that the installer consults to know where to mount each component and where to run cables. While the wiring diagram says "how" to connect the wires (terminal by terminal), the topographical diagram says "where" in the physical room the start and end points of each LED strip run are located, where to position the controller, where to install the PIR sensor to achieve the desired coverage, and which path to follow with cables to reach each point. The topographical diagram is indispensable for several reasons related to the specificity of LED systems. First, LED strips are linear components that can extend for many meters and must be precisely positioned within aluminum profiles, in suspended ceiling coves, under cabinets, or along stair edges. Only a diagram superimposed on the floor plan can indicate with precision where each luminous run starts and ends, and where the power and junction points are located. Second, the position of sensors is critical for correct operation of the automation system. A PIR sensor for stair lighting must be positioned to cover the entire passage area without blind spots: a microwave sensor mounted behind drywall must have a clear space free of metal structures in front of it that would block its signal. This information can be communicated effectively only through a detailed topographical diagram. Third, the cable routing in an LED system must be carefully planned to minimize the lengths of low-voltage runs (reducing voltage drops) and to ensure physical separation between 230V power cables and extra-low voltage 24V DC cables, as required by standard CEI 64-8. In LED systems of a certain complexity, typically in commercial, industrial, or large residential projects with domotic systems, it is standard practice to separate the graphical documentation into two complementary diagrams: the power diagram and the control diagram. This separation reflects the functional distinction between the circuit that carries the energy needed to power the LED strips (power) and the circuit that manages control signals for switching, dimming, and lighting scenarios (control). What is the power diagram in an LED system? It is the drawing that exclusively represents the path of energy from the source (mains or main panel) through protections, power supplies, and controllers to the LED strips. In the power diagram you find magnetothermal circuit breakers, differentials, contactors (if present), power supplies with their nominal power, controllers with output currents, and LED strips with consumption per meter and run lengths. You do not find buttons, remote controls, communication buses, or sensors. What is the control diagram? It is the complementary drawing that exclusively represents signal circuits: buttons connected to controller Push-Dim inputs, DALI buses with master and slave devices, 0-10V or 1-10V connections between the management system and LED drivers, PIR and microwave sensor inputs, wireless interfaces (WiFi, RF, Zigbee, Bluetooth). The control diagram shows how control signals reach each device, allowing diagnosis of control logic problems separately from power problems. The separation between power diagram and control diagram offers significant advantages for the design and maintenance of complex LED systems. First, each diagram is more readable because it contains fewer information, all pertinent to the same functional domain. Second, during maintenance it is possible to focus attention on the diagram relevant to the type of problem encountered: if LED strips won't turn on, consult the power diagram; if they don't respond to dimmer commands, consult the control diagram. Third, when modifying the system (for example adding a sensor or changing the control protocol), it is sufficient to update the control diagram without touching the power one. The assembly diagram is a representation that shows the actual physical appearance of components and connections, often in the form of a three-dimensional view or exploded assembly. Unlike circuit diagrams that use abstract symbols, the assembly diagram shows components with their recognizable physical appearance: the Mean Well power supply with its dimensions and terminals, the Skydance controller with colored connectors, the LED strip with the arrow indicating polarity. What is the assembly diagram for in LED systems? It is particularly useful for installers working with components they are not yet familiar with, or for companies that need to train new personnel on assembling standardized configurations. LED component manufacturers, including ledpoint, often provide assembly diagrams in their datasheets and installation guides to facilitate the installer's first approach to their products. The ability to read electrical diagrams with precision and safety is founded on in-depth knowledge of standardized symbology. Electrical symbols are the vocabulary with which diagrams are written: every circuit component, from the simplest switch to the most sophisticated DALI controller, is represented by a conventional graphical symbol that uniquely identifies its type and function. International standardization of symbols is what makes electrical diagrams a universal language, understandable by any qualified professional regardless of nationality, spoken language, or measurement system used. For those working with professional LED systems, mastery of symbology is particularly important because these systems involve components belonging to different technological categories: mains-voltage power components (230V AC), extra-low voltage DC components (12V/24V DC), semiconductors (LEDs), conversion devices (switching power supplies), control electronics (controllers, dimmers), and sensors. Each of these categories uses its own family of symbols that the installer and designer must be able to recognize with the same naturalness with which a musician reads notes on a staff. The electrical symbols used in diagrams are defined by a series of international and national standards that guarantee their uniformity and universal comprehensibility. Knowledge of these standards is essential not only for those who draw diagrams, but also for those who read and interpret them. The IEC 60617 standard (International Electrotechnical Commission) is the international reference standard for graphical symbols used in electrical and electronic diagrams. Published and periodically updated by the IEC, this standard contains a database of thousands of symbols organized by functional categories: conductors and connections, passive components (resistors, capacitors, inductors), semiconductors (diodes, LEDs, transistors), switching devices (switches, relays, contactors), measuring instruments, electrical machines, protection equipment, and many others. In Italy, the IEC 60617 standard is adopted as CEI EN 60617 and is the official reference for graphical representation in compliant electrical diagrams. When a designer uses symbols from IEC 60617/CEI EN 60617, anyone in the world trained on the same standard will be able to interpret the diagram without ambiguity. In Italy, the Italian Electrotechnical Committee (CEI) has adopted and in some cases supplemented IEC standards with national specifications. Regarding symbology, in addition to the aforementioned CEI EN 60617, CEI 3-14 and CEI 3-15 are relevant, containing the graphical symbols most commonly used in Italian installation practice. These documents are particularly useful for installers who must read diagrams drawn in Italy following local conventions, which may present subtle graphical differences compared to "pure" IEC symbols. Although less used in Italy, the ANSI/IEEE standard (American National Standards Institute / Institute of Electrical and Electronics Engineers) is widespread worldwide, especially in datasheets and technical documents from American and Asian manufacturers. For those working with internationally produced LED components, it is useful to know at least the main differences between IEC and ANSI symbology: for example, the resistor symbol is a rectangle in IEC and a zigzag line in ANSI; the power supply/voltage generator symbol is a circle in IEC and two parallel lines (+ and −) in ANSI. Let us now analyze in detail the most important electrical symbols encountered in LED system diagrams. For each symbol we will indicate the name, reference standard, graphical appearance, and function in the context of LED systems. Conductors are represented by solid lines. A single conductor is a simple line; a group of conductors following the same path (a multi-core cable) can be represented by a single line with a number or transverse tick marks indicating the number of wires (in the single-line diagram). The junction point (node) is a filled dot (●) that indicates an actual electrical connection between two intersecting conductors; if two lines cross without the dot, it means they physically cross but are not electrically connected. This detail is fundamental in reading electrical diagrams for LED systems: in multi-channel circuits (RGB or RGBW), where conductors are numerous, it is essential to clearly distinguish which lines are connected to each other and which simply cross in the drawing. A reading error on this point can lead to short circuits between different color channels, with potential damage to controllers. The AC power supply source (230V mains) is represented by the AC generator symbol: a circle with a sine wave inside (~). The power supply that converts AC voltage to DC is represented by the rectifier/converter symbol or, more commonly in practical diagrams, by a rectangle with the model number and input (230V AC) and output (24V DC) indications. The polarities of the DC output are indicated with + and − symbols, corresponding respectively to the positive conductor (typically red) and negative conductor (typically black). The LED (Light Emitting Diode) is represented by the standard diode symbol — a triangle with a transverse bar — with the addition of two arrows emanating from the triangle and pointing outward, indicating light emission. The direction of the triangle indicates polarity: the anode (+) is on the triangle base side and the cathode (−) is on the bar side. In the practice of LED strip diagrams, instead of drawing hundreds of individual LED symbols, a simplified representation is used: a rectangle with the word "LED" or the LED symbol repeated two or three times with ellipsis (...) to indicate strip continuity. The protection devices that appear in LED system diagrams include: the magnetothermal circuit breaker (switch symbol with a rectangle indicating the thermal relay and a semicircle indicating the magnetic relay), the differential circuit breaker (switch symbol with a "T" or differential current sensing circuit), the fuse (a rectangle with a thin wire in the center), and the disconnector (a contact with a cross indicating the ability to open under no-load conditions). The selection and sizing of these devices are defined in the single-line diagram and must comply with the prescriptions of standard CEI 64-8. In electrical diagrams for LED systems with dimming and automation, specific symbols appear for control devices. The potentiometer/dimmer is represented by the resistor symbol with an arrow indicating the ability to vary the value. The NO (Normally Open) button, fundamental for Push-Dim circuits, is a contact with a dashed line indicating return to rest. The PIR sensor is typically represented with a semicircle with rays indicating the detection zone. The relay is represented by a rectangle with the coil and associated contacts. For communication protocols like DALI, the diagram uses specific conventions: the DALI bus is represented by two parallel lines (without polarity, unlike DC buses) with the protocol symbol indicated. DALI devices are represented with their numerical address on the bus. One of the most frequent questions among those approaching reading electrical diagrams concerns the identification of the phase conductor. In electrical diagrams compliant with IEC and CEI standards, the phase conductor is identified with the letter L (from English "Line"). In a single-phase 230V system like that of Italian residential installations, there are three conductors: L (phase, color brown, black, or gray), N (neutral, light blue color), and PE (protective conductor/earth, yellow-green color). In a three-phase system there are L1, L2, L3 (or also R, S, T in the old nomenclature) for the three phases. In LED system diagrams, phase (L) and neutral (N) appear in the primary 230V AC circuit, i.e., in the part of the diagram that goes from the main electrical panel to the power supply input. Downstream of the power supply, in the extra-low voltage DC circuit, one no longer speaks of phase and neutral but of positive (+V) and negative (−V or GND), with color codes typically red for positive and black for negative. An important distinction for correct diagram interpretation concerns the difference between electrical diagram and electronic diagram. The electrical diagram represents circuits that transport and distribute electrical energy (power systems, distribution, lighting): the main components are switches, cables, protections, transformers, motors, and loads. The electronic diagram represents circuits that process electrical signals (amplifiers, microcontrollers, regulation circuits): the main components are resistors, capacitors, transistors, integrated circuits, diodes, and LEDs. In professional LED systems, both worlds converge: the system as a whole is an electrical system (energy distribution from mains to LED strips), but internally it contains distinctly electronic components (the power supply conversion circuit, the dimmer control logic, the WiFi controller microprocessor). For this reason, LED system diagrams use symbols from both traditions: installation symbols for the distribution and protection part, and electronic symbols for the conversion and control part. The installer who masters both symbol families is able to read any diagram submitted to them, from the designer's system drawings to the technical datasheets of component manufacturers. A professional LED system is a system composed of several interconnected components, each with a specific function and each represented in the electrical diagram with its own symbols and technical characteristics. Understanding the role of each component and its interactions with other system elements is essential to being able to correctly read, draw, and verify LED system wiring diagrams. In this section we will analyze in detail the main components that make up the system, starting from the lighting load (LED strips) and proceeding backwards toward the power source, passing through control and automation devices. The components of a professional LED system can be grouped into four fundamental functional categories: the lighting load (LED strips), power supply (constant voltage power supplies), intelligence (controllers, dimmers, domotic masters) and automation (motion, presence, and light sensors). These four categories correspond to the four main blocks that appear in any functional diagram of an LED system, and their correct interaction determines the performance, reliability, and safety of the entire system. LED strips represent the central component of any system, the lighting load that the entire system is designed to power and control. In the electrical diagram, the LED strip is the terminal point of the power circuit, the component that transforms electrical energy into light. The choice of LED strip determines in cascade the sizing of all other components: power supply capacity, controller capacity, cable cross-section, and type of necessary protections. LED strips with COB (Chip On Board) technology, such as model F52-300-480OR, represent the most advanced evolution in LED linear lighting. In these strips, LED chips are mounted directly on the flexible circuit at such a high density as to produce a continuous line of light, without the "dotted" effect (dot effect) typical of conventional LED strips. This characteristic makes them ideal for applications where the strip is directly visible or through profiles with thin diffusing covers, such as in high-end architectural lighting, recessed wall profiles, and decorative design applications. In the electrical diagram, a COB strip is represented like any other LED strip: a rectangle with the LED symbol and indications of voltage (24V), power (W/m), and length, but the designer and installer must take into account its high power per meter (typically 10-15 W/m for standard versions, up to 20+ W/m for high-brightness versions) which requires adequately sized power supplies and mandatory use of aluminum profiles for thermal dissipation. High-density LED strips, such as model B52-40s-240D22, are designed for main lighting applications where long-term reliability and luminous efficiency are priorities over the aesthetics of the light source. Characterized by high LED density (240 LEDs/m in the cited version), excellent efficiency (lm/W), and long life, these strips are the preferred choice for lighting offices, shops, showrooms, corridors, and commercial environments. In the wiring diagram, Performance series strips require particular attention to sizing of power supply cables since their high efficiency translates into significant operating currents which, on long low-voltage runs (24V), can generate problematic voltage drops. The diagram must clearly indicate the maximum lengths that can be powered from a single injection point and, for runs longer than 5 meters, provide for dual-end feeding (from both ends) or intermediate injection points. The special LED strips available in the ledpoint catalog include models with advanced functionalities that require more complex wiring diagrams than monochrome strips. CCT (Correlated Color Temperature) strips integrate LEDs of two different color temperatures (typically warm white 2700K and cool white 6500K) which, mixed in variable proportions by the controller, allow adjusting the light temperature from warm to cool. In the electrical diagram, a CCT strip has three conductors: the common positive (+V) and two separate negatives, one for the warm channel (WW, Warm White) and one for the cool channel (CW, Cold White). Pixel/Control strips are addressable LED strips in which each LED or group of LEDs can be controlled individually, enabling dynamic effects such as "running" (light sequence scrolling along the strip), "rainbow", and any programmable animation. These strips use digital communication protocols (WS2812B, SK6812, APA102) and in the electrical diagram present three connections: power supply (+V and GND) and a digital data signal (DATA or DIN/DOUT). The controller must be compatible with the specific protocol of the strip and the representation in the diagram must clearly indicate the direction of data flow (from the first to the last strip in the chain). RGB strips have four conductors (common positive + R + G + B) and RGBW strips have five (common positive + R + G + B + W), requiring controllers with the corresponding number of output channels. In the wiring diagram, each color channel must be clearly identified with its own label and, preferably, with the cable color code. The correct representation of LED strips in electrical technical drawing is an aspect that deserves specific attention, since these components have unique geometric and functional characteristics in the landscape of electrical loads. An LED strip is not a discrete point light like a lamp or spotlight: it is a linear load that extends for a variable length, has consumption proportional to length, can be cut at predefined points, and its performance depends on the quality of power supply along the entire length. These peculiarities must be correctly documented in the electrical diagram to guarantee a professional installation. Every LED strip represented in the wiring diagram or single-line diagram must be accompanied by a set of technical parameters that allow the installer and inspector to understand the load characteristics and verify the correctness of system sizing. These parameters include the nominal operating voltage (expressed in Volts, typically 12V or 24V DC), power per linear meter (expressed in W/m), length of the installed run (in meters), total power of the run (W/m × length), absorbed current (calculated as total power divided by voltage), number of required conductors, and minimum cutting pitch. Voltage drop is the most insidious technical problem in low-voltage LED systems and must be carefully documented and managed in the electrical diagram. In a 24V DC circuit, every volt of drop corresponds to about 4.2% of nominal voltage; in a 12V DC circuit, the same 1V drop corresponds to 8.3%. When the voltage at the LED strip terminals drops significantly below the nominal value, brightness decreases, color rendering is altered, and in the worst cases, the strip might not turn on correctly or present visible non-uniformities (the beginning of the strip brighter than the end). The wiring diagram must therefore indicate for each LED strip run: the length of the cable connection from the power supply to the strip power injection point, the cable cross-section chosen based on current and length, and the power injection point (start, end, center, or both ends). For LED strip runs longer than 5 meters, the diagram must explicitly show the adopted power strategy: dual-end feeding (cables at start and end connected in parallel to the same power supply), central injection, or feeding from multiple independent power supplies. The voltage drop in a DC cable is calculated with the formula: ΔV = 2 × ρ × L × I / S, where ΔV is the voltage drop in Volts, ρ is the resistivity of copper (0.0178 Ω·mm²/m at 20°C), L is the cable length in meters (the factor 2 accounts for the go + return path), I is the current in Amperes, and S is the cable cross-section in mm². The percentage voltage drop is obtained by dividing ΔV by the nominal voltage and multiplying by 100. The maximum acceptable value is generally 5% of nominal voltage (1.2V on 24V, 0.6V on 12V) to guarantee luminous uniformity. The values in bold in the table exceed the recommended 5% limit and indicate inadequate cross-section/length/current combinations. Values are calculated for copper cables at 20°C with go + return path. The power supply is the heart of the power circuit of any LED system. Its function is to convert the alternating voltage of the electrical mains (230V AC in Italy) into a constant direct voltage (typically 12V or 24V DC) suitable for powering LED strips. For professional LED strips, it is mandatory to use constant voltage (CV) power supplies, which maintain stable output voltage regardless of load variations, contrary to constant current (CC) drivers used instead for high-power LEDs and discrete COB modules. The correct selection, sizing, and connection of the power supply are documented in the electrical diagram and represent one of the most critical aspects of designing a professional LED system. The market offers several families of power supplies for LED strips, each optimized for specific installation conditions and functionalities. The choice of type directly influences the wiring diagram of the system, since each family has different terminals, control interfaces, and installation requirements. Mean Well HLG and ELG series power supplies represent the industrial standard for reliability and versatility in professional LED systems. The HLG (Heavy Load Grade) series offers powers from 40W to 600W with IP67 protection, making them suitable for installation both indoors and outdoors, even in harsh environmental conditions. The ELG series is positioned as an economical alternative with analogous performance for less demanding applications. In the electrical diagram, a Mean Well HLG power supply is represented as a rectangular block with input terminals (L, N, PE) on the left side (or top) and output terminals (+V, −V) on the right side (or bottom). Models with suffix "A" have an internal adjustment potentiometer for varying output voltage, which should be indicated in the diagram if used for calibration. Models with suffix "B" add an 1-10V input or a PWM input for external dimming, which must be connected to the controller or management system and documented in the control diagram separately from the power circuit. A particularly interesting category of power supplies for LED systems with dimming is that of power supplies with integrated PWM output. These devices combine the AC/DC conversion function with the dimming function, eliminating the need for a separate controller/dimmer and significantly simplifying the wiring diagram. The PWM output (Pulse Width Modulation) regulates LED strip brightness by switching the voltage on and off at a very high frequency (typically >1 kHz), invisible to the human eye but perceived by LEDs as a variation in average intensity. Skydance PHN and PS series power supplies are compact solutions that integrate in a single device the power supply and the signal receiver (RF or 0/1-10V), with evident advantages in terms of space reduction in the technical compartment and wiring simplification. In the electrical diagram, these power supplies are represented as a single block with AC inputs (L, N), DC outputs (+V, −V) and, depending on the model, an integrated RF antenna or terminals for the 0-10V signal. The simplification of the diagram is notable compared to the traditional configuration of separate power supply + controller, since the DC wiring between the two devices is eliminated. Power supply sizing is one of the fundamental calculations that must be verified in the electrical diagram of an LED system. The basic rule is simple but non-negotiable: the power supply power must be 20-30% higher than the total power of the connected LED load. This margin, known as derating, is necessary to ensure that the power supply never operates at its maximum nominal power, a condition that would drastically reduce its useful life and reliability. The formula for power supply sizing is: P_power_supply ≥ (P_per_meter × L_total_meters) × 1.25 where P_per_meter is the LED strip power in W/m, L_total_meters is the total length of strip connected to the power supply, and 1.25 is the 25% safety factor (intermediate value between the recommended 20% and 30%). The commercial power supply chosen will be the one with nominal power immediately higher than the calculated value. The wiring diagram of the power supply must document with precision every electrical connection, both on the primary side (AC input) and on the secondary side (DC output). Below we analyze the typical connections that must appear in the diagram. On the primary side, the power supply terminals are typically three: L (phase), N (neutral), and PE (ground). In the diagram, the primary side connection must show: the derivation from the main line protected by its own magnetothermal circuit breaker with appropriate curve and rating (typically C6 or C10 for medium-power LED power supplies), passage through any differential circuit breaker dedicated or shared (Idn 30 mA type AC or type A, the latter preferred for power supplies with internal rectifier), and arrival at the power supply terminals. The ground conductor (PE) must be connected to the metal chassis of the power supply and, in cascade, to the aluminum profiles housing the LED strips, ensuring continuity of grounding of all accessible conductive parts. On the secondary side, the power supply output terminals are two: +V (positive) and −V (negative/GND). In the wiring diagram, the power supply output goes to the controller/dimmer (if present) or directly to the LED strip. Secondary circuit cables must be clearly distinguished from primary circuit cables, both in the diagram (using lines of different thickness, different colors, or different styles) and in the actual installation (physical separation of routes, possible use of separate conduits). An important aspect to document in the diagram is the cross-section of secondary circuit cables. At 24V DC, the currents involved are much higher compared to corresponding powers at 230V AC: a 240W load at 24V draws 10A, requiring cables of at least 1.5 mm² for short runs and 2.5 mm² for runs of several meters. The diagram must report the cross-section of each run and, for long runs, the voltage drop verification. Controllers and dimmers are the devices that confer "intelligence" to the LED system, transforming a simple static lighting system into a dynamic, adjustable, and automatable solution. The Skydance brand, distributed in Italy by ledpoint, offers a complete range of controllers covering all main control protocols: from simple Push-Dim with wall button to smart control via WiFi/Tuya/Alexa, from 0-10V analog dimming to DALI domotic bus, up to Triac phase-cut dimming for backward compatibility with existing systems. Each of these solutions has its own specific wiring diagram that the installer must know and be able to execute. The V (Voltage) series of Skydance controllers comprises RF constant voltage devices designed to control LED strips powered at 12V or 24V DC. The series name reflects the operating mode: these are controllers that operate on the output voltage, modulating it via PWM to achieve dimming. V series models differ by the number of channels managed, which determines the type of controllable LED strips. The Skydance V1-L is the most widespread single-channel controller in ledpoint professional LED systems. It manages a single output channel (monochrome or single white LED strip) and has RF input for wireless remote control, Push-Dim input for wall button control, and status LED. The wiring diagram of the V1-L provides the following connections: the 24V power supply provides current to the controller INPUT (+/−) terminals; a NO (Normally Open) button is connected between the controller PUSH and GND terminals; the LED strip is connected to the OUTPUT (+/−). Operation is intuitive: a brief press of the button toggles the LED strip on/off, while a long press (holding down) progressively adjusts brightness from minimum to maximum and vice versa. The controller memorizes the last set brightness level and restores it at the next power-on. The Skydance V5-L is the 5-channel controller of the V series, designed to manage RGBW+WW LED strips (with separate warm white) or, alternatively, five synchronized independent monochrome runs. The wiring diagram is more articulated than the V1-L: the output terminals are five (R, G, B, W, WW) plus the common positive (+V), for a total of six conductors to the LED strip. Power input and Push-Dim button are connected analogously to the V1-L. The Smart series of Skydance controllers comprises models with wireless connectivity for integration with the most widespread domotic ecosystems. Variants are identified by suffix: WT for WiFi/Tuya, WZ for Zigbee, and WB for Bluetooth. Each variant is compatible with respective hubs and voice assistants: WT models are compatible with Tuya Smart, Amazon Alexa, and Google Home; WZ models with Philips Hue, Samsung SmartThings and other Zigbee hubs; WB models with proprietary Bluetooth apps. The wiring diagram of the V1-L(WT) controller is identical to that of the standard V1-L regarding the power circuit (power supply → controller → LED strip) and the Push-Dim input. The difference lies in the additional connectivity: the controller connects to the building's 2.4 GHz WiFi network and is paired with the Tuya Smart app via a pairing procedure. In the electrical diagram, this wireless connection has no physical wiring to represent, but it is good practice to indicate it with an antenna symbol and the label "WiFi 2.4G" next to the controller to document the smart functionality of the system. A particularly powerful aspect of WT controllers to document in the diagram when used: the RF auto-transmission function. Every V1-L(WT) controller can act as a WiFi→RF converter, sending the command signal received via WiFi also via radio frequency to other Skydance V series controllers (even non-smart) within a range of about 30 meters. This means that a single smart controller as a "gateway" is sufficient to control via smartphone an entire network of conventional RF controllers, with significant component savings and wiring simplification. The system diagram should indicate which controller acts as gateway and which are secondary RF receivers, with dashed lines representing the wireless connection. The AC Triac dimmers of the Skydance range, such as models S1-B and S1-L, are designed to dim phase-cut compatible LED drivers or 230V dimmable LED lamps. These devices operate directly on 230V mains voltage, modulating it through phase cutting (leading edge or trailing edge) to achieve dimming. They are the ideal solution for upgrading existing systems where 230V wiring to light points already exists and one wishes to add dimming functionality without laying new cables. The wiring diagram of phase-cut dimming for an LED system is more complex than low-voltage dimming because it involves 230V mains voltage at every point in the circuit. The S1-B dimmer receives phase (L) and neutral (N) from the 230V mains at its input. The dimmer output (L1/N) goes to the AC input of a Triac-compatible LED driver (for example a Mean Well from the PWM series with Triac dimmable input). The driver converts the dimmed AC signal into a dimmed constant DC voltage for the LED strip. In the diagram it is fundamental to clearly indicate that the S1-B dimmer operates at 230V AC and that therefore all wiring between the mains, the dimmer, and the LED driver must be realized with cables of adequate cross-section for the current and with insulation suitable for mains voltage (minimum 450/750V). The circuit downstream of the driver, toward the LED strip, operates instead at extra-low voltage (24V DC) and is clearly separated in the diagram. The DALI (Digital Addressable Lighting Interface) protocol represents the standard for controlled professional lighting in commercial, hotel, and advanced tertiary environments. The Skydance series includes DALI components such as the TD-W Master and the DA4 Dimmer that allow integrating ledpoint LED strips into DALI systems managed by professional domotic control units. The electrical diagram of a DALI system for LEDs has distinctive characteristics compared to conventional diagrams. The DALI bus consists of two wires (DALI+ and DALI−) that connect the DALI Master to all slave devices (dimmers, drivers, sensors) in a bus topology. Unlike other bus protocols, DALI does not require polarity: the two wires can be connected indifferently, simplifying wiring. The bus can have a maximum length of 300 meters (with total resistance not exceeding 2Ω) and connect up to 64 individually addressable devices. In the specific case of LED systems, the DALI dimmer DA4 receives 24V DC voltage from the power supply and the control signal from the DALI bus, driving up to 4 runs of monochrome LED strips or one RGBW strip (4 channels). Device addressing on the bus occurs automatically from the DALI Master, which assigns a unique address to each connected dimmer. In the diagram, the DALI bus is represented with a two-wire line distinct from power lines, with devices connected in parallel (bus topology) and DALI addresses indicated next to each device. The integration of sensors in the LED system represents the most advanced level of automation, allowing LED strips to autonomously react to people's presence, ambient light level, or hand gesture, without need for remote controls or smartphones. The range of sensors distributed by ledpoint covers three main technologies: PIR (passive infrared), Hand Sweep (touchless), and Microwave, each optimized for a specific application. The wiring diagram of each sensor must document with precision the power connections, output signal, and interface with the controller or LED strip. PIR (Passive Infrared) sensors of the ER-AV series detect human movement through variation of infrared radiation emitted by the passing body. They are the ideal solution for automatic lighting of stairs, corridors, entrances, garages, and passages where light must turn on only when someone is present and turn off automatically after a programmable absence time. In the wiring diagram, the PIR sensor typically has three connections: positive power (+V), ground (GND), and signal output (OUT). The output can be of switching type (relay or MOSFET contact) or analog (proportional voltage). In the case of Skydance sensors for LED lighting, the output is typically of switching type, which in the simplest case can directly drive the LED strip (the sensor acts as an automatic switch) or, for more sophisticated configurations, can be connected to a controller trigger input to activate programmed scenarios (gradual turn-on, timed dimming, sequential effects). Hand Sweep sensors of the EB series are specifically designed for lighting kitchen under-cabinets and environments where one wishes to turn lights on and off with a simple hand gesture in front of the sensor, without physical contact. This solution is particularly appreciated in kitchens where hands may be wet or dirty, making use of a traditional button inconvenient. The wiring diagram of the Hand Sweep sensor is particularly simple: the sensor is powered directly from the 24V output of the power supply and its output is connected to the LED strip. The sensor integrates an infrared proximity detector with a range of 5-8 cm and functions as an on/off switch activated by gesture. In the topographical diagram, it is important to indicate the position of the sensor relative to the LED strip and the work surface, ensuring that the detection zone is easily reachable by the user. Microwave sensors of the V3-PE series represent the most advanced technology for presence detection in LED systems. Unlike PIR sensors that detect only movement in their direct field of view, microwave sensors emit a low-power RF signal and analyze its reflection, detecting presence even through non-metallic materials such as drywall, wood, glass, and plastic. This characteristic makes them ideal for installations where the sensor must be completely hidden behind a wall, suspended ceiling, or cabinet, remaining invisible but perfectly functional. In the wiring diagram, the microwave sensor presents the same basic connections as the PIR sensor (power and signal output) but with additional adjustable parameters: detection sensitivity (range), delay time (duration of activation after last detection), and in some models the ambient light threshold (which prevents activation when natural light is sufficient). In the diagram, it is useful to indicate next to the sensor the set configuration parameters, facilitating future maintenance. After having analyzed the individual components and their technical characteristics, it is time to put everything together in complete electrical diagrams representing real installation situations. This section is dedicated to electricians, designers, and technicians seeking concrete and immediately applicable examples of electrical diagrams for professional LED systems. Each situation has been selected to cover a different type of installation, from the simplest to the most complex, and is described with the detail necessary to guide the installer from understanding the diagram to practical execution of the wiring. This configuration is ideal for offices, bedrooms, and residential environments where one wishes to use existing electrical installation fruits (buttons) to control LED lighting. The main advantage is that it does not require replacing existing wall buttons nor laying new signal cables: the standard NO (Normally Open) button already present in the wall box is simply reused as a control interface for the LED controller. The wiring diagram of Situation A provides the following components: a 24V power supply (Mean Well HLG of adequate power for the load), a Skydance V1-L controller (single-channel with Push-Dim input), a NO button (standard wall button, not a two-way switch or switch), and the 24V LED strip (model and length of choice). Optionally, a Skydance RF remote control can be added for remote control in addition to the wall button. The wiring is articulated in three main connections. First connection: the 24V power supply provides current to the V1-L controller INPUT (+/−) terminals. The cable used is a bipolar (red for +, black for −) of adequate cross-section (minimum 0.75 mm², recommended 1.0 mm² for runs over 3 meters). Second connection: a NO button is connected between the controller PUSH and GND terminals, using a thin bipolar cable (0.5 mm² is sufficient given that the signal is at very low current). Third connection: the LED strip is connected to the controller OUTPUT (+/−), strictly respecting polarity. Operation: a brief button press toggles the LED strip on/off. A long press (holding the button down) continuously adjusts brightness: the first long press increases from current level to maximum, the next decreases from current level to minimum, and so on alternating. Releasing the button at any time locks brightness at the reached level. The controller memorizes the last set level and restores it at the next power-on. This configuration is designed to manage different environments from smartphone or via voice commands, leveraging the Tuya Smart ecosystem and compatibility with Amazon Alexa and Google Home. It is the preferred solution for modern residences, B&Bs, restaurants, and small offices where centralized and intuitive control is desired without investing in a dedicated domotic system. The wiring diagram provides: a 24V power supply for each zone (or a single power supply if zones are close and total load allows), a V1-L(WT) controller for each zone, and 24V LED strips for each zone. Physical wiring is identical to Situation A for each zone: power supply → controller → LED strip, with the possibility of adding local Push-Dim buttons. The fundamental difference is the wireless connection: each V1-L(WT) controller is associated with the Tuya Smart app via 2.4 GHz WiFi during the configuration phase. Advanced capability: each V1-L(WT) controller can act as a WiFi→RF converter, sending the wireless signal to other Skydance V series receivers within a range of about 30 meters. This means that for an entire home with, for example, six LED zones, it is sufficient that only one controller is of the WT version (smart): the other five can be standard V1-L (more economical) and receive commands via RF from the smart controller. The system diagram must indicate this "star" architecture with the smart controller at the center and satellite RF controllers connected wirelessly. Sequential stair lighting is one of the most spectacular and technically demanding applications of LED systems. The system progressively turns on the LED strips of each step in the direction of the person's walking detected, creating a light effect that "accompanies" the step. When no one is on the stairs, the lights gradually turn off, ensuring energy saving and scenic effect. The system is composed of: an ES32 stair controller (Skydance), capable of managing up to 32 independent outputs (one per step), 2 ER-S PIR sensors (one at the top and one at the bottom of the stairs), and a 24V power supply of adequate power for the sum of all step consumptions. Each step is illuminated by an LED strip run of length equal to the step width itself (typically 80-120 cm). The wiring diagram of the ES32 is articulated but logically structured. Power (5-24V, depending on the strip model) is connected to the ES32 INPUT (+/−) terminals. Each step is connected to one of the numbered outputs (01-32) of the controller, with the positive cable (+) directly from the power supply and the negative cable (−) from the corresponding ES32 output (the controller switches the negative side). The two PIR sensors are installed respectively at the upper and lower heads of the stairs and connected to the dedicated inputs UP PIR INPUT and DW PIR INPUT of the ES32. Operation: when a person ascends the stairs and is detected by the lower sensor (DW), the controller progressively turns on the steps from bottom to top with a smooth fade-in effect. When the person reaches the top and is detected by the upper sensor (UP), the turn-off timer starts: after a programmable time, the steps progressively turn off in the same direction. If a person descends the stairs (detected by the UP sensor), the sequence is inverted. The diagram must clearly show the correspondence between output number and step number, to facilitate maintenance in case of malfunction of a single step. The DALI configuration is intended for systems in commercial, hotel, and advanced tertiary environments managed by professional domotic control units. The DALI protocol offers the maximum level of flexibility, reliability, and functionality for managed lighting: individual addressing of each device, programmable groups and scenarios, status feedback from device to master, and compatibility with any building automation system that supports the DALI standard (IEC 62386). The wiring diagram of a DALI system for LEDs comprises: a DALI Master (for example the Skydance TD-W) that manages the bus and communicates with the supervision system, one or more DALI DA4 dimmers that receive commands from the bus and drive LED strips, dedicated 24V power supplies, and LED strips. The DALI bus (two wires without polarity) connects the Master to all DALI dimmers/drivers in a bus topology. The DA4 dimmer receives 24V from the power supply and drives up to 4 runs of monochrome LED strips or one RGBW strip. Addressing occurs automatically from the DALI Master which assigns addresses to connected devices. In the DALI electrical diagram it is standard practice to represent the bus on a distinct level compared to the power circuit, using a line of different color (typically purple or orange for DALI, black for 230V, red/black for 24V DC). Each device on the bus is annotated with its DALI address (from 0 to 63), group membership, and scenarios in which it is involved. This configuration is the solution for upgrading old existing systems or for using 230V dimmable LED lamps in combination with Skydance dimmers. It is particularly indicated when 230V wiring to light points already exists and one does not want or cannot lay new low-voltage cables. The wiring diagram of Situation E involves three components in cascade. The Skydance S1-B dimmer receives phase (L) and neutral (N) at 230V from the mains. The S1-B output (L1/N) is connected to the AC input of the Triac LED driver (for example a Mean Well from the PWM series with Triac dimmable input). The driver converts the dimmed 230V AC signal (with phase cutting) into a dimmed constant DC voltage at 24V for the LED strip. The S1-B dimmer can be controlled via wall NO button (connected to the PUSH input) and/or via RF remote control, offering the same flexibility as low-voltage controllers but operating entirely on mains voltage. In the diagram it is fundamental to highlight that all cables between the electrical panel, the S1-B dimmer, and the Triac LED driver operate at 230V AC and must comply with the requirements of standard CEI 64-8 for mains voltage circuits. One of the most frequent questions that emerge during the design and reading of electrical diagrams for LED systems concerns the difference between series connection and parallel connection. Thoroughly understanding these two circuit topologies is essential for anyone working with LED strips, since the choice between series and parallel determines the distribution of voltage, current, and brightness along the system, with direct consequences on lighting quality and system reliability. In series connection, components (in this case LED strips or individual strip segments) are connected one after another in a single closed path for current. The current is identical at all points in the circuit (the same current passes through each component), while voltage is distributed among the various components (the sum of voltage drops across each component equals the total voltage supplied by the power supply). For constant voltage LED strips (12V or 24V), pure series connection between different strips is generally discouraged and in most cases not practicable, since it would require a power supply with output voltage equal to the sum of the nominal voltages of the strips (for example, three 24V strips in series would require 72V). However, it is important to know that inside each single LED strip, LEDs are organized in groups connected in series-parallel: each group contains LEDs in series (typically 3 LEDs in series for 12V strips, 6 LEDs for 24V strips) and the groups are connected in parallel with each other along the strip. This internal topology is already defined by the manufacturer and is not modifiable by the installer, but it is useful to understand it for diagnosing faults (if an LED in a group fails, the entire group turns off but other groups remain lit). In parallel connection, each component is connected directly to the power supply source with its own pair of conductors. The voltage is identical on each component (all receive the same voltage from the power supply), while the current divides among the various branches (the total current supplied by the power supply is the sum of the currents absorbed by each component). For constant voltage LED strips, parallel connection is the standard and recommended topology. Each strip run is connected directly to the output terminals of the power supply (or controller) with its own pair of +/− cables. In this way, each run receives the entire nominal voltage (24V) and operates independently from the others: if one run fails or is disconnected, the others continue to function normally. When connecting multiple LED strip runs in parallel to the same power supply or controller, it is fundamental to respect some best practices that must be documented in the wiring diagram. First, each run must have its own dedicated pair of cables from the power supply/controller to the strip power injection point ("star" or "radial" connection). Avoid "daisy-chain" connection where the cable passes from one strip to another in series on the connection: this topology causes increasing voltage drops on strips farther from the power supply. Second, cable cross-sections must be sized for the total current of the branch: the cable connecting between the power supply and the first distribution point must carry the total current of all connected strips, while cables toward individual strips carry only the current of the respective run. The diagram must clearly indicate the cross-sections of each cable segment, which may be different at various points in the circuit. The ability to read electrical diagrams with competence and safety is one of the most important skills for any professional in the electrotechnical sector, from the electrician on-site to the designer in the studio, from the engineering student to the maintenance technician. A well-drawn electrical diagram contains all the information necessary to understand, realize, and verify a system, but this information is coded in a technical language that requires training and practice to master. In this section we will provide a step-by-step guide to reading and interpreting electrical diagrams specifically oriented to professional LED systems. To correctly read an electrical diagram for an LED system, we recommend following a systematic six-step procedure, which allows extracting all necessary information without overlooking critical details. The first step is to determine which type of diagram is being examined: is it a functional, wiring, single-line, topographical, power, or control diagram? This identification is fundamental because it sets expectations about what information will be found in the diagram and what will be absent. A single-line diagram, for example, will not show individual component terminals (for those the wiring diagram is needed); a functional diagram will not indicate cable cross-sections (for those the single-line or wiring diagram is needed). Always start from the origin point of energy: where does the circuit begin? In most LED system diagrams, the starting point is the main electrical panel or a sub-panel dedicated to lighting. Identify the main switch, magnetothermal and differential protections, supply voltage (230V AC single-phase), and nominal current of protections. Verify that protections are adequate for downstream loads. Trace the path of energy from the source to the lighting load, passing through all intermediate devices: protections → power supply (AC/DC conversion) → controller/dimmer (regulation) → LED strip. For each run, note the voltage, expected current, and cable cross-section. Verify that polarities are respected throughout the DC circuit (downstream of the power supply). Separately from the power circuit, identify all signal and control circuits: Push-Dim buttons, DALI bus, 0-10V cables, PIR sensor inputs, wireless connections (indicated with antenna symbols). Verify that signal circuits are physically separated from power circuits and use appropriate cables. Check the dimensional coherence of the system: is the power supply power sufficient for the total load (with the 20-30% margin)? Are cable cross-sections adequate for circulating currents and run lengths? Are protections coordinated with loads and cables? Finally, ensure that the diagram respects applicable regulatory prescriptions: separation between primary circuit (230V) and secondary (24V), presence of mandatory protections (magnetothermal + differential), continuity of grounding, minimum cable cross-sections according to standard CEI 64-8. Even experienced professionals can make errors in reading electrical diagrams, especially when working with unfamiliar components or configurations. Here are the most common errors to avoid. Confusing polarity: in LED system diagrams, the circuit downstream of the power supply operates in direct current where polarity is critical. Never confuse + with − and do not assume that the position of terminals on the symbol corresponds to the physical position on the real device: always verify on the component datasheet. Ignoring voltage drop: a diagram that reports undersized cable cross-sections for the distances involved may seem correct but will produce a system with non-uniform brightness problems. Always verify that section-length-current combinations fall within acceptable voltage drop limits (5%). Confusing power and current: a 200W power supply at 24V delivers a maximum current of 8.33A. In the diagram, power is the most visible information, but for cable and protection sizing, current is needed. Do not forget to calculate I = P/V for each circuit branch. Neglecting circuit separation: the 230V AC circuit and the 24V DC circuit must be clearly separated in the diagram and in reality. A diagram that does not highlight this separation is potentially dangerous and non-compliant. The design, realization, and verification of electrical diagrams for LED systems are regulated by an articulated regulatory corpus that every professional in the sector must know and apply. Standards are not simple recommendations: in Italy, compliance with CEI technical standards is the fundamental requirement for considering an electrical system installed "according to best practices" according to Law 186/68 and DM 37/2008. A non-compliant system exposes the installer, designer, and client to civil and criminal liability in case of accidents, in addition to invalidating insurance coverage and preventing issuance of the Declaration of Conformity. The CEI 64-8 standard is the main Italian regulatory reference for low-voltage electrical user systems (up to 1000V AC or 1500V DC). First published in 1984 and periodically updated, it has reached the ninth edition effective November 1, 2024. The standard covers all aspects of design, installation, and verification of electrical systems in residential, commercial, and industrial environments, and is therefore the reference framework within which electrical diagrams for LED systems are also inserted. Some sections of CEI 64-8 are particularly relevant for those designing and installing LED systems. Section 559 specifically addresses "lighting appliances and systems", providing prescriptions on protection, sizing, and installation of luminaires. Section 715 is dedicated to "extra-low voltage lighting systems" (SELV and PELV), which is the operating condition of LED strips powered at 12V or 24V DC via power supplies with reinforced insulation. Section 714 covers "outdoor lighting systems" with specific prescriptions for IP protection, grounding, and insulation. Chapter 37 defines minimum performance requirements for residential systems on three levels, including requirements for light points and lighting management systems. Standard CEI 64-8 defines three performance levels for residential systems, with increasing minimum equipment. Level 1 is the mandatory minimum that guarantees basic safety and functionality. Level 2 adds systems such as video surveillance, burglar alarm, and load management. Level 3 requires at least 4 domotic functions (lighting, climate control, load control, scenarios) and is the level most aligned with smart LED systems with WiFi controllers, sensors, and programmable scenarios. In addition to the installation standard CEI 64-8, individual components of the LED system must comply with specific product standards that guarantee their safety and performance. Ministerial Decree 37/2008 (which replaced Law 46/1990) regulates electrical system installation activities inside buildings and requires that every electrical system be accompanied by the Declaration of Conformity (Di.Co.), drawn up by the qualified installer. The Di.Co. certifies that the system was installed according to best practices and must be accompanied by a series of mandatory attachments, including the system diagram (typically the single-line diagram). Without the Di.Co. and the relative diagram, the LED system is formally non-compliant, with all the legal and insurance implications that follow. Standards that specifically regulate the way electrical diagrams must be drawn and presented include IEC 61082 (CEI EN 61082), which defines rules for preparing documents used in electrotechnics, and the aforementioned IEC 60617 (CEI EN 60617) for graphical symbols. These standards establish minimum symbol sizes, rules for component arrangement on the sheet, conventions for terminal numbering, codes for component identification, and requirements for title blocks (information frames) that must accompany each diagram sheet. Creating professional electrical diagrams requires adequate tools that combine technical precision, regulatory compliance, and productivity. The landscape of software for electrical technical drawing is broad and includes solutions for every level of complexity and experience, from professional CAD software for industrial projects to free online applications for quick diagrams of small residential systems. In this section we will analyze the most used tools by sector professionals, highlighting for each the strengths, limitations, and suitability for LED system design. AutoCAD Electrical by Autodesk is the most widespread CAD software in the world for professional electrical design. Based on the AutoCAD platform with specific functionalities for electrical drawing, it offers a complete library of electrical symbols compliant with IEC, ANSI, and JIS standards, tools for automatic generation of single-line and wiring diagrams, automatic numbering of cables and components, and production of bills of materials and reports. For designing complex LED systems — such as multi-zone DALI systems, commercial building lighting, or large residential systems — AutoCAD Electrical is the reference tool. EPLAN Electric P8 is the most used electrical design software in the industrial and automation sector. Its power lies in integrated management of power diagrams, control diagrams, hydraulic and pneumatic diagrams, panel layouts, and technical documentation. For large industrial and commercial LED systems, EPLAN offers advanced functionalities such as macro management (reusable diagrams), automatic verification of consistency between different diagrams, and direct interface with configurators of major electrical component manufacturers. DIALux evo is the worldwide reference software for lighting design, developed and distributed free of charge by the German institute DIAL. Although it is not a software for drawing electrical diagrams in the strict sense, DIALux is complementary to system design because it allows simulating illumination levels, uniformity, energy efficiency, and visual comfort of the LED system before realization. DIALux simulation results provide input data for electrical system sizing: total load power, number and distribution of light points, independent control zones. QElectroTech is open source and free software for creating electrical diagrams, available for Windows, macOS, and Linux. It offers a library of electrical symbols compliant with IEC standard, intuitive drawing tools, and the ability to create custom symbols. It is an excellent solution for electricians and small design studios that need a professional tool without the costs of commercial CAD software licenses. KiCad is another open source suite for electronic and electrical design, particularly strong in printed circuit board (PCB) design but also usable for generic electrical diagrams. It is the preferred solution for engineering students and makers who need to create electronic diagrams for custom LED control circuits. Lucidchart and SmartDraw are web applications for creating diagrams and schematics, including basic electrical diagrams. They offer electrical symbol libraries, drag-and-drop interface, and online sharing. They are suitable for functional diagrams, schematic diagrams, and client presentations, but do not have the specific functionalities necessary for professional system design. Many electrical component manufacturers offer online configurators that generate specific wiring diagrams for their products. These tools are particularly useful for installers working with products from a specific brand: by entering the power supply, controller, and LED strip model, the configurator generates the complete wiring diagram with all details on terminals and cables. Skydance, for example, provides detailed wiring diagrams for each of its controllers, which can be used directly as a reference for on-site wiring. Experience gained in technical support to hundreds of professional installers has allowed identification of best practices and most frequent critical issues in realizing LED systems. These technical tips represent the distillation of years of field practice and are designed to complete the information contained in electrical diagrams with that operational know-how that only direct experience can provide. Choosing a power supply with power 20-30% higher than the LED load is a fundamental rule to guarantee longevity and reliability. A power supply that constantly operates at 100% of its nominal power undergoes accelerated thermal stress that drastically reduces its useful life (from 50,000+ hours to less than 20,000 hours). The 20-30% margin keeps the power supply in the optimal operating zone, with contained internal temperatures and electronic components under low stress conditions. In practical terms, for a 100W LED load one must choose a power supply of at least 125-130W nominal. Using cables of adequate cross-section is the second pillar of professional installation. The empirical rule is 1 mm² per 10A in direct current for short runs (up to 5 meters). For longer runs, the cross-section must be increased to compensate for voltage drop (consult Table 6.2 of this guide). Equally important is tightening terminals well: a loose connection increases contact resistance, generating localized overheating that at best reduces performance and at worst can trigger a fire. Always verify terminal tightness after the first thermal cycle of the system (power on for 30 minutes, power off, recheck). For high-power LED strips (above 10 W/m), the use of aluminum profiles for heat dissipation is not optional but a fundamental technical requirement to preserve LED life and maintain luminous performance over time. The aluminum profile acts as a passive heat sink, transferring heat generated by LED chips to the surrounding air and preventing LED junction temperature from exceeding limits specified by the manufacturer (typically 80-85°C). Without a profile, a 14.4 W/m LED strip mounted on a non-conductive surface (wood, drywall, plastic) reaches dangerous temperatures that rapidly degrade phosphors, reduce luminous flux, and shorten useful life from 50,000 to less than 10,000 hours. In the topographical diagram, the presence and position of aluminum profiles should be indicated for each run of high-power LED strip, specifying the profile model and type of cover (transparent, opal, satin). The wiring diagram must also indicate the connection of the aluminum profile to ground (PE) when the profile is accessible and can be touched by people. One of the most powerful functionalities of Skydance controllers is the RF auto-transmission of the signal. Every V series controller that receives a command (from remote control, button, or WiFi) automatically retransmits it via radio frequency, and any other Skydance controller within reception range (about 30 meters in indoor environments) can receive and retransmit the command in turn. This effectively creates a mesh network in which each device acts as a repeater, extending signal range virtually infinitely through the building. To leverage this functionality, controllers must be paired during the configuration phase. In the system diagram, it is good practice to indicate RF synchronization groups with dashed lines connecting controllers belonging to the same group, specifying which controller is the "master" (the one receiving the original command) and which are the "followers". An aspect often neglected in installation practice is preventive maintenance of LED systems. Even though LEDs have a much longer useful life than traditional lamps, the system as a whole (power supplies, controllers, connections, cables) requires periodic checks to guarantee constant performance over time. An annual check is recommended including: verification of terminal and connection tightness, cleaning of aluminum profiles and LED strips from dust (which reduces heat dissipation capacity), testing of controller and sensor functionalities, verification of output voltage from power supplies, and checking cable condition (flexibility, absence of insulation cracking). Systematic analysis of the most frequent errors found in electrical diagrams for LED systems and in the installations that derive from them is a high-value training tool for sector professionals. Knowing typical errors allows preventing them both in the design phase (when drawing the diagram) and in the installation phase (when executing wiring following the diagram). In this section we will analyze the ten most common errors, explaining for each the causes, consequences, and correct solutions. Polarity reversal (connecting + where − should go and vice versa) is the most frequent and potentially most damaging error in LED systems. The cause is almost always unclear representation of polarity in the wiring diagram or failure to respect cable color code during installation. Consequences can vary from simple non-ignition of the LED strip (in fortunate cases where the controller has internal protection against reversal) to irreversible damage to the strip, controller, or both. Prevention: always indicate polarity with +/− symbols and color codes on the diagram; use red/black cables for the DC circuit; verify polarity with a multimeter before connecting LED strips. Choosing a power supply with power equal to or lower than the LED load is an error that does not cause immediate damage but seriously compromises long-term reliability. The overloaded power supply constantly operates at its maximum capacity, generating excessive heat, accelerating aging of internal components, and encountering premature failure, typically after 6-18 months instead of the expected 5-10 years. Prevention: always apply the 20-30% margin in sizing and verify the calculation in the diagram. Using cables too thin for low-voltage runs is an insidious error because consequences are not immediately catastrophic but manifest as non-uniform brightness (strip brighter near the power supply and dimmer at the end), overheating of cables and terminals, and instability of dimmer regulation. Prevention: always calculate voltage drop for each run and choose the cable cross-section that keeps drop within 5%. Running 230V AC cables and 24V DC cables in the same corrugated conduit or same trunking violates standard CEI 64-8 and represents a safety risk. In case of insulation damage, mains voltage could transfer to the low-voltage circuit, making LED strips and aluminum profiles dangerous. Prevention: indicate in the topographical diagram separate routes for AC and DC cables; use distinct conduits or, alternatively, cables with insulation adequate for the highest voltage present in the conduit. Aluminum profiles housing LED strips are accessible conductive parts that, in case of insulation failure, could become live. Failure to connect profiles to the protective conductor (PE) exposes people to the risk of indirect contact. Prevention: in the diagram, always indicate the connection of profiles to ground via yellow-green conductor of adequate cross-section. The Push-Dim circuit of Skydance controllers requires a NO (Normally Open) button (with return to rest), not a switch (which maintains position). Connecting a switch to the controller PUSH input causes malfunction: with the switch in ON position the controller interprets a continuous press and brightness regulates without stopping. Prevention: in the diagram, use the correct symbol of the NO button (not of the two-way switch or switch) and explicitly indicate "NO BUTTON" next to the component. Powering an LED strip longer than 5 meters from one end only causes progressive voltage drop that translates into decreasing and non-uniform brightness. Prevention: in the diagram, indicate dual-end feeding for runs longer than 5 meters and provide for the relative additional cables. Not all LED drivers are compatible with phase-cut dimming (Triac). Connecting a Triac dimmer to an incompatible driver causes flickering, audible buzzing, and in some cases non-operation. Prevention: verify Triac compatibility of the driver before inserting it in the diagram and explicitly indicate "Triac/IGBT compatible" in the component title block. Skydance controllers with internal RF antenna must be positioned so that the antenna is not shielded by metal surfaces (metal boxes, aluminum profiles, suspended ceilings with metal structure). Prevention: in the topographical diagram, indicate the controller position and verify that it is not surrounded by conductive materials. One of the most common and most underestimated errors is not updating the electrical diagram after having made modifications to the system on-site. A diagram that does not correspond to the reality of the installed system is worse than the total absence of a diagram, because it misleads the maintenance technician inducing them to make decisions based on erroneous information. Prevention: every modification made on-site relative to the original diagram must be documented with an updated "as-built" diagram that faithfully reflects the actual configuration of the system. This section collects the most frequent questions that electricians, designers, students, and maintenance technicians ask about electrical diagrams for LED systems, providing concise and directly applicable technical answers in professional practice. Questions are organized by theme to facilitate quick consultation. An electrical diagram is a coded graphical representation of an electrical circuit or system that uses standardized symbols (IEC 60617 / CEI EN 60617) to indicate components, connections, current flows, and functional relationships. For LED systems, the diagram documents the path of energy from the 230V mains through protections, constant voltage power supply, controllers and dimmers to the LED strips. Electrical diagrams serve to design the system, communicate specifications between designer and installer, document configuration for the Declaration of Conformity (DM 37/2008), facilitate fault diagnosis and maintenance, and allow replication of the system in similar contexts. Electrical diagrams are drawn by authorized electrical designers (engineers, industrial surveyors), by qualified installers with DM 37/2008 requirements, or by the technical team of LED component manufacturers. For systems with power above 6 kW, a project signed by an authorized professional is mandatory. The functional diagram (or schematic diagram) represents the operating principle of the circuit using logical blocks connected by flow lines, without details on physical wiring. For LED systems it shows the blocks "Mains→Protections→Power Supply→Controller→LED strip" with relative signal flows. The single-line diagram represents the entire system with a single line for each circuit (regardless of number of conductors), indicating protections, cable cross-sections, run lengths, and load powers. It is the mandatory attachment of the Declaration of Conformity. The topographical diagram superimposes the electrical system on the building floor plan, showing the physical position of components (LED strips, power supplies, sensors, buttons) and cable routes. It is essential for LED systems where the position of strips and sensors determines lighting quality. The assembly diagram shows the actual physical appearance of components and connections, facilitating practical assembly. Skydance controller datasheets provide assembly diagrams (wiring diagrams) that indicate the exact position of terminals and cable color codes. The power diagram exclusively represents the circuit that carries energy: from the mains, through protections and power supplies, to the LED strips. It does not include signal circuits (buttons, DALI bus, sensors). It is complementary to the control diagram. The control diagram represents signal and control circuits: Push-Dim buttons, DALI bus, 0-10V connections, sensor inputs, wireless interfaces. It shows how commands reach each device, separately from the energy path. In series connection the current is the same on each component but voltage divides. In parallel connection the voltage is the same on each component but current adds up. For constant voltage LED strips (12V/24V) parallel connection is the recommended standard. For the 230V AC circuit: cable with 450/750V insulation, cross-section according to standard CEI 64-8 (typically 1.5 mm² for lighting circuits). For the 24V DC circuit: cross-section depends on current and run length. Basic rule: 0.75 mm² up to 5m for loads up to 60W; 1.0 mm² up to 10m; 1.5 mm² for high loads or long runs. The phase conductor is identified with the letter L (Line). Insulation color: brown (preferred), black, or gray. In a three-phase system: L1, L2, L3. Do not confuse with neutral (N, blue color) and ground (PE, yellow-green color). The step-by-step relay (or impulse relay) is an electromechanical device that changes state (ON/OFF) at each impulse received from a button. In LED systems it is used to control switching on and off of the power supply from multiple different points (like a two-way switch but with unlimited number of control points). However, for modern LED systems, Push-Dim controllers (such as the Skydance V1-L) replace the step-by-step relay adding dimming functionality. The most used software for electrical technical drawing of LED systems are: AutoCAD Electrical for complete professional design, EPLAN Electric P8 for industrial systems, QElectroTech (free) for residential and small commercial systems, KiCad (free) for electronic diagrams of LED control circuits, and DIALux evo (free) for lighting simulation that provides input data for electrical sizing. Compliance verification is performed by checking: correspondence of symbols to standard IEC 60617/CEI EN 60617, respect of CEI 64-8 prescriptions for protections, cable sizing, and circuit separation, compliance of components with product standards (EN 62031 for LED modules, EN 61347 for power supplies), and completeness of documentation required by DM 37/2008 for the Declaration of Conformity. In an LED system three types of circuits are distinguished: the primary circuit at 230V AC (from mains to power supply), the secondary circuit at 12V/24V DC (from power supply to LED strips, through any controllers), and the signal circuit (Push-Dim buttons, DALI bus, 0-10V cables, sensor inputs). Each circuit has its own requirements in terms of cables, protections, and installation. Formula: P_power_supply ≥ (W/m × length_m) × 1.25. Example: for 10m of 14.4 W/m strip → load 144W → minimum power supply 180W → choose Mean Well HLG-185H-24A (187W). Always round up to the immediately superior commercial model. LED systems are classified by increasing complexity in: monochrome system with on/off switching, monochrome system with dimming (Push-Dim, 0-10V, Triac), CCT system with color temperature adjustment, RGB/RGBW system with chromatic control, smart system with WiFi/Zigbee/Bluetooth control, DALI system for building automation, and system with sensor automation (PIR, microwave, ambient light). It emerges clearly the role of electrical diagrams in professional LED systems and the importance that these technical documents hold in every phase of a system's lifecycle: from initial design to on-site installation, from compliance verification to maintenance over time. In an LED lighting market in continuous evolution, with the global market estimated at 94.5 billion dollars in 2024 and double-digit growth expected in the next decade, mastery of electrical diagrams is an increasingly strategic competence for sector professionals. Whether it is a simple electrical diagram for under-cabinet kitchen lighting with a touch sensor, or a complex multi-zone DALI electrical system diagram for a luxury hotel, the fundamental principles remain the same: clarity in representation, correctness in sizing, respect of current regulations, and attention to safety. The five types of diagrams analyzed in this guide—functional, wiring, single-line, topographical, and power/control—are complementary tools that, used together, provide complete and professional technical documentation. The advice we want to give to all sector professionals is to invest time in the quality of electrical diagrams. A well-drawn, complete, and updated diagram is not a cost but an investment that will save time on-site, reduce installation errors, simplify future maintenance, and strengthen professional reputation with clients. In a sector where lighting quality depends equally on component quality and installation quality, the electrical diagram is the bridge that connects the two.
What are electrical diagrams?
Definition of electrical diagram
What electrical diagrams are for: essential functions
Design function
Communication function
Documentation and regulatory function
Diagnostic and maintenance function
Replication function
Why electrical diagrams are fundamental for LED systems
Characteristic Traditional 230V system Professional LED system Impact on the electrical diagram Operating voltage 230V AC 12V or 24V DC + 230V AC Need to represent two voltage levels and the conversion point Polarity Not critical for the load Critical: reversal = damage Obligation to indicate + and − on every DC connection Signal circuits Only on/off switches Push-dim, RF, WiFi, DALI, 0-10V, sensors Diagram must distinguish power and signal with different line types Power supply sizing Standard panel protections Dedicated power supply for each LED zone/group Diagram must report load power and power supply capacity for each line Voltage drop Negligible on normal runs Critical: 1V on 24V = 4% loss Diagram must indicate cable cross-sections and maximum lengths for each run Thermal dissipation Not managed in the diagram Aluminum profiles mandatory >10 W/m Diagram may include indications on dissipation and profiles
Types of electrical diagrams for LED systems
The functional diagram (or schematic diagram)
Characteristics of the functional diagram for LED systems
Practical example: functional diagram of an LED system with Push-Dim dimmer
The wiring diagram (connection diagram)
What the wiring diagram is for in LED systems
The single-line diagram
What the single-line diagram is: structure and informational content
The topographical diagram (planimetric diagram)
What the topographical diagram is for in LED systems
The power diagram and the control diagram
Advantages of power/control separation
The assembly diagram
Comparative summary of diagram types
Diagram type Level of detail Main purpose Main recipient Legally mandatory Functional diagram Low (logical blocks) Define operating principle Designer, client No Wiring diagram Very high (terminal by terminal) Guide on-site wiring Electrician installer Recommended Single-line diagram Medium (single line, protections, cable sections) Overview, Di.Co. documentation Designer, inspection body Yes (DM 37/2008) Topographical diagram Medium-high (physical position on floor plan) Define where to install components Installer, site manager Recommended for complex systems Power diagram High (power circuit only) Document energy path Designer, maintenance technician Required for systems >6 kW Control diagram High (signal circuit only) Document control logic Programmer, maintenance technician Required for domotic systems Assembly diagram High (physical appearance of components) Facilitate physical assembly Installer, training personnel No
Electrical symbols and standardized symbology for LED systems
International standards for electrical symbols
The IEC 60617 standard
CEI standards for Italian symbology
The ANSI/IEEE standard
Fundamental electrical symbols for LED systems
Conductor and connection symbols
Power supply source symbols
The LED and LED strip symbol
Protection device symbols
Control and automation device symbols
Summary table of electrical symbols for LED systems
Component Symbol description Reference standard Use in LED system LED (light-emitting diode) Triangle with bar + two outgoing arrows IEC 60617-5 Represents each single LED or an LED strip DC Power Supply Rectangle with AC→DC indication IEC 60617-6 Converter from 230V AC to 12V/24V DC Magnetothermal circuit breaker Contact + thermal rectangle + magnetic semicircle IEC 60617-7 Protection of primary 230V circuit Differential circuit breaker Contact + differential current sensing circuit IEC 60617-7 Protection against indirect contact Fuse Rectangle with thin internal wire IEC 60617-7 Protection for power supply and secondary circuits NO Button Contact with return to rest (dashed) IEC 60617-7 Push-Dim input for Skydance controller Two-way switch Contact with two positions IEC 60617-7 LED control from two different points Relay Rectangle (coil) + associated contacts IEC 60617-7 Step-by-step relay for LED switching PIR Sensor Semicircle with rays IEC 60617-12 Presence detection for LED automation Potentiometer/Dimmer Resistor with adjustment arrow IEC 60617-4 LED strip brightness adjustment Terminal Empty or filled circle IEC 60617-11 Connection point on power supply, controller, strip Protective earth conductor (PE) Line with three decreasing horizontal bars IEC 60617-2 Grounding of accessible metal parts (aluminum profiles) DALI Bus Two parallel lines with "DALI" label IEC 62386 Domotic connection for professional lighting
What symbol does the phase have? Identification of live conductors
What is the difference between electrical and electronic? Impact on symbology
Main components of the LED system in the electrical diagram
LED strips: the lighting load
COB (Chip On Board) LED strips
Performance series LED strips
Special LED strips: CCT, Pixel/Control, RGB, RGBW
LED strip type Number of conductors Controller channels Diagram complexity Typical application Monochrome (single white) 2 (+V, −V) 1 channel Low General lighting, under-cabinets, profiles CCT (dynamic white) 3 (+V, WW, CW) 2 channels Medium Offices, residential, wellness, Human Centric Lighting RGB 4 (+V, R, G, B) 3 channels Medium-high Decoration, hospitality, retail, events RGBW 5 (+V, R, G, B, W) 4 channels High Scenography, accent + general lighting combined Pixel/Control (addressable) 3 (+V, GND, DATA) Digital (specific IC) Very high Dynamic effects, running, luminous signage COB monochrome 2 (+V, −V) 1 channel Low Architectural lighting, visible light, design
LED strips in electrical technical drawing: representation and parameters
Technical parameters of LED strips to report in the diagram
Parameter Unit of measurement Example: COB F52-300 Example: performance B52-40s-240D22 Notes for the diagram Nominal voltage V DC 24V 24V Always indicate 12V or 24V Power per meter W/m 14.4 19.2 Basis for power supply sizing Current per meter A/m 0.6 0.8 Basis for cable sizing Maximum feedable length m 5 5 From a single injection point; beyond, provide dual-end feeding Cutting pitch mm 50 41.6 The strip can only be cut at these points LED density LEDs/m 480 (COB) 240 Influences light uniformity IP rating — IP20 IP20 IP20 indoor, IP65/67/68 for outdoor or humid environments
Voltage drop: the critical problem to document in the diagram
Formula for calculating voltage drop in LED circuits
Cable cross-section (mm²) Current 1A — 5m Current 1A — 10m Current 2A — 5m Current 2A — 10m Current 4A — 5m Current 4A — 10m 0.50 1.5% 3.0% 3.0% 5.9% 5.9% 11.9% 0.75 1.0% 2.0% 2.0% 4.0% 4.0% 7.9% 1.00 0.7% 1.5% 1.5% 3.0% 3.0% 5.9% 1.50 0.5% 1.0% 1.0% 2.0% 2.0% 4.0% 2.50 0.3% 0.6% 0.6% 1.2% 1.2% 2.4%
Power supplies for LED strips: wiring diagrams and sizing
Types of power supplies for LED systems
Mean Well HLG and ELG series power supplies
Power supplies with integrated PWM output
Skydance PHN and PS series power supplies
Power supply sizing: rules and calculations
Sizing formula
LED strip (model) W/m Length (m) Load power (W) With 25% margin (W) Recommended power supply Economic strip 60 LEDs/m 4.8 5 24 30 Mean Well LPV-35-24 (35W) Standard strip 120 LEDs/m 9.6 5 48 60 Mean Well HLG-60H-24A (60W) COB F52-300-480OR2-S1 14.4 5 72 90 Mean Well HLG-100H-24A (96W) Performance B52-40s-240D22 19.2 5 96 120 Mean Well HLG-120H-24A (120W) High-power strip 30W/m 30 5 150 187.5 Mean Well HLG-200H-24A (192W) 2× Performance B52 in parallel 19.2 10 192 240 Mean Well HLG-240H-24A (240W)
Power supply wiring diagrams
Primary side connection (230V AC)
Secondary side connection (24V DC)
Skydance controllers and dimmers: electrical diagrams and configurations
Skydance V series controllers
V1-L controller: monochrome wiring diagram
V5-L controller: wiring diagram for RGBW and multi-channel strips
Skydance smart series controllers: WiFi, Zigbee, Bluetooth
Wiring diagram of V1-L(WT): smart WiFi control
Skydance AC Triac dimmers: integration with existing systems
Wiring diagram of phase-cut dimming
DALI integration: diagram of the domotic bus
DALI bus diagram for LED systems
Sensors for LED automation
PIR sensors (ER-AV): motion detection
Hand Sweep sensors (EB): touchless gesture control
Microwave sensors (V3-PE): detection through materials
Practical examples of electrical diagrams for LED systems
Situation A: simple dimming with Push-Dim button
Required components
Detailed wiring diagram
Situation B: smart multi-zone WiFi/Tuya control
Components and wiring diagram
Situation C: sequential stair lighting with sensors
System components for stairs
ES32 wiring diagram
Situation D: professional DALI integration
Components and diagram
Situation E: phase-cut dimming (Triac)
Wiring diagram of Triac dimming
Summary table of wiring situations
Situation Typical scope Controller Protocol Number of components in diagram Wiring complexity A — Simple Push-dim Residential, single office V1-L Button + optional RF 3-4 Low B — Smart multi-zone Modern home, B&B, restaurant V1-L(WT) WiFi/Tuya + RF relay 4-8 per zone Medium C — Sequential stairs Residential, hotel, commercial ES32 PIR sensor + sequential 5 + n steps High D — Professional DALI Commercial, hotel, tertiary TD-W + DA4 DALI bus (IEC 62386) 6+ per zone Very high E — Triac phase-cut Renovation, retrofit S1-B Triac 230V + button/RF 4-5 Medium
Series and parallel connection: diagrams and fundamental differences
What is series connection?
What is the difference between series connection and parallel connection?
Characteristic Series connection Parallel connection Voltage on each strip Divides (V_total = V1 + V2 + ... + Vn) Same for all (V_strip = V_power_supply) Current Same throughout the circuit Adds up (I_total = I1 + I2 + ... + In) Failure of one strip Entire circuit turns off Only the failed strip turns off Luminous uniformity Identical on all strips (same current) Depends on voltage drop on cables Power supply voltage Must be sum of voltages Must be equal to nominal strip voltage Use with 24V LED strips Discouraged / non-standard Standard and recommended
Best practices for parallel connection of LED strips
How to read and interpret electrical diagrams for LED systems
Systematic reading procedure
Step 1: identify the type of diagram
Step 2: identify the power source and protections
Step 3: follow the power circuit
Step 4: identify signal circuits
Step 5: verify sizing
Step 6: verify regulatory compliance
Common errors in reading LED electrical diagrams
Regulations and reference standards: CEI 64-8, IEC, EN
The CEI 64-8 standard: the fundamental reference
Sections of CEI 64-8 relevant for LED systems
The three performance levels of CEI 64-8
Product standards for LED components
Standard Component Main content EN 62031 (CEI EN 62031) LED modules Safety requirements for general lighting LED modules EN 61347 (CEI EN 61347) LED power supplies/drivers Safety requirements for power supplies (lamp supply devices) EN 62384 (CEI EN 62384) LED power supplies/drivers Performance requirements for electronic LED power supplies EN 60598-1 (CEI EN 60598-1) Lighting fixtures General requirements and tests for lighting fixtures (including LEDs) EN 62722 (CEI EN 62722) LED fixtures Performance requirements for LED lighting fixtures EN 62471 (CEI EN 62471) LED sources Photobiological safety (blue light hazard) EN 62504 LED products Terminology and definitions for LED products IEC 62386 DALI system Standard for digital lighting control interface (DALI)
DM 37/2008 and the Declaration of Conformity
Standards for diagram representation
Software and tools for drawing electrical diagrams
Professional CAD software
AutoCAD Electrical
EPLAN Electric P8
DIALux and DIALux evo
Accessible and free software
QElectroTech
KiCad
Lucidchart and SmartDraw
Manufacturer configurators
Software Type Indicative cost Learning curve Suitability for LED systems AutoCAD Electrical Professional CAD Annual subscription High Excellent for complex projects EPLAN Electric P8 Industrial CAD Professional license Very high Excellent for industrial systems DIALux evo Lighting simulation Free Medium Complementary (lighting sizing) QElectroTech Open source electrical diagrams Free Low-medium Good for residential and small commercial systems KiCad Open source EDA Free Medium Good for electronic LED control diagrams Lucidchart / SmartDraw Online diagrams Freemium / Subscription Low Adequate for functional diagrams and presentations
Technical advice for the professional installer
Power supply sizing: the safety margin
Wiring: cross-sections and connections
Thermal dissipation: mandatory aluminum profiles
RF synchronization: the power of the mesh network
Advice for preventive maintenance
Common errors in LED electrical diagrams and how to avoid them
Error 1: polarity reversal in the DC circuit
Error 2: undersized power supply
Error 3: undersized cables for the DC circuit
Error 4: failure to separate primary and secondary circuits
Error 5: failure to ground aluminum profiles
Error 6: confusing button and switch for Push-Dim
Error 7: excessive strip length without dual-end feeding
Error 8: incompatibility between Triac dimmer and LED driver
Error 9: RF antenna covered by metal
Error 10: diagram not updated after modifications
Frequently asked questions about electrical diagrams for LED systems
General questions about electrical diagrams
What is an electrical diagram?
What are electrical diagrams for?
Who draws electrical diagrams?
Questions about diagram types
What is a functional diagram?
What is a single-line diagram?
What is a topographical diagram?
What is the assembly diagram for?
What is the power diagram?
What is the control diagram?
Technical questions on components and connection
What is the difference between series connection and parallel connection?
What cable to use for an LED system?
What symbol does the phase have?
What is the step-by-step relay for in LED systems?
Questions on software and tools
What program to use for electrical technical drawing?
How to verify compliance of electrical diagrams with regulations?
Questions on specific diagrams for LED systems
What types of circuits are there in LED systems?
How to size the power supply for LED strips?
What types of LED electrical systems are there?
Electrical diagrams as a guarantee of professional quality