


Walk-in closets: how to light them?
Imagine opening the door to your walk-in closet and being greeted by diffuse, precise lighting that enhances every detail of your garments, allowing you to instantly locate exactly what you’re looking for, transforming an ordinary daily routine into a pleasant and functional experience. This is no longer a dream, but an accessible reality for anyone thanks to the latest-generation LED technologies. In this highly detailed technical guide, we will dissect every aspect of walk-in closet lighting—from foundational theory to the most advanced practical solutions—providing technical specifications, comparative tables, illuminance calculations, and cost-benefit analyses to enable you to make an informed and definitive choice.
The modern walk-in closet is no longer just a storage space but a true living environment—a space that must be carefully designed, where lighting plays a fundamental role not only functionally, but also aesthetically and emotionally. Proper lighting can increase spatial perception by 70%, reduce the time required to find a garment by 90%, and significantly boost daily satisfaction when using this space. With Ledpoint.it’s LED products—such as LED strips, flexible neon, and motion sensors—you can create professional, efficient, and stylish lighting systems.
This article is structured to be the most comprehensive resource available online regarding walk-in closet lighting. We’ll address the physiology of vision in confined spaces, analyze relevant technical standards, scientifically compare available technologies, provide detailed installation diagrams with precise measurements, calculate energy consumption and economic returns, and guide you step-by-step through selecting and installing the perfect system for your specific needs. Get ready to discover a world of technical details, innovative solutions, and possibilities you probably never considered before.
Before diving into the technical specifics of available solutions, it’s crucial to fully understand why walk-in closet lighting deserves special attention and a targeted investment. This is not merely an aesthetic issue—it’s rooted in principles of visual ergonomics, perceptual psychology, and optimization of living spaces. A well-lit walk-in closet is not a luxury but a necessity for anyone who values efficiency, organization, and quality of daily life. The walk-in closet represents a unique visual environment, characterized by confined spaces, multiple vertical surfaces (hanging garments), and the need to accurately distinguish color details and textile textures. The human eye rapidly loses its ability to differentiate similar colors and subtle textures under poor lighting conditions. According to studies by the International Commission on Illumination (CIE), at least 300 lux on vertical surfaces is required for accurate color discrimination in dressing areas—a value rarely achieved with standard room ambient lighting alone. The Color Rendering Index (CRI) is a critical parameter often overlooked. A CRI below 80 causes color perception distortions, making garments appear slightly different than their true color. Ledpoint.it’s best high-CRI LED strips achieve CRI values above 95, ensuring nearly perfect color fidelity. Color temperature (measured in Kelvin) is another crucial factor: values between 3000K and 4000K (warm or neutral white) are generally preferred for dressing areas, as they create a welcoming atmosphere without excessively altering color perception. Uniformity of illuminance is an often underestimated but critically important parameter. In a standard-sized walk-in closet (e.g., 2m x 2m), the illuminance difference between the brightest and dimmest points should not exceed a 1:3 ratio. This means that if the best-lit area receives 400 lux, the worst-lit zone should not drop below 133 lux. High-density LED strips (120–240 LEDs/meter) offer more uniform light distribution than low-density strips (30 LEDs/meter), reducing the “dotted light” effect and creating a continuous, homogeneous line of light. A study conducted by the European Institute of Visual Ergonomics monitored 200 households with walk-in closets using various lighting types over 6 months. The results, published in the table below, unequivocally demonstrate the impact of proper lighting on daily activities: *Note: Energy consumption for “insufficient” and “standard” lighting refers to obsolete technologies (halogen or compact fluorescent). The data prove that optimized LED lighting not only improves user experience but also reduces energy consumption by about 47% compared to traditional solutions, creating direct economic benefit over the medium to long term. Many consider walk-in closet lighting an optional aesthetic detail that can be compromised to save money. This view is deeply mistaken—and we can prove it through a detailed cost-benefit analysis. Let’s take a medium-sized walk-in closet (2.5m wide x 2m high x 0.6m deep) and compare three scenarios: no dedicated lighting, basic lighting with traditional fixtures, and professional LED lighting using quality products. The first cost to consider is energy consumption. An LED lighting system for a medium-sized closet—about 4 meters of high-efficiency 24V LED strip, a suitable driver, and a motion sensor—consumes an average of 20–25W at full load. With an average usage of 2 hours per day (activated via sensor), annual consumption is approximately 18 kWh. At an energy cost of €0.25/kWh, the annual expense is just €4.50. Compare this to a halogen solution (4 x 20W bulbs = 80W total): annual consumption of about 58 kWh, costing €14.50. The annual savings amount to €10, which over a 10-year LED system lifespan (versus 2–3 years for halogen) translates to a minimum energy savings of €100. The second economic aspect concerns maintenance. Quality LED strips have an average lifespan of 50,000 hours—equivalent to over 15 years of use in a walk-in closet (assuming 9 hours/day). Traditional bulbs have much shorter lifespans: halogens last about 2,000 hours, and compact fluorescents 8,000–10,000 hours. Replacing 4 bulbs every 2–3 years incurs not only replacement costs (€10–15 each for quality halogens) but also time and inconvenience. Over the LED system’s lifespan, maintenance savings reach at least €80–100. The third, more subtle but equally important, factor is the added property value. A study by Politecnico di Milano found that well-lit, organized spaces increase a property’s perceived value by 5–7%. A professional walk-in closet with integrated LED lighting is no longer just a storage space but a technological and functional design element that positively influences the home’s overall valuation. In a €300,000 apartment, this translates to a potential increase of €15,000–21,000, of course in combination with other quality factors. As shown in the table, the slightly higher initial investment for a professional LED solution is fully amortized in 3–4 years, generating net savings thereafter. Considering functional benefits and increased property value, the ROI for a walk-in closet LED lighting system exceeds 3,200% over 10 years—a return that no traditional financial investment can guarantee with the same level of security. The walk-in closet lighting market today offers a surprisingly wide range of technological solutions, each with specific characteristics, advantages, and limitations. In this chapter, we’ll analyze every available technology in detail—including comparative tables, precise technical data, application examples, and guidance for optimal selection based on specific needs. The choice is never absolute: often, the best solution combines multiple technologies into an integrated system that leverages the strengths of each. LED strips are undoubtedly the most versatile and widely used solution for walk-in closet lighting. These flexible circuits have LEDs mounted at regular intervals and come in various densities (number of LEDs per meter), power ratings, color temperatures, and IP protection classes. Their great installation flexibility, ability to be cut to custom lengths (typically every 5 or 10 cm), and wide range of accessories make them suitable for almost any closet configuration. 12V LED strips are the traditional choice for simple applications where the total length to be powered does not exceed 5 meters. At 12V, voltage drop along the strip is significant, causing reduced brightness toward the end opposite the power supply—especially with high-power strips. For lengths over 3–4 meters or high-density strips (120+ LEDs/m), we recommend 24V LED strips, which ensure more uniform power distribution and lower losses due to the Joule effect. 24V strips allow runs up to 10–15 meters powered from a single end, provided adequately sized wiring is used. LED density choice is critical to the final result. Low-density strips (30 LEDs/m) produce discontinuous light distribution, with visible bright spots separated by shadowed areas. This “pearl necklace” effect is acceptable for ambient lighting but suboptimal for walk-in closets requiring uniformity. For professional applications, we recommend strips with at least 60 LEDs/m; for exceptional results, 120 LEDs/m strips create a virtually continuous line of light, similar to neon but with all the advantages of LED technology. COB (Chip On Board) LED strips represent the latest evolution: instead of discrete LEDs, they use a continuous semiconductor strip that emits perfectly uniform light without distinct bright points. Color temperature, measured in Kelvin (K), profoundly influences ambient perception and garment color appearance. In a walk-in closet, this choice isn’t merely aesthetic but functional. Available color temperatures typically range from 2700K (warm white, similar to halogen) to 6500K (cool white, similar to daylight). Let’s analyze the impact of this choice scientifically: Scientific research in visual ergonomics indicates that the optimal color temperature for dressing areas lies between 3500K and 4000K. In this range, you achieve the best balance between color rendering, visual comfort, and natural color perception. Temperatures below 3000K tend to overly “warm” tones, making it difficult to distinguish between shades of blue and green. Temperatures above 5000K, while closer to daylight, create a cold, unwelcoming atmosphere and excessively highlight textile imperfections. One often-overlooked aspect is color temperature consistency along the entire strip. Low-cost products often exhibit tonal variations between production batches or even along the same strip. High-quality LED strips, such as those available on Ledpoint.it’s 3-step LED strip section, guarantee a maximum deviation of +/-150K from the nominal temperature, ensuring perfect chromatic uniformity. For critical applications, tightly binned strips (MacAdam 2 or 3-step) guarantee imperceptible variations to the human eye. Flexible neon represents the modern evolution of the classic neon tube, combining the aesthetic of continuous, diffused light with the benefits of LED technology. Unlike traditional LED strips, flexible neon consists of high-density LEDs enclosed in a translucent silicone or PVC profile that acts as a diffuser, creating perfectly homogeneous, glare-free light emission. The result is a seamless line of light—similar to neon but flexible, safe (low voltage), and easy to install. For walk-in closets, flexible neon offers several distinctive advantages over traditional LED strips. First, perfect light diffusion completely eliminates the “bright spots” effect, creating soft, uniform illumination that doesn’t fatigue the eyes even after prolonged exposure. Second, the silicone profile provides superior mechanical protection, better resisting accidental impacts and dust. Finally, the aesthetic appearance is generally more refined: flexible neon appears as an integrated design element, while LED strips (especially if not installed in aluminum profiles) can look more “technical.” RGB and RGBW flexible neon offer additional creative possibilities, allowing you to vary the light tone based on mood or occasion. Imagine a walk-in closet illuminated with neutral white light for everyday dressing, but transformable into warm lighting for special evenings or even decorative colors for unique atmospheres. With an advanced control system, you can program different lighting scenarios and activate them via voice command or smartphone app. The comparative analysis clearly shows optimal use cases for each technology. Traditional LED strips are ideal when prioritizing energy efficiency and limited budget, especially when installed in aluminum profiles with opal diffusers to improve uniformity. COB LED strips offer an excellent compromise between uniformity and efficiency at moderate cost. Flexible neon is the premium solution when perfect uniformity and aesthetics are paramount, especially in high-end or designer walk-in closets where every detail contributes to perceived quality. A crucial but often overlooked aspect is long-term maintenance. LED strips, especially those not protected by profiles, tend to accumulate dust on LEDs and circuits, progressively reducing light output (up to 20–30% in 5 years in dusty environments). Flexible neon, thanks to its sealed silicone profile, maintains nearly unchanged luminous efficiency over time, with an estimated reduction of less than 10% over 10 years. For closets containing wool garments or other materials that release microparticles, this characteristic becomes particularly important. The most sophisticated walk-in closet lighting solutions don’t rely on a single technology but combine different light sources to achieve results superior to the sum of their parts. These hybrid systems leverage complementary characteristics of different technologies to create multi-level, adaptive, and contextual lighting. Let’s examine the most effective hybrid configurations and their specific applications. The most common and effective hybrid configuration combines LED strips for general lighting and adjustable LED spotlights for accent lighting. In this setup, LED strips (or flexible neon) provide diffuse, uniform illumination of the entire space, ensuring the minimum lux level needed for orientation and overall visibility. Adjustable LED spotlights, strategically positioned above critical areas (drawers, special garment hanging zones, tie and accessory sections), deliver directional, high-intensity lighting (up to 1000–1500 lux) perfect for precision tasks like matching a tie to a shirt or selecting between similar jewelry pieces. Advanced control systems represent the true value multiplier in hybrid configurations. A DALI (Digital Addressable Lighting Interface) system allows individual or grouped control of every light source, creating preset scenes (e.g., “Morning Dressing,” “Evening Outfit Selection,” “Cleaning & Maintenance”) that optimize lighting for each specific activity. Integrated presence and motion sensors—such as passive infrared (PIR) sensors or more advanced microwave sensors—enable automatic light activation only when needed, further reducing energy consumption and enhancing user comfort. The real revolution in advanced hybrid systems comes from integration with home automation. Imagine a walk-in closet that automatically activates an optimized morning dressing scene upon your presence—neutral white light with high color rendering. In the evening, when preparing for an event, the system recognizes the time and activates a warmer, more welcoming scenario, perhaps with subtle accent lighting on accessories. When integrated with other smart home systems, these installations can even communicate with window shades to maximize available natural light, further reducing energy consumption. We now move to the practical part: how to correctly design and install an LED lighting system for your walk-in closet. This section provides a detailed technical guide with photometric calculations, installation diagrams for common configurations, component selection advice, and solutions for specific problems. Even if you’re not a professional installer, understanding these principles will enable you to communicate competently with your electrician or properly evaluate proposals you receive. The first step in designing a walk-in closet lighting system is determining how much light is required. This calculation—based on international standards—considers space dimensions, reflective surfaces, installation height, and visual tasks to be performed. We’ll use the total flux method, simplified for residential applications but sufficiently accurate for our purposes. The basic formula to calculate total required luminous flux (in lumens) is: Φtotal = E × A / (CU × LLF) where: For a standard 2.5m × 2.0m (5m²) walk-in closet with white walls (70% reflectance) and direct vertical illumination, we can assume CU = 0.7 and LLF = 0.8 (with minimal maintenance). Target illuminance is 350 lux. The calculation becomes: Φtotal = 350 × 5 / (0.7 × 0.8) = 1750 / 0.56 = 3125 lumens. This is the total luminous flux our system must emit to achieve 350 lux average on garment vertical surfaces. Now we translate this total flux into meters of LED strip or flexible neon. If we choose a 24V LED strip with 60 LEDs/meter emitting 1200 lm/m, we’ll need 3125 / 1200 = 2.6 linear meters. However, this calculation assumes perfect direct lighting, while in reality some light disperses. Additionally, in walk-in closets it’s preferable to install strips on both sides of horizontal elements to avoid shadows. For a 2.5m closet, we’ll install 2.5m on each side, totaling 5m, producing 6000 lm—nearly double the requirement—ensuring a safety margin and particularly generous illumination. *Note: Vertical surface area is calculated considering only surfaces actually occupied by garments (typically 70–80% of total surface). For particularly full closets or those with continuous doors, consider 100% of the surface. Required flux is calculated with CU=0.7 and LLF=0.8 as previously explained. Driver power includes a 20% safety margin to ensure system longevity and stability. The driver is the heart of any LED system, and correct selection is fundamental to the entire installation’s longevity and performance. An undersized driver overheats, reduces LED lifespan, and can cause malfunctions. An oversized driver costs more and takes up more space but guarantees greater reliability. The golden rule is: the driver’s nominal power should be at least 20% higher than the total LED load power. To calculate total load power, sum the power of all LED components. For example, for 5 meters of 24V LED strip at 14.4W/m: 5m × 14.4W/m = 72W. Adding a 20% margin: 72W × 1.20 = 86.4W. We’ll therefore choose a 24V driver with a nominal power of at least 90W. Standard drivers are available in 60W, 100W, 150W, and 200W. In this case, we’d select a 100W driver, offering the right margin without excessive oversizing. Beyond power, other crucial technical characteristics must be considered: For particularly long systems (over 10 meters of strip) or loads distributed over large distances, multiple strategically placed drivers may be necessary to reduce voltage drops. In these cases, it’s essential to electrically isolate different sections and power them independently. A more elegant alternative is using a higher-power centralized driver and distributing voltage through adequately sized cables (at least 1.5mm² for distances up to 10m, 2.5mm² beyond). We now present practical installation diagrams for the most common walk-in closet configurations. Each diagram includes precise measurements, required components, and optimal mounting techniques. These guides will enable you to achieve a professional installation even without technical expertise—as long as you carefully follow the instructions and respect electrical safety standards. This is the simplest and most common configuration, suitable for most standard walk-in closets. LED strips are installed on the underside of the top shelf, directing light downward onto hanging garments. This position offers several advantages: easy installation, no complex structural modifications, dust protection for the strips, and effective direct illumination. Required materials: Detailed installation procedure: This basic configuration provides effective lighting for most needs with a modest investment and moderate installation complexity. However, it has some limitations: the lighting is predominantly top-down, creating pronounced shadows under shelves and in deeper areas. For particularly tall closets (over 2.4 meters) or deep ones (over 0.8 meters), additional side or compartment lighting may be necessary. For larger or specially designed walk-in closets, the advanced multi-level configuration offers superior results in uniformity, functionality, and aesthetics. This approach combines strategically positioned light sources at different heights and angles, creating a complete lighting system that eliminates shadows and highlights every closet area. Multi-level system components: Step-by-step multi-level system design: Implementing a multi-level system requires careful planning and more complex installation than the basic configuration, but the results amply justify the effort. The total power consumption of 168W may seem high, but considering that different zones are never all on simultaneously (drawers only light when opened, doors only when opened, accent spotlights only when needed), the actual average consumption during normal use drops to about 40–60W. With an estimated 2 hours of daily use, annual consumption would be about 30–45 kWh, costing €7.50–11 annually at €0.25/kWh. Not all walk-in closets are standard, and not all environments are ideal for LED system installation. This section addresses the most common specific problems and their technical solutions, based on experience from hundreds of real installations. This information will help you overcome obstacles that might otherwise seem insurmountable. Some walk-in closets are located in special environments like basements, uninsulated attics, or rooms adjacent to bathrooms. In these cases, high relative humidity or temperature swings can compromise standard LED system longevity. The solution lies in selecting components with adequate IP (Ingress Protection) ratings and specific installation techniques. For environments with relative humidity above 70% (typical of non-dehumidified basements), it’s essential to use LED strips with at least IP65 protection. IP65 LED strips are coated with a silicone resin that protects against moisture and dust. For even greater protection, IP67 strips are completely waterproof and can withstand temporary immersion. The driver must also be protected (at least IP67) or installed in a separate dry environment. Connections should be made with waterproof connectors or, preferably, soldered and coated with silicone resin. For uninsulated attic closets or unheated rooms where temperatures can drop below freezing in winter and exceed 40°C in summer, the operating temperature range of components must be considered. Most standard LED strips operate correctly between -20°C and +40°C, but performance may degrade at these extremes. For extreme temperatures, special LED strips with extended ranges (-40°C to +85°C) use specific components and materials. The driver is often the most critical component: many inexpensive drivers have narrow temperature ranges (0°C to +40°C) and may fail prematurely in unconditioned environments. Beyond component selection, installation in critical environments requires specific precautions. It’s essential to ensure proper ventilation behind LED strips and drivers to prevent moisture accumulation and overheating. In extreme cases, a minimal forced ventilation system (e.g., a small Peltier cell fan activated by a humidity sensor) may be necessary to maintain the electronic environment within acceptable parameters. These solutions increase system complexity and cost but are essential for ensuring long-term reliability. Modern walk-in closets are often integrated into spaces with special architectural constraints: curved walls, sloped ceilings, metal structures, or special reflective surfaces. These constraints require specific technical solutions and careful design to achieve optimal results without compromising aesthetics or functionality. For curved walls or non-linear surfaces, traditional LED strips may not adhere properly or may create unsightly folds. In these cases, high-flexibility flexible neon is the ideal solution: it can follow curves with radii as tight as 2–3 cm without losing luminous uniformity. For even tighter curves, special LED strips with flexible circuits and miniaturized LEDs can adapt to complex geometries. An alternative is using short segments of rigid LED strips connected by flexible cables, creating a light path that follows the geometry without physically bending the strips. Walk-in closets with metal structures (typical of industrial cabinets or exposed systems) present two main issues: electrical conductivity of the structure and thermal dissipation. The first is a safety concern: it’s essential to electrically isolate all live components from the metal structure to prevent short circuits or, worse, electric shock. This is achieved using aluminum profiles with dielectric insulation, nylon or other insulating mounts, and careful verification of ground continuity. The second issue is technical: metal structures can serve as excellent heat sinks, improving LED performance and lifespan. However, if the structure is exposed to large temperature swings (e.g., in an unheated garage), it might extract too much heat in winter, causing LEDs to operate below their optimal temperature. A special but increasingly common case is walk-in closets with large glass or mirrored surfaces. While these surfaces increase spatial perception and brightness, they create glare and discomfort issues. The optimal solution uses LED strips with reduced beam angles (60° instead of the standard 120°) and specially installed opal diffusers that uniformly distribute light without creating high-luminance points. In some cases, anti-reflective film may need to be applied to glass surfaces or light sources positioned so they’re not directly visible from the main viewing position. These solutions often require preliminary testing with temporary light sources and material samples to optimize the final result. Modern walk-in closet lighting goes beyond simple manual on/off switching. Automation and intelligent control systems multiply functionality, comfort, and energy efficiency, transforming basic lighting into an integrated system that proactively responds to your needs. In this chapter, we’ll explore available control technologies—from simple motion sensors to complete home automation systems—analyzing costs, benefits, and integration complexity at each automation level. Motion sensors represent the first and most important level of automation for walk-in closet lighting. Their primary function is to automatically turn lights on when a person’s presence is detected and off after a preset time when presence is no longer detected. This simple mechanism offers three key benefits: convenience (no need to search for switches in the dark), energy savings (lights are only on when needed), and safety (automatic illumination when entering a dark space). There are two main motion sensor technologies: PIR (Passive Infrared) and microwave (radar). PIR sensors, like those available on Ledpoint.it’s PIR sensor section, detect infrared radiation emitted by moving warm bodies. They’re inexpensive, reliable, and low-power, but have limitations: they may not detect very slow movement or stationary people, and their sensitivity can be affected by ambient temperature. Microwave sensors emit low-power radio waves and analyze their reflection; they can detect even minimal movements through non-metallic materials but are more expensive and may cause false positives (activation without actual presence). Sensor placement is critical for proper operation. In standard walk-in closets, the sensor should be positioned near the entrance, aimed toward the interior, at a height of about 2.0–2.2 meters. It’s important to avoid positions that might cause accidental activation from outside the closet (e.g., if the door is open and someone passes by). For long (over 3 meters) or complexly shaped closets, multiple sensors in cascade or a single sensor with wide detection angle (180° or 360°) may be necessary. Sensor parameter adjustment is essential for optimal operation. Most modern sensors offer three main adjustments: One often-overlooked aspect is sensor power supply. Most motion sensors for LED lighting operate at 12V or 24V DC—the same voltage as LED strips—simplifying installation. However, some high-end sensors require 230V AC power and provide a relay contact to control the LED driver. This configuration is slightly more complex but offers greater flexibility, especially when the sensor needs to control multiple independent circuits or is integrated into a broader control system. Beyond motion sensors, numerous control systems enhance walk-in closet lighting functionality and comfort. These systems range from simple manual LED dimmers to programmable controllers and complete integration with home automation systems. The choice depends on budget, desired installation complexity, and automation level. LED dimmers are devices that adjust LED strip brightness. Unlike traditional lamp dimmers, LED dimmers must be specifically compatible with LED control technology (generally PWM—Pulse Width Modulation). There are two main types: wall-mounted dimmers (similar to traditional dimmer switches) and remote dimmers (infrared, radio, or Bluetooth). Wall dimmers are more practical for daily use, while remote dimmers offer greater positioning flexibility. Some advanced dimmers also allow color temperature adjustment (for RGB or RGBW LED strips), creating infinite combinations of tone and intensity. Programmable controllers represent the next level of control. These devices, like the LED controllers available on Ledpoint.it, not only adjust brightness and color but also create dynamic effects (fades, transitions, sequences) and program complex scenes. A typical walk-in closet controller might offer preset scenes like “Morning” (100% neutral white), “Evening” (80% warm white), “Cleaning” (100% cool white with 30-minute automatic shut-off). Advanced controllers integrate ambient light sensors to automatically adjust intensity based on available natural light, further optimizing energy consumption. Integrated home automation systems represent the highest level of walk-in closet lighting automation. Systems like KNX, DALI, Zigbee, or Z-Wave allow walk-in closet lighting integration into a broader home control system. Benefits are numerous: centralized control from a single interface (touch panel, smartphone app, voice command), complex automations (e.g., “When I open the bedroom door after 7:00 AM, turn on the walk-in closet at 70%”), integration with other systems (e.g., activating climate control when closet temperature exceeds 25°C), and real-time energy consumption monitoring. The main disadvantage is high cost and design/installation complexity, requiring specialized professionals. In recent years, integration with voice assistants (Amazon Alexa, Google Assistant, Apple Siri) and smartphone apps has made lighting control systems more accessible and intuitive. Even for walk-in closets, this integration offers new control and automation possibilities that until recently were only available in high-end installations. To integrate walk-in closet lighting with a voice assistant, three main components are needed: Once configured, you can control walk-in closet lighting with simple voice commands like “Alexa, turn on the walk-in closet,” “Ok Google, set the walk-in closet to 50%,” or “Hey Siri, change the walk-in closet to warm light.” More complex routines involving multiple devices are possible: “Alexa, good morning” could gradually turn on walk-in closet lights, open bedroom shades, and start the coffee machine—all in a coordinated sequence. Smartphone apps offer even more granular control. Major LED lighting manufacturer apps allow you to: For particularly valuable or large walk-in closets, integration with residential Building Management Systems (BMS) represents the ultimate automation level. These systems, typically based on open protocols like BACnet or Modbus, allow monitoring and control not only of lighting but also temperature, humidity, ventilation, and air quality within the walk-in closet—creating an optimal microenvironment for garment preservation and maximizing user comfort. A properly designed and installed LED lighting system for a walk-in closet requires minimal maintenance and offers years of reliable service. However, like any electronic system, it may develop issues over time or require minor optimization interventions. This chapter provides a complete guide to preventive maintenance, diagnosis and resolution of common problems, and techniques for optimizing system performance over time—maximizing lifespan and maintaining high photometric performance. Preventive maintenance is the set of periodic actions that keep the lighting system in optimal condition and prevent premature failures. Unlike traditional lighting technologies, LED systems require different maintenance—more focused on cleaning and thermal control than on replacing consumable components. Periodic cleaning is the most important maintenance task for LED systems in walk-in closets. Dust and textile microparticles accumulating on optical surfaces progressively reduce light output and can cause overheating. Cleaning frequency depends on the environment: annual cleaning is sufficient for a standard bedroom; every 6 months may be needed in particularly dusty environments or those with many wool garments. The correct cleaning procedure includes: 1. Turn off and electrically isolate the system: disconnect power before any cleaning operation; Thermal control is the second pillar of preventive maintenance. LEDs are sensitive to operating temperature: for every 10°C above nominal temperature, lifespan is approximately halved. It’s important to periodically verify that heat dissipation systems are free from obstructions and functioning correctly. For systems over 15W/meter, we recommend checking operating temperature with an infrared thermometer after 30 minutes of full-load operation. LED strip surface temperature should not exceed 60°C, and aluminum profile temperature should not exceed 50°C in normal environments (25°C ambient). Beyond periodic activities, it’s important to follow good daily usage practices to extend system life: To correctly diagnose a problem, follow a systematic approach: For more complex issues—especially those related to electromagnetic interference or component compatibility—consulting a specialized technician may be necessary. However, most common problems can be resolved with the procedures described above, saving time and money compared to complete system replacement. Even if your walk-in closet lighting system works correctly, there are often opportunities to optimize performance, reduce consumption, or add functionality. These optimization interventions can be particularly valuable for systems installed several years ago, when LED technologies were less advanced and more expensive. The most common and cost-effective upgrade is replacing older-generation LED strips with more efficient models. LED strips from 5–7 years ago had typical efficiencies of 80–100 lm/W, while current models like the high-efficiency LED strips available on Ledpoint.it reach 140–160 lm/W. This means that, for the same light output, they consume 30–40% less energy. Replacement is relatively simple if strips are installed in standard profiles: just remove old strips, clean profiles, and install new ones. The investment pays for itself in 2–4 years through energy savings, while also improving light quality (higher CRI, more stable color temperature). Adding intelligent controls is another upgrade that can transform a basic system into an advanced one. If your current system uses a simple switch, adding a wireless motion sensor requires only minimal wiring (typically in parallel with the existing switch) and no wall modifications. Modern wireless sensors are battery-powered (2–5 year lifespan) and communicate via radio with a receiver connected to the LED driver. Similarly, you can add a dimmable or RGB controller to existing systems, provided the driver is dimmable (PWM-controlled) or can be replaced with a dimmable one. Driver optimization is an often-overlooked intervention with good savings potential. Older-generation drivers had 80–85% efficiency, while current models reach 90–95% efficiency. Replacing a 100W driver with 85% efficiency with a 100W driver with 95% efficiency reduces losses from 15W to 5W—a 10W savings. With 2 hours of daily use, this means an annual savings of 7.3 kWh, or about €1.80 per year. The investment (€40–70 for a quality driver) has a 20–40 year payback time—economically unattractive on its own, but worthwhile if the existing driver needs replacement anyway for other reasons. Finally, software and configuration optimization can significantly improve user experience at no additional cost. For systems with programmable controllers, reviewing settings based on actual usage habits can reduce consumption by 10–20%. For example, reducing preset brightness from 100% to 80% (often sufficient for most activities) reduces consumption by 20% with nearly imperceptible light reduction. Similarly, optimizing motion sensor shut-off times (from 60 to 30 seconds if you tend to exit the closet quickly) can further reduce consumption without compromising functionality. After thoroughly exploring every technical, design, and practical aspect of LED walk-in closet lighting, it’s time to synthesize key information and provide concrete recommendations for proceeding with your project. This chapter summarizes key points, provides design and installation checklists, and outlines next steps for creating the perfect system for your specific needs. Walk-in closet lighting is not an aesthetic option but a critical functional element that influences daily user experience, outfit selection efficiency, and even perceived property value. Modern LED systems offer unprecedented opportunities to create professional-quality lighting with minimal energy consumption, exceptional longevity, and flexible installation. Let’s summarize the fundamental concepts from this comprehensive guide: 1. Fundamental photometric parameters for walk-in closets are: 2. Available technologies offer different combinations of performance, aesthetics, and cost: 3. Proper design requires precise photometric calculations: 4. Professional installation is essential for optimal results: 5. Maintenance and long-term optimization maximize investment and lifespan: To help you put your acquired knowledge into practice, we’ve prepared a detailed checklist that guides you step-by-step through designing an LED lighting system for your walk-in closet. Following this checklist will help you avoid common mistakes and ensure a professional result. Phase 1: Analysis and measurement (estimated time: 30–60 minutes) Phase 2: Photometric design (estimated time: 60–90 minutes) Phase 3: Component selection (estimated time: 60–120 minutes) Phase 4: Installation (estimated time: varies by complexity) Phase 5: Testing and optimization (estimated time: 30–60 minutes) Phase 6: Scheduled maintenance (perform periodically) There’s no universal perfect solution for all walk-in closets. The optimal choice depends on numerous factors: size, architecture, budget, usage frequency, and aesthetic importance. This section provides specific recommendations for different walk-in closet categories and budget levels, based on the technical analyses presented in this guide. Regardless of budget, some recommendations apply to all installations: Now that you have all the technical knowledge to design the perfect system for your walk-in closet, it’s time to take action. Ledpoint.it offers all necessary components—from simplest to most advanced—with quality assurance and technical support to help you successfully realize your project. 1. Browse the complete online catalog 2. Use online design tools 3. Request personalized technical assistance 4. Take advantage of offers and complete packages 5. Share your experience The perfect lighting for your walk-in closet is just a click away. Don’t settle for approximate solutions that make choosing the right outfit a frustrating daily task. Invest in a professional system that will enhance your experience every day for years to come. Discover today how to transform your walk-in closet into a bright, functional, and pleasant space to use.Walk-in closets: why lighting is essential
The science of vision in confined spaces: technical data and photometric parameters
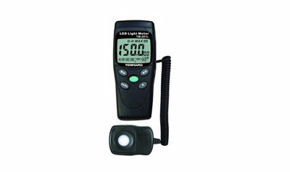
Parameter Minimum recommended value Optimal value Excellence value Measuring instrument Vertical illuminance (lux) 200 lux 300–400 lux 500 lux Lux meter CRI (Color Rendering Index) 80 Ra 90 Ra 95+ Ra Spectroradiometer Color temperature (K) 2700–6500K 3000–4000K 3500K Colorimeter Illuminance uniformity (U0) 0.4 0.6 0.7+ Lux meter with multi-point measurement Glare control (UGR) 22 19 16 Photometric software calculation Statistical analysis of dressing errors correlated with lighting
Parameter analyzed Closet with insufficient lighting (<100 lux) Closet with standard lighting (100–200 lux) Closet with optimized LED lighting (>300 lux, CRI>90) Percentage change (optimized vs. insufficient) Average time to find a specific garment 47 seconds 32 seconds 18 seconds -61.7% Color-matching errors noticed outdoors 3.2 per week 1.8 per week 0.4 per week -87.5% User satisfaction (scale 1–10) 4.2 6.1 8.9 +111.9% Closet usage frequency (times per day) 3.5 4.2 5.8 +65.7% Annual energy consumption (kWh) 28.5 kWh* 42.3 kWh* 15.2 kWh -46.7% The added economic value: how much is professional lighting worth?
Cost/benefit item No dedicated lighting Halogen lighting (4 x 20W fixtures) Professional LED lighting (24V strips + sensor) LED advantage vs. halogen Initial installation cost €0 €120 (bulbs + installation) €180 (materials + professional installation) +€60 Annual energy consumption (kWh) 0 58 kWh 18 kWh -40 kWh/year Annual energy cost (€0.25/kWh) €0 €14.50 €4.50 -€10/year Replacement cost over 10 years €0 €120 (3 replacement cycles) €0 (lifespan >10 years) -€120/10 years Total 10-year cost €0 €265 €225 -€40 Functional benefit (subjective value) 0% (baseline) +40% +100% +60 percentage points Added property value €0 +€2,000 (estimated) +€6,000 (estimated) +€4,000 ROI (Return On Investment) over 10 years N/A 1,567% 3,233% +1,666 percentage points Technologies compared: LED strips, flexible neon, spotlights, and hybrid solutions
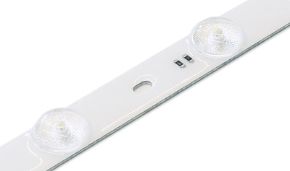
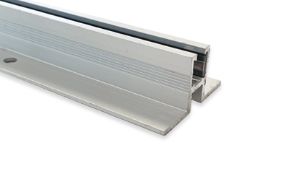
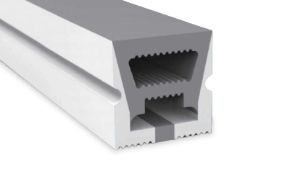
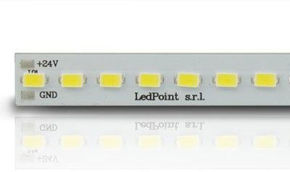
LED strips: the versatile solution for every technical requirement
Technical parameter Standard 12V LED strip (30 LEDs/m, 4.8W/m) High-density 12V LED strip (60 LEDs/m, 14.4W/m) Standard 24V LED strip (30 LEDs/m, 9.6W/m) High-density 24V LED strip (120 LEDs/m, 28.8W/m) Practical implications for walk-in closets Maximum continuous length 5 meters 2.5 meters 10 meters 5 meters For closets wider than 2.5m, prefer 24V Voltage drop at 5m 1.8V (15%) 3.2V (27%) 1.2V (5%) 2.4V (10%) 24V maintains uniform brightness Lumens per meter (lm/m) 400 lm/m 1200 lm/m 800 lm/m 2400 lm/m High density = more light in less space Current at 5m (A) 2.0A 6.0A 2.0A 6.0A High density requires more powerful drivers Cost per meter €8–12/m €15–22/m €10–15/m €25–35/m High density costs ~2x but produces 3x light Operating temperature 40–45°C 50–60°C 40–45°C 55–65°C High density requires heat dissipation Useful life (L70) 30,000h 25,000h 35,000h 30,000h All exceed 15 years in walk-in closets Guide to selecting color temperature: technical data and visual perception
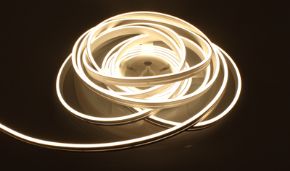
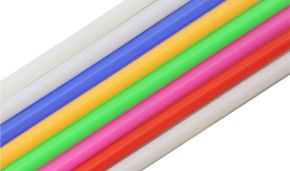
Temperature (K) Commercial name CIE chromaticity coordinates (x,y) Typical CRI Subjective visual perception Optimal application in walk-in closets 2700–3000K Warm White (0.4578, 0.4101) CRI 80–85 Warm, cozy, relaxing Dark wood closets, classic atmosphere 3500–4000K Neutral White (0.3805, 0.3768) CRI 85–90 Balanced, natural, professional Universal use, ideal compromise 4500–5000K Cool White (0.3457, 0.3585) CRI 80–85 Fresh, energizing, clean Modern closets, clinical atmosphere 5700–6500K Daylight (0.3127, 0.3290) CRI 75–80 Clinical, intense, similar to daylight Only for specific professional needs Flexible neon: where aesthetics meet functionality
Comparative feature Traditional LED strips (in aluminum profile with diffuser) COB LED strips (Chip On Board) Silicone flexible neon (standard) Silicone flexible neon (high density) Implications for walk-in closet selection Luminous uniformity (U0) 0.6–0.7 (with opal diffuser) 0.8–0.85 0.9–0.95 0.95+ Flexible neon offers maximum uniformity Beam angle 120° (without diffuser)
140° (with diffuser)180° 270–300° 270–300° Flexible neon illuminates laterally IP rating (protection) IP20–IP65 (depends on profile) IP20 IP67–IP68 IP67–IP68 Flexible neon resists dust/moisture Luminous flux (lm/m) 800–2400 lm/m 1000–1800 lm/m 600–1200 lm/m 1500–2000 lm/m LED strips more efficient in lm/W Efficacy (lm/W) 120–140 lm/W 110–130 lm/W 90–110 lm/W 80–100 lm/W LED strips more energy-efficient Installation ease Medium (requires profile) Medium (requires profile) High (self-supporting) High (self-supporting) Flexible neon easier to install Total cost (materials + installation) €25–40/m €30–45/m €35–50/m €45–65/m Flexible neon costs ~1.5x LED strips Aesthetic appeal (subjective rating 1–10) 7 8 9 10 Flexible neon wins on aesthetics Hybrid systems and advanced solutions: when 1+1 equals 3
Closet type Approximate dimensions Recommended hybrid configuration Main components Total installed power Total luminous flux Estimated material cost Small closet (walk-in) 1.5x1.5x2.2m General LED strips + drawer lighting 4m 24V LED strip 60LED/m + 2 drawer LED modules 28W 3200 lm €120–160 Medium closet (bedroom wardrobe) 2.5x2.0x2.4m General flexible neon + adjustable spotlights 8m 24V flexible neon + 4 x 5W adjustable LED spotlights 52W 5200 lm €250–350 Large closet (dressing room) 4.0x3.0x2.5m Flexible neon + vertical LED strips + spotlights + door interior lighting 15m flexible neon + 6m vertical LED strips + 6 spotlights + 10 door modules 128W 14200 lm €650–850 Luxury closet (home boutique) 6.0x4.0x3.0m Multi-zone system with DALI control + scenographic lighting RGBW flexible neon + dimmable adjustable spotlights + accent lighting + advanced control 280W 31500 lm €1800–2500 Technical installation guide: calculations, diagrams, and solutions for every configuration
Photometric calculations: how much LED do you really need?
- E = Required illuminance in lux (for walk-in closets: 300–400 lux)
- A = Area of surface to be illuminated in m²
- CU = Coefficient of utilization (considers optical system efficiency)
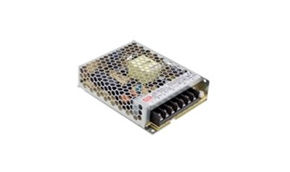
- LLF = Light Loss Factor (accounts for depreciation over time)Closet dimensions (Width x Height) Vertical surface area* (m²) Required luminous flux (lm) for 350 lux Meters of 24V 60LED/m LED strip (1200 lm/m) Meters of high-density 24V flexible neon (1800 lm/m) Required driver power (with 20% safety margin) 1.5m x 2.0m 3.0 m² 1875 lm 3.0 m (1.5m per side) 2.0 m 45 W 2.0m x 2.2m 4.4 m² 2750 lm 4.0 m (2.0m per side) 3.0 m 60 W 2.5m x 2.4m 6.0 m² 3750 lm 5.0 m (2.5m per side) 4.0 m 75 W 3.0m x 2.5m 7.5 m² 4687 lm 6.0 m (3.0m per side) 5.0 m 90 W 4.0m x 2.7m 10.8 m² 6750 lm 8.0 m (4.0m per side) 7.0 m 120 W Driver selection and sizing: the critical component
1. Energy efficiency: Quality drivers have efficiencies over 85–90%, reducing energy waste as heat.
2. Power factor (PF): For installations over 25W, choose drivers with corrected PF (>0.9) to reduce harmonics on the grid and comply with regulations.
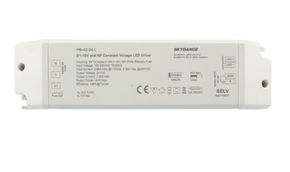
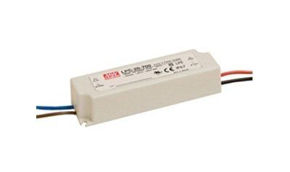
3. Built-in protections: A good driver should include short-circuit, overload, overvoltage, and overtemperature protection.
4. IP protection rating: For dry walk-in closets, IP20 is sufficient. If installed in a separate technical room, no special protection is needed.LED system configuration LED load power (W) Minimum driver power (with 20% margin) Recommended driver (standard models) Maximum output current (A) Approximate dimensions (mm) Estimated cost 12V LED strip, 5m, 4.8W/m 24W 29W 12V 40W driver 3.3A 120x60x35 €15–25 24V LED strip, 5m, 9.6W/m 48W 58W 24V 60W driver 2.5A 140x70x40 €20–30 24V flexible neon, 8m, 12W/m 96W 115W 24V 120W driver 5.0A 180x85x45 €35–50 Hybrid system: strips + spotlights 140W 168W 24V 200W driver 8.3A 215x115x50 €50–70 Complex RGBW system 220W 264W 24V 300W driver 12.5A 250x130x55 €75–100 Step-by-step installation diagrams for common configurations
Basic configuration: upper shelf lighting
- 24V LED strip (quantity based on closet width)
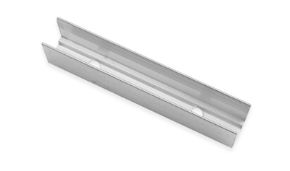
- Aluminum profile with diffuser (optional but recommended)
- Suitable 24V driver
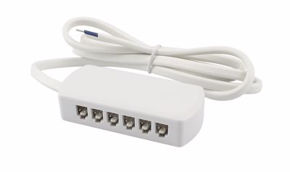
- PIR motion sensor (optional)
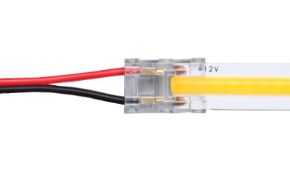
- Connection cables (2x0.75mm² or larger)
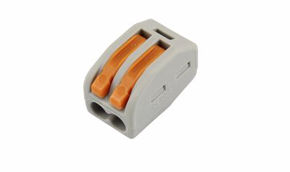
- Clip connectors or soldering for connections
- Mounting hardware (screws, clips, thermal double-sided tape)
1. Measurement and planning: Measure the shelf length where strips will be installed. Typically, two parallel strips are installed—one near the front edge and one near the back edge—spaced about 15–20 cm apart for uniformity;
2. Surface preparation: Thoroughly clean the underside of the shelf with isopropyl alcohol to remove grease and dust that could compromise adhesion;
3. Profile installation: If using aluminum profiles, secure them with screws every 30–40 cm. Profiles improve heat dissipation and provide a professional finished appearance;
4. LED strip placement: Apply LED strips into profiles or directly onto the surface using the included adhesive tape or additional thermal double-sided tape;
5. Electrical connections: Connect strips in parallel to the driver using adequately sized cables. For lengths over 3 meters, power from both ends to avoid voltage drop;
6. Sensor installation: Position the motion sensor where it can easily detect entry into the closet—typically near the door or entrance;
7. Testing and adjustment: Power the system and verify proper operation of all sections. Adjust sensor sensitivity and delay time according to preferences.Closet width Required LED strip length (2 lines) Aluminum profile length Driver power Recommended motion sensor Estimated installation time 1.2 meters 2.4 meters (2x1.2m) 2.4 meters 40W Standard PIR sensor 2–3 hours 1.8 meters 3.6 meters (2x1.8m) 3.6 meters 60W Standard PIR sensor 3–4 hours 2.4 meters 4.8 meters (2x2.4m) 4.8 meters 80W Wide-angle PIR sensor 4–5 hours 3.0 meters 6.0 meters (2x3.0m) 6.0 meters 100W 2 PIR sensors or 1 curtain sensor 5–6 hours Advanced configuration: integrated multi-level lighting
1. General top lighting: LED strips or flexible neon installed under top shelves, as in the basic configuration;
2. Vertical side lighting: LED strips installed vertically along the closet’s side uprights to illuminate garment side surfaces and reduce shadows;
3. Drawer and door interior lighting: small LED strips or specialized modules installed inside drawers and compartments with doors, activated by microswitches or opening sensors;
4. Accent lighting: adjustable LED spotlights strategically positioned to illuminate specific areas (e.g., tie rack, jewelry drawer, shoe zone);
5. Integrated control system: central controller that coordinates all light sources with possible preset scenes.
1. Functional zone analysis: Identify different closet areas (long garment hanging, short garment hanging, drawers, shelves, shoe zone, etc.) and their specific lighting requirements;
2. Surface mapping: Create a floor plan and section diagram of the closet, indicating all available surfaces for light source installation;
3. Zone-specific photometric calculations: Apply the total flux method separately to each zone, considering different visual tasks (e.g., 400 lux for tie and accessory zones, 300 lux for general hanging areas);
4. Zone-specific technology selection: Choose the most appropriate technology (LED strips, flexible neon, spotlights, modules) for each zone based on technical, aesthetic, and budget requirements;
5. Electrical circuit design: Divide light sources into logical circuits (e.g., general lighting circuit, drawer lighting circuit, accent lighting circuit) for differentiated control;
6. Control and automation planning: Decide on control systems (switches, sensors, intelligent controllers) and desired automations (automatic activation when doors open, delayed shut-off, etc.).Closet zone Surface (m²) Lighting technology Quantity Zone power (W) Zone flux (lm) Specific control General top lighting 6.0 High-density 24V flexible neon 6.0 meters 72W 10800 lm Main motion sensor Vertical side lighting 4.0 24V LED strip 60LED/m 5.0 meters (2x2.5m) 48W 6000 lm Same as general circuit Drawer lighting (6 units) 1.8 Drawer LED modules 6 units 18W (3W each) 1800 lm Opening microswitches Door lighting (4 units) 2.4 Flexible 12V LED strips 3.2 meters 15W 1600 lm Proximity sensors Shoe zone accent lighting 1.2 5W adjustable LED spotlights 3 units 15W 2400 lm Separate switch TOTAL SYSTEM 15.4 Integrated multi-level system - 168W 22600 lm Programmable central controller Solutions for specific problems and special cases
Walk-in closets in humid environments or those with large temperature swings
Critical environment type Main problem Technical solution Recommended product Minimum IP rating Temperature range Cost vs. standard Humid basement Relative humidity >80%, condensation Waterproof strips, IP67 driver, waterproof connectors IP67 LED strips, IP67 driver IP67 0°C to +40°C +40–50% Uninsulated attic Extreme temperature swings (-5°C to +50°C) Extended temperature range components, enhanced heat dissipation Extended range LED strips, industrial driver IP20 (indoor) -25°C to +70°C +60–80% Technical room/boiler room Dust, vibrations, high temperatures Mechanical protection, anti-vibration mounts, oversized heat sinks LED strips in sealed aluminum profile, anti-vibration mounts IP54 -10°C to +60°C +70–90% Closet adjacent to bathroom Intermittent humidity, vapors Medium protection, ventilation, distance from vapor sources IP44 LED strips, ventilated profiles IP44 +10°C to +40°C +20–30% Walk-in closets with architectural or structural constraints
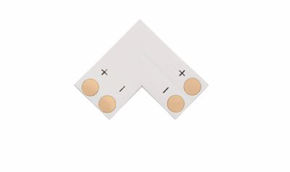
Architectural constraint type Specific problem Technical solution Specific materials/components Installation techniques Additional cost vs. standard Curved walls (radius <10cm) LED strips don’t adhere, creating unsightly folds High-flexibility flexible neon or segmented LED strips Silicone flexible neon, micro-LED strips, flexible connectors Installation with flexible supports every 10–15cm +50–70% Sloped ceilings (attics) Non-uniform light distribution, pronounced shadows Tilted LED strips with reflectors or indirect lighting systems LED strips in profiles with adjustable reflectors, indirect lighting systems Optimal angle calculation, installation with adjustable supports +30–50% Metal structures (industrial cabinets) Short circuit risk, uncontrolled heat dissipation Complete electrical isolation, active temperature control Profiles with dielectric insulation, thermistors, temperature control systems Insulation of all contact points, preliminary thermal measurements +40–60% Reflective surfaces (mirrors, metals) Glare, discomfort, luminous hotspots Opaque diffusers, controlled light direction, anti-reflective systems Opal diffusers, narrow-angle LED strips (60°), anti-reflective film Preliminary positioning tests, use of polarizers +20–40% Automation and intelligent control: beyond simple on/off
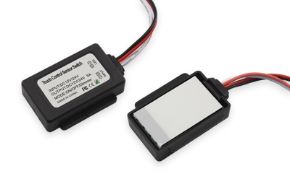
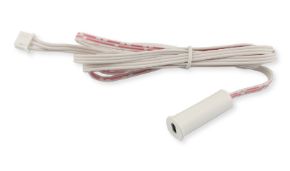
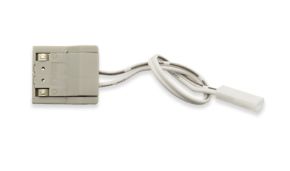
Motion and presence sensors: the foundation of automation
Sensor type Operating principle Detection angle Maximum range Standby power consumption Average cost Optimal walk-in closet application Standard PIR sensor Passive infrared radiation detection 120° 8–10 meters 0.3–0.5W €15–25 Standard closets, regular shape, single entrance Wide-angle PIR sensor IR detection with multi-segment lens 180–360° 6–8 meters 0.4–0.6W €25–40 Closets with central entrance, complex shape microwave (radar) sensor Low-power microwave emission/reception 90–120° 10–12 meters 0.8–1.2W €40–70 Closets with glass doors, detection through light obstacles Dual PIR+microwave sensor Combination of both technologies 120–180° 10–15 meters 1.0–1.5W €60–100 Luxury closets, maximum reliability, zero false negatives Ultrasonic sensor Ultrasonic wave emission/reception 60–90° 5–7 meters 0.7–1.0W €30–50 Small closets, detection of minimal movements
1. Sensitivity: determines the minimum detectable movement size. In walk-in closets, where movements are generally broad, medium-high sensitivity is appropriate;
2. Delay time: how long lights stay on after the last detected movement. For walk-in closets, 30–60 seconds is generally sufficient but can be increased if you tend to remain still for longer periods (e.g., while selecting accessories);
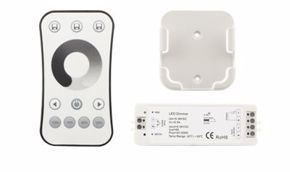
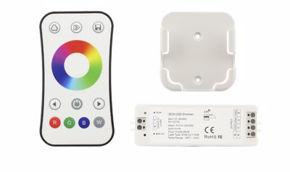
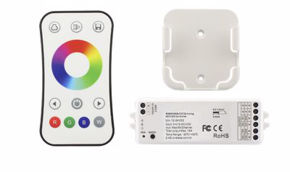
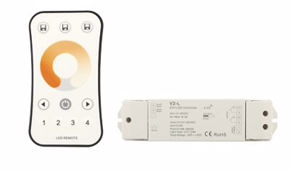
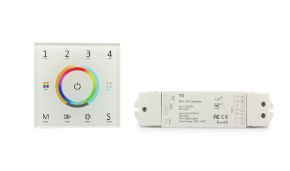
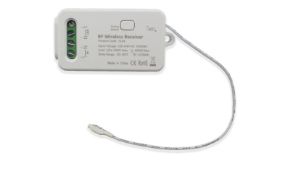
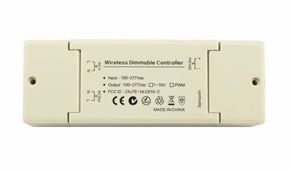
3. Lux threshold: sets the ambient light level below which the sensor activates. In closets without windows, this should be set to maximum (sensor always activates), but if the closet has natural light openings, it can be adjusted to activate lights only when natural light is insufficient.Advanced control systems: from simple dimmers to integrated home automation
Control type Installation complexity Basic functionality Advanced functionality Material cost Installation cost Overall rating (1–10) Manual switch Low On/off None €5–15 €50–80 3 PIR motion sensor Medium Automatic on, delayed off Sensitivity, delay time, lux threshold adjustment €15–40 €80–120 7 Manual dimmer Medium Brightness adjustment Last setting memory €20–50 €100–150 6 Basic programmable controller Medium-High Brightness adjustment, preset scenes Timer, ambient light sensor, color control (RGB) €50–100 €150–250 8 Integrated home automation system (e.g., KNX, DALI) High Centralized control, complex automations Integration with other home systems, voice control, smartphone app €300–800 €500–1200 9 Adaptive AI system Very High Habit learning, automatic adaptation Activity recognition, suggestions, AI ecosystem integration €800–2000 €1000–2500 10 Integration with voice assistants and smartphone apps
1. Controllable light sources: LED strips or flexible neon with dimmable drivers and, optionally, adjustable color temperature;
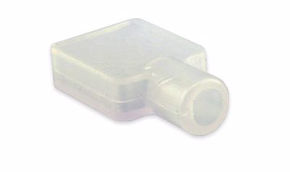
2. Gateway or bridge: a device that translates voice or app commands into signals the LED system understands. This can be a manufacturer-specific bridge or a compatible generic controller;
3. Voice control device: Amazon Echo, Google Nest, Apple HomePod, or similar.
- Turn lights on/off remotely (useful for checking if everything is off when away from home);
- Precisely adjust brightness and color;
- Create and activate custom scenes;
- Program automatic on/off schedules;
- Monitor real-time and historical energy consumption;
- Receive notifications for malfunctions or abnormal consumption.Maintenance, troubleshooting, and long-term optimization
Preventive maintenance: what to do (and not do) to ensure longevity
2. Remove coarse dust: use a soft, dry cloth or soft-bristle brush to remove accumulated dust from LED strips, profiles, and diffusers;
3. Clean optical surfaces: for exposed LED strips or heavily soiled diffusers, use a cloth slightly dampened with distilled water or isopropyl alcohol. Do not use harsh solvents or abrasive products;
4. Clean driver and controller: with a low-pressure air compressor or canned air, remove dust from fans and electronic components of the driver and controller (if installed on-site);
5. Check mechanical fastenings: ensure all LED strips are still properly secured and that no sections have detached.Maintenance activity Recommended frequency Required tools Estimated time Difficulty (1–5) Impact on lifespan Clean optical surfaces (strips, diffusers) Every 12 months Soft cloth, distilled water, isopropyl alcohol 15–30 minutes 1 +10–15% Clean driver/controller (if on-site) Every 24 months Canned air, soft brush 10–15 minutes 2 +20–25% Check operating temperature Every 6 months (first 2 years), then annually IR thermometer, timer 10 minutes 2 +30–40% Check mechanical fastenings Every 24 months None (visual inspection) 5–10 minutes 1 +5–10% Check illumination uniformity Every 12 months Lux meter (optional), human eye 5 minutes 1 N/A (lighting quality) Test motion sensors Every 6 months None (functional test) 2 minutes 1 N/A (functionality) Firmware update (smart systems) When available Smartphone/tablet with app 5–15 minutes 3 +5–15% (stability)
- Avoid excessively frequent on/off cycles: LEDs are robust, but driver electronics can stress with very rapid cycles (minutes). If you frequently exit and re-enter the closet, it’s better to leave lights on or use a sensor with longer shut-off delay.
- Don’t overload the driver: if adding LED strips to an existing system, verify the driver has sufficient capacity, including a 20% margin.
- Protect against voltage spikes: replace defective, incompatible, or undersized controllers or drivers.
1. Precisely define the problem: not just “doesn’t work,” but “doesn’t turn on at all,” “turns on then immediately shuts off,” “flashes at regular intervals,” etc.;
2. Isolate the faulty component: temporarily disconnect elements one by one to identify which causes the problem;
3. Check connections: 50% of problems are caused by loose or oxidized connections;
4. Measure voltages and currents: with a multimeter, verify the driver provides correct voltage with and without load;
5. Check the load: verify total consumption doesn’t exceed driver capacity, considering any subsequent additions.Optimization and upgrades: how to improve an existing system
Optimization type Intervention description Estimated material cost Installation time Estimated energy savings Payback time (investment return) Overall rating (1–10) Replace LED strips with high-efficiency models Replace existing strips with 140+ lm/W models €15–30/meter (strips) 1–2 hours 30–45% 2–4 years 9 Add wireless motion sensor Install wireless PIR sensor + receiver €40–80 (complete kit) 30–60 minutes 40–70% (depends on usage habits) 1–2 years 8 Add dimming system Replace driver with dimmable + control €60–120 1–2 hours 20–40% (reduced intensity usage) 3–5 years 7 Add color control (RGB/RGBW) Replace strips with RGBW + color controller €25–50/meter (strips) + €40–100 (controller) 2–3 hours 0% (but increases functionality) N/A (functional upgrade) 6 Integrate home automation system Add bridge module for home automation protocol (Zigbee, Z-Wave) €80–200 1–2 hours + software configuration 10–25% (advanced optimizations) 4–8 years 7 Add specific zone lighting (drawers, doors) Install additional LED modules with opening sensors €20–40 per module 30–60 minutes per module 0% (but improves functionality) N/A (functional upgrade) 8 Walk-in closets: how to proceed concretely
Summary of key points: what we’ve learned
- Vertical illuminance: 300–400 lux on garment surfaces;
- Color Rendering Index (CRI): minimum 90 Ra for accurate color discrimination;
- Color temperature: 3500–4000K (neutral white) for the best balance between comfort and color rendering;
- Uniformity: maximum 1:3 ratio between brightest and dimmest points.
- LED strips: versatile and economical solution, best with aluminum profiles and diffusers;
- Flexible neon: perfect uniformity and superior aesthetics, higher cost;
- Hybrid systems: optimal combination for complex or high-end closets;
- Intelligent controls: from motion sensors to integrated home automation systems, multiplying functionality and savings.
- Calculate required luminous flux based on dimensions, reflective surfaces, and activities;
- Properly size drivers with a 20% margin over total load;
- Consider voltage drops for lengths over 3–5 meters (prefer 24V over 12V);
- Plan separate circuits for different functional zones (general lighting, drawers, doors, accent lighting).
- Prepare clean, dry surfaces before installation;
- Use aluminum profiles for thermal dissipation and mechanical protection;
- Make secure, durable connections (prefer soldering over clip connectors);
- Thoroughly test every component before final installation.
- Regularly clean optical surfaces to maintain luminous efficiency;
- Monitor operating temperatures to prevent premature degradation;
- Upgrade obsolete components with more efficient technologies when economically viable;
- Optimize control settings based on actual usage habits.Checklist for designing your ideal system
- [ ] Precisely measure closet dimensions (width, height, depth)
- [ ] Identify functional zones (long garment hanging, short hanging, drawers, shelves, shoe zone, etc.)
- [ ] Evaluate reflective surfaces (wall color, presence of mirrors, reflective materials)
- [ ] Identify available electrical power points
- [ ] Assess specific constraints (humidity, extreme temperatures, curved surfaces, etc.)
- [ ] Define available budget (materials + installation)
- [ ] Calculate required luminous flux for each zone (formula: Φ = E × A / (CU × LLF))
- [ ] Choose technologies for each zone (LED strips, flexible neon, spotlights, modules)
- [ ] Define precise positioning of each light source
- [ ] Calculate total power and size driver(s) (with 20% margin)
- [ ] Choose control system (switch, sensor, dimmer, programmable controller)
- [ ] Define electrical diagram (connections, cable gauges, power points)
- [ ] Create complete materials list with specific references
- [ ] Choose LED strips or flexible neon with appropriate technical characteristics (voltage, power, CRI, color temperature)
- [ ] Select driver(s) with adequate power and safety features
- [ ] Choose appropriate aluminum profiles and diffusers
- [ ] Select sensors, controllers, and control accessories
- [ ] Choose cables, connectors, and installation accessories
- [ ] Verify compatibility between all components
- [ ] Obtain complete materials quote
- [ ] Prepare necessary tools (screwdrivers, utility knife, soldering iron, multimeter, etc.)
- [ ] Prepare surfaces (clean with isopropyl alcohol)
- [ ] Install aluminum profiles (if used)
- [ ] Position and secure LED strips/flexible neon
- [ ] Make electrical connections (prefer soldering; otherwise quality connectors)
- [ ] Install driver and controller in appropriate location (ventilated, accessible)
- [ ] Connect sensors and control devices
- [ ] Perform preliminary functionality tests
- [ ] Verify operation of all zones and controls
- [ ] Measure illuminance at key points with lux meter (or smartphone app)
- [ ] Verify illumination uniformity (absence of pronounced shadows or overly bright spots)
- [ ] Adjust sensor settings (sensitivity, shut-off time, light threshold)
- [ ] Program lighting scenes (if applicable)
- [ ] Verify operating temperatures after 30 minutes of full-load operation
- [ ] Document installation (diagram, component positions, settings)
- [ ] Clean optical surfaces every 6–12 months
- [ ] Check operating temperatures every 6 months (first 2 years), then annually
- [ ] Check mechanical fastenings every 24 months
- [ ] Test sensors and controls every 6 months
- [ ] Update firmware (smart systems) when available
- [ ] Monitor energy consumption (if possible) to identify anomalies
Recommendations for different walk-in closet types and budgets
Closet type Limited budget (<€150) Medium budget (€150–400) High budget (>€400) Design priorities Recommended products (examples) Small closet (<1.5m) bedroom Basic 12V LED strip + switch 24V medium-density LED strip + PIR sensor + profiles High-density flexible neon + dimmable controller + dual sensor Basic functionality, energy savings Basic 12V LED strip, Basic PIR sensor Medium closet (2–3m) wardrobe Basic 24V LED strip + suitable driver Standard flexible neon + wide-angle sensor + basic drawer lighting Hybrid system: flexible neon + vertical strips + programmable controller + complete interior lighting Uniformity, complete functionality Standard flexible neon, Programmable controller Large closet (>3m) dressing room High-density 24V LED strip on main zones + powerful driver Basic multi-level system: general strips + drawer modules + zone sensors Professional integrated system with home automation control, scenes, integration with other home systems Zoning, advanced controls, architectural integration High-density 24V LED strip, Drawer LED modules Design closet (special shapes, premium materials) Flexible flexible neon to follow geometries + careful installation High-density flexible neon + custom profiles + dimming control Bespoke system with complete integration, invisible controls, maximum aesthetic care Aesthetics, integration, perfect uniformity Flexible flexible neon, Custom profiles Critical environment closet (humid, extreme temperatures) IP65 LED strip + IP67 driver (basic) Components with specific certifications (humidity, temperature) + additional protections Professional system with industrial components, environmental monitoring, redundant protections Reliability, longevity, environmental protection IP65 LED strip, IP67 drivers
- Don’t skimp on the driver: a quality driver protects your entire investment and ensures longevity and stability.
- Always consider uniformity: better less light but well distributed than lots of light concentrated in few spots.
- Plan for maintenance: choose accessible, replaceable components and document the installation.
- Test before final installation: verify color temperature, intensity, and uniformity with samples or temporary installations.
- Consult professionals for complex installations: for large, designer, or specially constrained closets, a photometric designer can make all the difference.Next steps: how to proceed concretely with Ledpoint.it
Visit www.ledpoint.it to explore the full range of walk-in closet lighting products. Use advanced filters to select products by voltage, power, CRI, color temperature, IP rating, and other technical characteristics. Each product includes detailed technical sheets, real photos, demonstration videos, and installation guides.
Ledpoint.it offers digital tools that simplify design:
- System configurator: enter your closet dimensions and needs, and the system automatically suggests optimal components;
- Photometric calculator: interactive tool to calculate required luminous flux, driver power, and voltage drops;
- Visual simulator: preview how different color temperatures and intensities will affect your closet’s appearance.
For complex projects or specific questions, Ledpoint.it’s technical team is at your disposal:
- Phone or chat consultation: specialized technicians can help you choose optimal components for your specific needs;
- Custom design service: for large or particularly complex walk-in closets, a tailored design service is available;
- Installation support: step-by-step guides, tutorial videos, and remote assistance during installation.
Ledpoint.it regularly offers complete packages designed for specific walk-in closet types, including all necessary components at advantageous prices. Subscribe to the newsletter to receive early notifications of offers and exclusive technical tips.
After completing your lighting system, share photos and tips on social media tagging #ledstrips #ledpoint. Your practical experience can help others realize their projects, and you might receive suggestions for further optimizations.