


Angled, U-shaped, and flat led profiles: applications, installation, and differences in light output
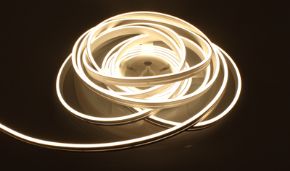
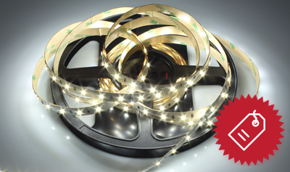
LED strip lighting has revolutionized the way we design and experience spaces: flexible, efficient, colorful, dimmable, and available in thousands of configurations, LED strips have become one of the most versatile tools available to architects, interior designers, electrical installers, and home decor enthusiasts. However, the LED strip alone, without an adequate housing, is not sufficient to guarantee an aesthetic and functional result that meets expectations: this is where aluminum LED profiles come into play, technical and aesthetic tools of primary importance for any professional-quality LED lighting installation.
Angular, U-shaped, and flat LED profiles are not simply decorative containers: they perform essential technical functions, including thermal dissipation of the heat produced by LED chips (extending the strip's useful life), mechanical protection against impacts and dust, uniform light diffusion thanks to opalescent or transparent covers, and architectural integration of the light source into room surfaces. Choosing the wrong profile can compromise not only the aesthetics of a project, but also the energy efficiency and durability of the installation.
What are LED profiles and what are they for: definition and main functions
First of all, it is useful to precisely define what is meant by LED profile and what functions this component performs within an LED strip lighting system. Understanding these basics allows for more informed decisions during the design and purchasing phases, avoiding the most common mistakes that compromise the quality of the final result.
Definition of LED profile
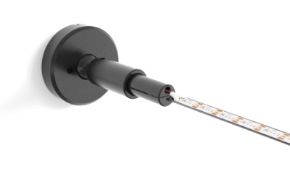
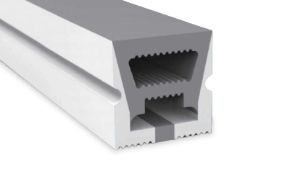
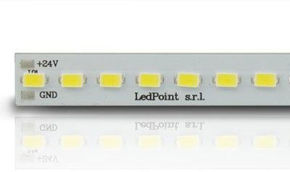
An LED profile (also called LED channel or LED track) is a structural extruded element, generally made of 6063-T5 aluminum alloy or similar, designed to house, protect, cool, and optically guide a flexible LED strip. The profile consists of three main parts:
- The aluminum body: the supporting structure of the profile, which acts as a heat sink and as a mounting element;
- The diffuser (cover): a translucent or opaque element made of PMMA (plexiglass), PC (polycarbonate), or glass, which covers the LED strip and diffuses its light, eliminating bright spots ("hot spots");
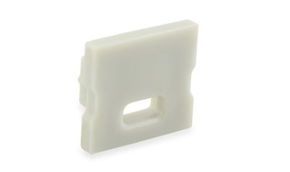
- End caps: plastic or metal elements that close the sides of the profile, protecting the strip and cables from dust, insects, and moisture ingress.
Main functions of aluminum LED profiles
Aluminum profiles for LED strips simultaneously fulfill multiple functions, each of which contributes decisively to the overall quality of the lighting installation:
Thermal dissipation
This is probably the most important function from a technical point of view. LED strips, although much more efficient than traditional light sources, still produce a certain amount of heat, concentrated mainly in the LED chips and resistors. Adequate thermal dissipation is fundamental to keep the junction temperature of the LEDs within design values (typically <85°C), which translates directly into longer system life. Aluminum, with its thermal conductivity of approximately 160-200 W/m·K, is the ideal material to fulfill this function: it transfers heat from the base of the LED strip to the external surface of the profile, where it is dissipated into the environment by convection.
Industry studies have shown that an LED strip correctly mounted on an aluminum profile can have an operating temperature up to 15-20°C lower than the same strip applied directly to a wood or plastic surface. This translates into an increase in system lifespan from approximately 30,000 hours to 50,000 hours or more.
Mechanical protection
LED strips are fragile components: the flexible PCB (printed circuit board) layer can be easily damaged by excessive bending, impacts, accidental stepping, or simple mechanical wear over time. The aluminum profile offers robust mechanical protection, allowing handling and installation even in environments with impact risk.
Optical light diffusion
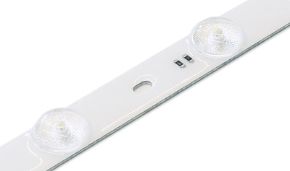
A further fundamental advantage of LED profiles concerns the quality of emitted light. An LED strip installed without a profile clearly shows individual LED chips as separate bright points, generating an aesthetically unpleasing "dotted" effect (especially with low-density strips per meter). The profile's opal diffuser, available in various transmittance grades from opal 50% to opal 90%, uniformizes the luminous flux, eliminating hot spots and creating a continuous, homogeneous light effect. Transparent diffusers, on the other hand, maintain full brightness but do not eliminate hot spots: they are suitable only for high-density strips (≥120 LEDs/m) or when maximum luminous efficiency is desired.
Architectural integration
Aluminum LED profiles allow LED strips to be integrated into architectural surfaces in a clean and professional manner: drywall coves, suspended ceilings, wall moldings, kitchen cabinet edges, bookshelf shelves, stair steps, handrails. In all these contexts, the profile completely conceals the LED strip (and power cables), allowing only the light to emerge, for a result that approaches high-end installations.
Standardization and ease of maintenance
A system built with standard profiles is much easier to maintain and update than an improvised one: the LED strip can be replaced by removing the diffuser without having to dismantle the entire installation, and standard profiles allow the use of interchangeable accessories (connectors, brackets, end caps) that greatly simplify ordinary and extraordinary maintenance operations.
When is it mandatory to use an LED profile?
Technically, the use of an LED profile is not legally required for 12V or 24V installations in dry environments. However, from a technical and insurance standpoint, it is strongly recommended, and sometimes required by manufacturers as a warranty condition, in the following situations:
- LED strips with power > 10 W/m (overheating risk without heat sink);
- Installations in humid environments or outdoors (IP protection);
- Installations in contact with flammable materials (wood, cardboard, fabrics);
- Installations in visible environments (aesthetic quality required);
- Systems intended for commercial or public use (fire safety regulations).
Types of LED profiles: angular, U-shaped, and flat compared
The market for LED strip profiles today offers a wide range of solutions designed to meet very different installation and design needs. Among all available types, the three main categories—angular LED profiles, U-shaped profiles, and flat profiles—cover the vast majority of both residential and commercial applications. Understanding the differences between these categories is the first step in choosing the right product.
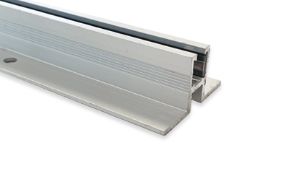
Angular LED profiles are perhaps the most recognizable and widely used type in contemporary interior design. Characterized by a cross-section shaped like an angle (at 45° or 90°), these profiles are specifically designed to be installed on the corners of walls, ceilings, furniture, stairs, and any other surface with a protruding or recessed angle. The construction peculiarity of these profiles means that light is emitted diagonally relative to the two surfaces on which the profile is mounted, creating effects of grazing illumination, bordering, or architectural highlighting of great visual impact. The 45° angular LED profile is the most widespread in its category. Its cross-section, with the diffuser opening inclined at 45° relative to the two mounting flanges, allows perfect installation in 90° corners between two surfaces (for example, wall and ceiling, or two cabinet doors). The 45° emitted light ensures grazing illumination that enhances adjacent surfaces and creates visual depth. Typical applications of the 45° angular LED profile: Extruded aluminum profile for LED strip, 45° angular cross-section, channel width 10 mm or 12 mm, available with opal or transparent diffuser, side caps included. Ideal for wall-ceiling corners, stair edges, under-cabinet lighting. The 90° angular LED profile (also called "L-shaped" or "elle") has a cross-section with two perpendicular flanges and the diffuser positioned vertically or horizontally. It is less common than the 45°, but finds application in situations where light should be emitted parallel to one of the two surfaces on which the profile is anchored, for example to illuminate a work surface from the front edge of the overhead cabinet. Some manufacturers also offer profiles with customized emission angles (60°, 120°, etc.) for specific architectural applications. These profiles are less common but highly appreciated in high-level architectural lighting projects, where the precise angle of illumination is critical to achieving the desired effect. In addition to profiles for protruding corners, versions designed for recessed (concave) corners exist, which allow inserting the LED strip inside a "groove" between two surfaces. These profiles create an indirect light effect of great elegance, widely used in luxury interior design. Discover all angular LED profiles available on Ledpoint.it with opal, transparent, and satin diffusers, in lengths of 1 m, 2 m, and 3 m. U-shaped profiles (also called channel profiles, U-profiles, U-channels, or simply "LED channels") are the most versatile and widespread type in the world of LED profiles for strips. Their U-shaped cross-section, with two side flanges and a flat bottom, allows accommodating the LED strip in the central channel and covering it with a diffuser that slides or snaps into place between the profile flanges. Aluminum U-profiles differ from each other in channel width (which must be compatible with the width of the chosen LED strip), flange height, channel depth (important for thicker LED strips or strips with raised components), and type of surface finish. The cross-section of U-profiles can vary greatly: from ultra-thin profiles with total height of 3-4 mm to deep profiles of 20 mm or more, designed for high-power LED strips requiring greater thermal dissipation. The surface-mount U-profile is fixed directly onto the surface of a wall, ceiling, or piece of furniture, remaining partially or completely visible. This is the simplest and fastest installation type, ideal for retrofits or installations where structural intervention on the surface is not possible. The diffuser closes the channel on top, concealing the LED strip and creating a clean, continuous line of light. The recessed U-profile is designed to be inserted into a groove cut into a wall or drywall ceiling, so as to be completely flush with the surrounding surface. This type of installation requires advance planning during the construction phase, but allows maximum architectural integration: the LED strip will appear literally "incorporated" into the structure, with a continuous light effect of great elegance. A double U-profile is a profile with two side-by-side channels, designed to house two parallel LED strips (for example, three different white colors for fine chromatic adjustment, or side-by-side RGB strips for complex chromatic effects). These profiles are used mainly in stage lighting, stage design, and artistic installations. Answering the question "what is a triple U-profile," we can say it is a multi-channel profile that allows managing multiple independent LED light sources within the same physical housing. A specific variant of U-profiles is represented by stair nosings, U-shaped or L-shaped profiles designed to be applied on the edges of steps (step nose) for safety and decorative lighting. These profiles have special construction characteristics: reduced thickness to avoid dangerous level differences, mechanical resistance to wear from foot traffic, and often IP65 or higher certification for water resistance during cleaning. Extruded aluminum channel profile for LED strips. Available in widths 8 mm, 10 mm, 12 mm, 15 mm, 17 mm, and 20 mm to accommodate all standard LED strips. PMMA diffuser included, side caps included. Suitable for surface or recessed installations. Flat aluminum profiles for LEDs (also called aluminum flat bar, flat aluminum strip, or simply flat aluminum) represent the ideal solution for all situations where available height space is extremely limited. A flat aluminum profile can have a total height of just 2-3 mm while maintaining the function of housing and thermal dissipation for the LED strip. The distinctive characteristic of this category is precisely the very low profile: while standard U-profiles have a height of 6-12 mm, flat aluminum profiles go down to 2 mm in height, allowing installations in spaces where no other type of profile would be possible—for example under baseboards, inside step gaps, or between two marble slabs. The ultra-slim flat aluminum for LEDs (2-3 mm total height) is designed for flush surface installations. The diffuser, also ultra-thin, is practically level with the surrounding surface, creating the effect of a "luminous line etched" into the wall or floor. This type of profile is highly appreciated in contemporary minimalist design and in high-level lighting projects where every detail counts. The surface-mount flat aluminum profile has a slightly greater height (4-8 mm) that allows quick installation on any flat surface with double-sided tape or screws. It is the most practical solution for those who want to install LED strips under furniture, bookshelves, or shelves without carrying out masonry work. The main difference between a flat profile and a U-profile lies in the geometry of the cross-section: the flat profile has a rectangular cross-section with very reduced height, while the U-profile has a channel cross-section with more pronounced side flanges. The flat aluminum therefore offers a more discreet visual profile and lower thermal dissipation capacity compared to the equivalent U-profile (for the same width), making it less suitable for high-power LED strips. Angular aluminum LED profiles: characteristics, variants, and applications
45° angular LED profile
90° angular LED profile (L-shaped)
60° angular LED profile and special variants
Angular LED profile for recessed corners
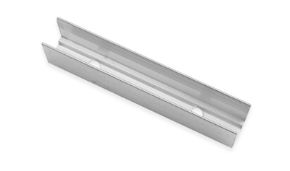
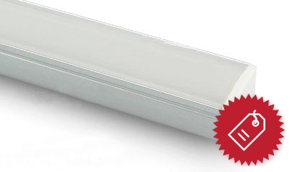
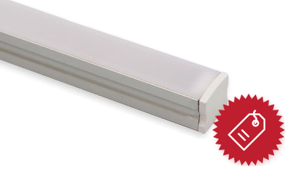
Aluminum U-shaped profiles for LEDs: characteristics and applications
Surface-mount U-profile, exposed installation
Recessed U-profile (drywall cove)
Double U-profile and multi-channel profiles
U-profile for stairs, LED stair nosings
LED U-profile, aluminum channel for LED strips
Flat aluminum profiles for LEDs: characteristics and applicationsUltra-slim recessed flat profile
Surface-mount flat profile
Differences between aluminum flat bar for LEDs and U-profile
Materials, finishes, and construction quality of LED profiles
The choice of material and finish for an LED profile is not merely an aesthetic issue: it directly affects the quality of thermal dissipation, corrosion resistance, the final appearance of the installation, and long-term durability. Understanding the differences between available materials is fundamental for anyone who wants to create a professional installation designed to last over time.
Extruded aluminum: the reference material
Extruded aluminum is by far the most widely used material for producing quality LED profiles. The extrusion process, in which material is forced through a shaped die to obtain the desired profile, allows producing profiles with complex cross-sections and very precise dimensions at contained costs.
The most common aluminum alloys for LED profiles are:
- 6063-T5 alloy: the most widespread, with excellent thermal conductivity (~200 W/m·K), good workability, excellent anodizability, and good corrosion resistance. It is the standard choice for professional-quality LED profiles;
- 6061-T6 alloy: greater mechanical strength than 6063, but less used for LED profiles due to higher cost and lower anodizability;
- 1050/1060 alloy: "pure" aluminum with excellent thermal conductivity (~230 W/m·K) but lower mechanical strength; used in applications where thermal dissipation is critical.
Surface finishes for aluminum profiles
The surface finish of the aluminum profile influences both aesthetic appearance and corrosion resistance. The main finishes available on the market are:
| Finish | Process | Appearance | Corrosion resistance | Relative cost | Typical applications |
|---|---|---|---|---|---|
| Natural anodized (silver) | Electrolytic anodizing | Polished or satin silver | Excellent | Low | Generic residential and commercial environments |
| Black anodized | Anodizing + black dyeing | Matte or glossy black | Excellent | Medium | Modern design, dark environments, kitchens |
| White painted | Powder coating | Matte or satin white | Good | Low-Medium | Residential environments, bathrooms, white kitchens |
| Black painted | Powder coating | Matte black | Good | Low-Medium | Modern design, industrial environments |
| Custom RAL painted | RAL powder coating | Any RAL color | Good | High | Custom projects, retail, contract |
| Raw (untreated) | None | Matte silver | Poor | Minimum | Hidden installations, recessed |
Alternative materials: plastic and PVC profiles
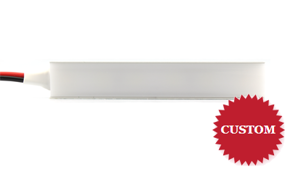
Besides aluminum, there are also LED profiles made of PVC or technical polymers. These materials have much lower thermal conductivity than aluminum (0.1-0.3 W/m·K vs 160-200 W/m·K), making them unsuitable for medium-to-high power LED strips. However, they can be used for low-power LED strips (≤5 W/m) in decorative installations where significant thermal dissipation is not required. The main advantage of PVC profiles is reduced cost and ease of manual cutting.
Diffusers: PMMA, PC, and glass
The LED profile diffuser is a critical component that directly influences the quality and quantity of emitted light. The most commonly used materials are:
- PMMA (polymethyl methacrylate, plexiglass): light transmittance 90-92% for transparent version, 50-80% for opal version. Excellent UV resistance, good mechanical durability. It is the standard material for most quality LED diffusers;
- PC (polycarbonate): similar transmittance to PMMA but with greater impact and temperature resistance. Used in applications requiring greater mechanical robustness;
- borosilicate glass: used for special applications requiring maximum thermal and chemical resistance. Heavier and more fragile than polymers, but with superior optical quality.
The opal transmittance of the diffuser is the most important parameter for visual comfort: a 60% opal diffuser allows 60% of the light emitted by the strip to pass through, perfectly uniforming it. Diffusers with higher transmittance (80-90%) allow more light but with less uniformity; those with lower transmittance (40-50%) give a more diffused and homogeneous effect but significantly reduce the final luminous flux.
Dimensions, cross-sections, and sizes of LED profiles: how to choose the right size
Choosing the correct dimensions for an LED profile is a fundamentally important technical step that many novice installers tend to underestimate. A profile with a channel that is too narrow will not allow insertion of the chosen LED strip; an excessively wide profile will appear aesthetically disproportionate. Correct size selection requires precise knowledge of the dimensions of the LED strip to be used.
Channel width: compatibility with LED strips
The channel width of the profile must be equal to or slightly greater than the width of the chosen LED strip. The available widths for the most common LED strips on the market are: 5 mm, 8 mm, 10 mm, 12 mm, 15 mm, 20 mm, and 24 mm. 5 mm strips (e.g., standard SMD 2835 strips) require profiles with a channel of at least 6 mm; 12 mm strips (the most common) require 12 mm channel profiles; 20 mm strips (typically high-power RGB strips) require 20 mm or larger profiles.
| LED strip width | Typical strip type | Recommended profile channel width | Notes |
|---|---|---|---|
| 5 mm | SMD 1204, single strip | 6–8 mm | Compact profile, low max power |
| 8 mm | SMD 2835, 3528 | 8–10 mm | Compatible with many standard profiles |
| 10 mm | SMD 5050, 2835 HD | 10–12 mm | The most common size on the market |
| 12 mm | SMD 5050 HD, COB 12 mm | 12–14 mm | Requires exact 12 mm profile or larger |
| 15 mm | COB 15 mm, high power | 15–17 mm | Always verify before purchase |
| 20 mm | RGB high power, COB 20 mm | 20–22 mm | Wider profile, greater dissipation |
| 24 mm | RGBW high power, dual row | 24–26 mm | Only special large format profiles |
Channel height and depth
The profile height (measured from the bottom to the upper edge of the flanges) must be sufficient to contain the LED strip with any soldered connectors. Standard LED strips have a thickness of approximately 1.5-2 mm, but with quick connectors or soldered joints they can reach 4-5 mm in height. It is important to verify that the chosen profile has sufficient channel depth to contain the strip with all its components without pressing against the diffuser.
Standard lengths and custom cutting
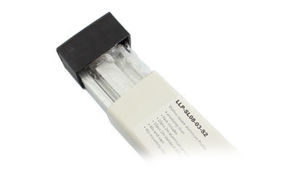
Aluminum LED profiles are produced and sold in standard lengths of 1 meter, 2 meters, and 3 meters. For special installations, many retailers also offer custom cutting, allowing ordering of profiles in the exact length needed for the project, reducing waste and simplifying installation.
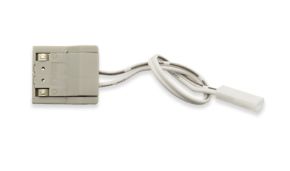
To connect two aluminum profiles in sequence, special joining connectors can be used that allow creating continuous lines longer than 3 meters without visual discontinuities. These accessories are fundamental for very long perimeter or linear installations.
How to join aluminum profiles
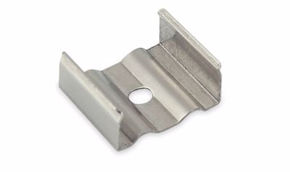
To join two aluminum LED profiles professionally, you can use:
- Internal pressure connectors: inserted inside the channel, they hold the two profiles together with friction force. Quick and clean solution, no tools required;
- Butt joints with screws: fix the two profiles with small self-tapping screws on the side of the profile; more stable but less aesthetically elegant;
- TIG welding: for permanent aluminum installations, welding guarantees perfect structural continuity; requires specialized equipment;
- 3M VHB double-sided tape + silicone: for semi-permanent joints on flat surfaces, using structural adhesive and transparent silicone to seal the joint.
Luminous output: diffusers, emission angles, and photometry of LED profiles
The luminous output of an LED profile + LED strip system is determined by a combination of factors: the quality and power of the LED strip, the type of diffuser, the profile geometry, the operating temperature (in turn influenced by the profile's thermal dissipation), and the reflectance of adjacent surfaces. Understanding how these factors interact is essential for correctly sizing an LED lighting system.
How the diffuser influences luminous output
The LED profile diffuser is the element that most influences the user's perception of light quality. There are three main types:
Transparent (clear) diffuser
The transparent diffuser lets almost all light emitted by the strip pass through (typical loss: 5-10%). Individual LED chips are visible through the diffuser, creating a "point of light" effect. This type of diffuser is indicated when maximum brightness is desired and LED positioning is not aesthetically critical, or for COB or very high-density LED strips (≥240 LEDs/m) where the dotted effect is already minimal.
Opal (frosted) diffuser
The opal diffuser is the most popular for residential and commercial lighting applications. It diffuses light uniformly, eliminating hot spots and creating a continuous light effect. Luminous flux loss varies from 20% (opal 80%) to 50% (opal 50%). For most residential applications, an opal diffuser with 65-75% transmittance represents the best compromise between uniformity and brightness.
Mikroprism (prismatic) diffuser
The prismatic or microprismatic diffuser is an advanced solution that combines excellent light uniformity (similar to opal) with limited flux loss (only 10-20%). It uses a microprism structure on the back of the diffuser to refract and diffuse light. It is the preferred choice in contexts where maximum uniformity is desired without sacrificing luminous efficiency.
Emission angle and photometric distribution
The emission angle of the LED profile system is determined mainly by the profile geometry and the position of the diffuser relative to the LED strip. The differences between the three main types are significant:
| Profile type | Typical emission angle | Light distribution | Main effect | Ideal application |
|---|---|---|---|---|
| 45° Angular | 120°–140° (from bisector) | Asymmetric relative to surfaces | Grazing/border illumination | Highlighting edges, steps |
| Surface-mount U | 120°–180° (downward) | Symmetric, Lambertian | Direct/diffused illumination | Under-cabinets, shelves, moldings |
| Recessed U | 80°–120° (downward) | Symmetric, concentrated | Accent/task illumination | Suspended ceilings, light coves |
| Surface-mount flat | 140°–160° (downward) | Symmetric, very diffused | Ambient diffused illumination | Under furniture, backlighting |
| Recessed flat | 100°–120° (downward) | Symmetric, semi-concentrated | Integrated linear ceiling light | Light lines in drywall |
How to correctly size LED strips
Sizing an LED strip system requires calculating the required luminous flux for the space to be illuminated. Here are the fundamental parameters to consider:
Required luminous flux (lumens)
As a general rule, for general lighting of a residential environment, approximately 300-500 lumens per square meter are required. For accent lighting (task lighting), this drops to 150-200 lm/m², while for decorative lighting even less. To calculate the luminous flux required for the entire system: Total lm = Surface area (m²) × Required lm/m².
From lumens to watts: luminous efficiency of the strip
The luminous efficiency of a quality LED strip varies between 80 and 180 lm/W. A 10 W/m strip with 100 lm/W efficiency delivers 1,000 lm/m. Taking into account diffuser loss (approximately 20-30% for a standard opal), the actual luminous flux exiting the profile will be approximately 700-800 lm/m. These figures allow estimating the length of LED strip needed to meet lighting requirements.
Quick sizing table for LED strips
| Application | Required lm/m² | Recommended strip type | Strip power (W/m) | Notes |
|---|---|---|---|---|
| Indirect lighting (ceiling cove) | 100–200 | SMD 2835 / 3528 HE | 4–8 | Reflected off wall/ceiling -40% flux |
| Under-cabinet kitchen lighting | 300–500 | SMD 2835 HE / COB | 8–14 | Requires good thermal dissipation |
| Accent/retail lighting | 500–800 | SMD 5050 / COB HD | 14–20 | Profile with good heat sink essential |
| Bathroom mirror lighting | 400–600 | SMD 2835 CRI90+ | 8–12 | Color temperature 3000–4000K recommended |
| RGB scenic effects | 200–400 | SMD 5050 RGB / RGBW | 10–18 | Effective flux of single channel |
Which is the brightest LED? COB vs SMD vs CSP
In the landscape of LED technologies for strips, it is important to distinguish between the main standards:
- SMD (Surface Mounted Device): the most common LEDs, available in dozens of formats (2835, 3528, 5050, 5630, etc.). SMD 5050 LEDs are the largest and brightest in the standard SMD family, with a typical flux of 20-25 lm per chip. High-efficiency SMD 2835 (HE) now reach efficiencies up to 200 lm/W and are among the most used in residential applications;
- COB (Chip On Board): tens or hundreds of LED chips mounted directly on a common base without individual packages. The result is extremely uniform light, virtually free of hot spots, with a color rendering index (CRI) typically very high (>90). COB strips are now considered top-of-the-line for applications where light quality is critical;
- CSP (Chip Scale Package): technology that minimizes the LED package dimensions to the physical limit, allowing extremely high chip densities and therefore exceptional light uniformity. Used in latest-generation strips with efficiency >150 lm/W.
The answer to the question "which is the brightest LED?" depends on context: in terms of flux per unit length, high-density COB strips now reach values of 1,000-2,000 lm/m, far exceeding traditional SMD strips.
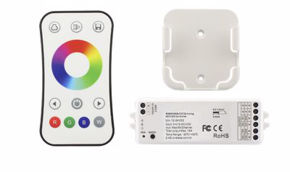
RGB vs RGBW: what's the difference?
A very frequent question among those approaching the world of colored LED strips is: what is the difference between RGB and RGBW? RGB LEDs combine three color channels (Red, Green, Blue) to create a wide range of colors, including white (obtained by mixing the three colors at maximum). However, "RGB white" is often unnatural, with a colored cast and very low CRI. RGBW LEDs add a fourth white chip (Warm White or Neutral White), which guarantees much higher quality white for general lighting, while maintaining all the chromatic flexibility of RGB. For mixed applications (chromatic effects + quality white lighting), the RGBW choice is always preferable.
Applications of angular, U-shaped, and flat LED profiles in domestic, commercial, and architectural environments
The applications of aluminum LED profiles are practically unlimited: from functional to purely decorative lighting, from small residential environments to large commercial spaces, aluminum LED profiles adapt to any context with results of great visual impact. In this section we will examine the main applications by environment category, with specific advice for each situation.
Residential applications
Kitchen: under cabinets and islands
Under-cabinet lighting is one of the most widespread and practical applications of LED profiles. Angular LED profiles installed on the lower corner of the cabinet directly illuminate the work surface below with direct, uniform light, significantly improving ergonomics and safety during food preparation. For this application, we recommend using LED strips with color temperature between 3000K and 4000K and CRI > 90, to ensure faithful color rendering of food. Recommended power is 8-12 W/m.
For kitchen island lighting, recessed U-profiles create an elegant "hidden light" effect, with the light source completely integrated into the island body.
Living room: luminous coves and indirect lighting
Light coves in living room suspended ceilings are the most scenographically effective application of LED profiles. Indirect lighting—with light reflected off wall or ceiling—creates a soft, enveloping atmosphere, eliminating harsh contrast between light source and surface. Recessed U-shaped LED profiles are the ideal solution for this application, combined with warm white LED strips (2700K-3000K) of medium power (6-10 W/m).
Lighting bookshelves with flat or angular profiles creates highly appreciated light effects in contemporary residential design, enhancing displayed objects and creating visual depth.
Bedroom: headboard and bedside lighting
The bedroom is the environment where lighting has the greatest impact on psychophysical well-being. Angular LED profiles installed on the bed frame (headboard) or under nightstands create ambient lighting of great comfort, ideal for nighttime reading. For this application, we recommend a warm color temperature (2700K) and the ability to dim the light to very low values to avoid disturbing sleep.
Bathroom: luminous mirrors and backlighting
In the bathroom, LED profiles find application in perimeter mirror lighting, a solution that guarantees uniform facial lighting, eliminating the awkward shadows of overhead spotlights. For this application, profiles with IP65 classification in zone 1 (within 60 cm of showers or bathtubs) are required, LED strips with CRI > 95, and color temperature between 2700K and 4000K. Aluminum U-profiles with integrated LED strip and satin opal diffuser are the most elegant choice for designer bathroom mirrors.
Stairs: nosings and step lighting
Lighting steps with angular LED profiles or nosings is a solution that combines safety function (nighttime visibility) and aesthetic value. Profiles must be chosen with minimum IP65 classification (to withstand water cleaning), mechanical resistance to foot traffic (material thickness at least 2 mm), and scratch-resistant diffuser. For steps, we recommend warm or neutral white light at low power (3-6 W/m) to avoid dazzling those using the stairs.
Commercial and retail applications
Shelf and display lighting
In retail, the quality of lighting for displayed products is directly correlated with sales performance: neuromarketing studies have shown that good shelf lighting can increase customer dwell time and conversions by up to 30%. Angular LED profiles applied to shelf edges create highly effective vertical product illumination. For retail applications, we recommend using LED strips with CRI > 90 and color temperature 3000-4000K, to ensure optimal color rendering of displayed products.
Bars, restaurants, and hospitality
In the hospitality sector, angular and U-shaped LED profiles are used to create scenic and personalized atmospheres. Bar counters illuminated from within with recessed profiles, backlit shelves with RGBW strips, ceilings with indirect light coves: these solutions, realized with quality LED profiles, create memorable environments that contribute to the venue's identity.
Offices and workspaces
In offices, LED profiles are used both for general lighting (linear ceiling profiles replacing fluorescent tubes) and for accent lighting of workstations. Light quality—high CRI, adequate color temperature (4000K for maximum concentration), absence of flicker (flicker-free)—is particularly important in work environments to reduce visual fatigue and improve productivity.
Architectural and design applications
Exterior facade lighting
Angular aluminum LED profiles with anodized finish and IP67-IP68 classification are used for lighting architectural facades: moldings, edges, eaves, decorative relief elements. For outdoor applications, it is fundamental to choose profiles with adequate IP protection, corrosion resistance (marine anodized or painted with anti-rust primers), and LED strips with color temperatures appropriate to the architectural context.
Museums, galleries, and art lighting
Lighting paintings and sculptures in museums requires light sources with CRI ≥ 95, absence of UV and IR components (to protect artworks), and color temperature typically between 3000K and 4000K. Angular LED profiles with high-quality, low-UV LED strips are an increasingly appreciated solution in this context, replacing traditional halogen lamps.
Practical guide to installing LED profiles: step by step
Installing an LED profile system can be simple or complex depending on the type of application, environment, and installer expertise. In this section we provide a detailed, operational guide to all fundamental steps: from tool selection to wiring management, from executing corners to handling the power driver. Following this step-by-step guide will allow even a novice installer to achieve professional results.
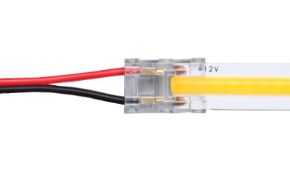
Before starting any installation, it is fundamental to have all necessary tools and materials. Starting a job without the right equipment almost inevitably leads to unsatisfactory results and wasted time. Essential tools: Consumable materials: Precise cutting of aluminum profiles is one of the most critical operations in the entire installation: an imprecise or non-perpendicular cut makes correct alignment between adjacent profiles or proper closure of end caps impossible. Here's how to proceed professionally: During the cutting phase, it is important to always respect safety norms (protective goggles, cut-resistant gloves), always using a cutting guide to ensure precise angles. Standard aluminum profiles are not designed to be bent, and attempting to do so without adequate equipment leads to breakage or diffuser deformation. For installations on curved surfaces, there are flexible LED profiles specifically designed, made of aluminum or special flexible polymers that can be bent with a minimum bending radius of 30-50 cm. For tighter bending radii, flexible plastic profiles are used or "V" cuts are made on the back of the rigid profile to achieve the desired curvature. The method of mounting the profile depends on the profile type, support surface, and end use. Let's look at the main available solutions: Screw mounting is the most reliable and permanent method. For masonry walls, holes must be drilled with a hammer drill and expansion anchors of correct diameter inserted. For drywall walls, cavity-specific anchors (type "molly" or "toggle") are used. For wooden surfaces, self-tapping screws are used. The recommended mounting spacing is 50-80 cm for U-shaped and angular profiles, and 30-50 cm for flat profiles (more prone to deformation). 3M VHB (Very High Bond) double-sided tape is an excellent alternative to screws in situations where drilling the surface is not possible. Using 1 mm thick VHB tape with 12-15 mm width, the profile can be glued to clean flat surfaces (glass, metal, smooth wood, ceramic) with an adhesion strength of over 100 N/cm². It is important to thoroughly clean the support surface with isopropyl alcohol before application, and allow at least 72 hours of pressure before applying significant loads to the profile. For outdoor or humid environment installations, mounting must use stainless steel screws (to avoid galvanic corrosion between aluminum and common steel) and seal all mounting holes with neutral silicone to prevent water ingress. The profile itself must have adequate IP classification (IP65 minimum for protected exterior, IP67 for direct rain exposure). Once the profile is fixed to the surface, inserting the LED strip into the channel is generally simple: quality LED strips already have adhesive on the back that facilitates positioning inside the channel. It is important to apply light, uniform pressure along the entire length of the strip to ensure good thermal contact between the strip base and the bottom of the aluminum profile, which is the necessary condition for effective thermal dissipation. Wiring is perhaps the most critical aspect of an LED strip installation: errors at this stage can cause malfunctions, overheating, or irreparable damage to components. Let's look in detail at all fundamental aspects. The choice of cable for LED strips depends on the supply voltage and installed power. The fundamental rules are: For 220V LED strips ("mains-direct" strips), wiring must follow the same rules as normal domestic electrical installations, with H05VV-F cables of 0.75 or 1.5 mm² depending on installed power, and must be carried out by a qualified electrician. Low-voltage LED strips (12V or 24V) are polarized: they have a positive (+) and negative (-) pole that must be correctly connected to the LED driver. Reversing polarity generally does not damage the strip (which simply does not turn on), but can damage the driver. How to recognize the polarity of an LED strip: The LED pins (anode and cathode) in the strip are already correctly connected internally: it is not necessary to identify the polarity of each individual LED. What matters is the polarity of the strip's power terminal. Reversing the polarity of a low-voltage LED strip generally results in the strip simply not turning on. Unlike individual LED components, modern LED strips include internal protections that prevent damage from polarity reversal. However, some LED drivers with internal protection may shut down in protection mode if they detect the strip connected incorrectly: in this case, it is sufficient to reverse the cables to restore normal operation. LEDs in strips are connected in parallel in series groups. Typically, 3 LEDs are connected in series (their forward voltage adds up: 3 × 3.2V ≈ 9.6V for white LEDs) with a current-limiting resistor, and these groups are then connected in parallel along the entire strip length. This scheme means that the strip can be cut at the marked cut points (every 2-5 cm depending on type) without the remaining sections ceasing to function. If the strip is cut outside the marked cut points, the circuit of one or more LED groups is broken, rendering that section non-functional. In worst cases, the current-limiting resistors can also be damaged, causing a short circuit in the adjacent group. Cut points are marked on the strip with a dashed line and/or scissors symbol: the strip must always and only be cut at these points. One of the most critical aesthetic aspects of an LED strip installation is cable management for power supply. The main solutions are: The LED driver (or LED strip power supply) is the component that converts mains voltage at 220V AC to the DC voltage required by the LED strip (typically 12V DC or 24V DC). Choosing the correct driver is fundamental for the longevity and performance of the entire system. The driver must be sized for a power at least 20% higher than the total power of the installed LED strip. Example: for 5 meters of 10 W/m LED strip (total 50 W), the driver must have a nominal power of at least 60 W. This safety margin prevents driver overheating and extends its useful life. The supply voltage directly influences the maximum length of LED strip installable without problematic voltage drops: For installations longer than the values indicated above, it is necessary to power the strip from both ends or divide the installation into multiple independent segments, each powered by a dedicated driver. 220V LED strips (also called "mains-direct strips" or "220V strips") do not require a separate driver: they are designed to be powered directly from mains voltage at 220-240V. Internally, each strip segment contains an integrated conversion and current-limiting circuit. The main advantage is installation simplicity and the ability to create very long runs without voltage drop problems while the disadvantage is that they are not dimmable with standard low-voltage LED dimmers (they require specific 220V dimmers) and present higher electrical risk compared to low-voltage strips. 220V LED strips must be installed according to current CEI regulations by qualified personnel. They cannot be freely cut like low-voltage strips: cut points are determined by the internal circuit geometry and are indicated by the manufacturer. To achieve brightness adjustment (dimming) of an LED strip, coordinated use of three elements is necessary: PWM (Pulse Width Modulation) dimming, the most widespread, works by varying the on/off frequency of the LEDs at a frequency so high (typically 1,000-40,000 Hz) as to be imperceptible to the human eye. The result is a variation in perceived brightness without variation in color temperature or CRI, which is a huge advantage compared to analog dimming (variable voltage dimming) which tends to shift the white point toward warmer tones at low intensity. To increase the brightness of an LED strip system, there are some practical strategies: LED longevity is directly correlated with junction temperature: every 10°C reduction in operating temperature approximately doubles the LED's useful life (Arrhenius law applied to semiconductor degradation). Practical measures to make LEDs last longer are: One of the most frequent questions from newcomers concerns precisely how to handle 90° angles in LED strip installations. Let's look at the available solutions, in increasing order of technical difficulty: Quick angular connectors for LED strips are accessories that allow changing direction without soldering. Available for 8, 10, and 12 mm strips, they are applied by cutting the strip at the cut point closest to the desired angle and inserting the terminals into the two connector housings. Very fast solution suitable for those who do not want to solder, but with the risk of contact loss over time if the connector is not of quality. When using an angular LED profile, the angle problem is already structurally solved: the profile itself guides the strip along the angle between the two surfaces, with the strip remaining straight inside the profile channel. For internal (concave) angles and upper angles (wall-ceiling), angular profiles are the most elegant and durable architectural solution. For angles where neither a quick connector nor an angular profile can be used, a short length of flexible cable (jumper) can be used that connects the two strip terminals. This solution requires soldering or the use of screw terminals: the cable section must be as short as possible to minimize voltage drop and must be mechanically secured to avoid tension on contacts. Parallel connection of two LED strip sections means powering them with the same driver, with "+" and "+" terminals connected together and "-" and "-" terminals connected together. In this way, current divides between the two branches and the driver must be sized for the sum of the currents. It is not possible to connect LED strips in series on the same supply voltage: voltage would accumulate and damage components. The number of strips connectable in parallel to the same driver is limited only by the driver's nominal power. The number of meters connectable in series on the same conductor without problematic voltage drops (>3% of nominal voltage) depends on cable cross-section, current, and supply voltage. For a 10 W/m LED strip at 24V, with 1.5 mm² cable, the maximum recommended length before needing a second tap is approximately 8-10 meters. For RGB or RGBW strips, the calculation must be performed separately for each color channel. Tools and materials needed for LED profile installation
Cutting and preparing the aluminum profile
How to cut an aluminum profile
How to bend an aluminum profile
Mounting the profile on different surfaces
Mounting with screws and anchors (permanent)
Mounting with VHB double-sided tape (semi-permanent)
How to mount the LED profile on an external surface
How to mount the LED strip in the profile
Wiring, polarity, and electrical connections for LED strips
What wire to use for LED strips?
Maximum current Run length up to 3 m Run length 3–6 m Run length 6–10 m Notes up to 2A (≈ 24W at 12V) 0.50 mm² 0.75 mm² 1.00 mm² Low power strip 2–5A (≈ 24–60W at 12V) 0.75 mm² 1.00 mm² 1.50 mm² Medium power strip 5–10A (≈ 60–120W at 12V) 1.00 mm² 1.50 mm² 2.50 mm² High power strip over 10A 1.50 mm² 2.50 mm² 4.00 mm² Requires power cable How to recognize LED polarity
What happens if LED polarity is reversed?
How are LEDs connected in LED strips?
What happens if the LED strip is cut outside the cut point?
How to hide LED wires
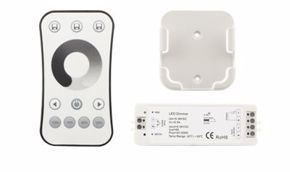
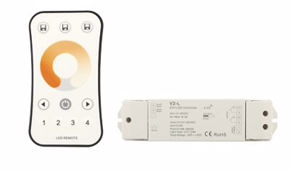
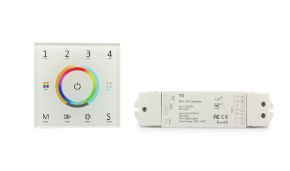
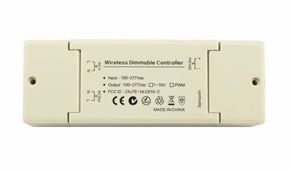
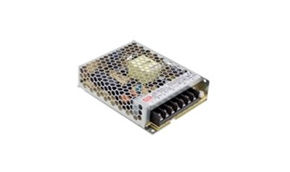
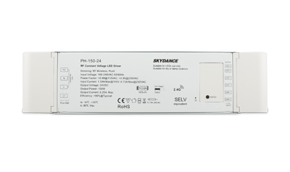
LED drivers, power supplies, and dimmability: everything you need to know
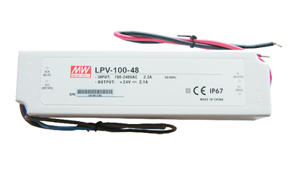
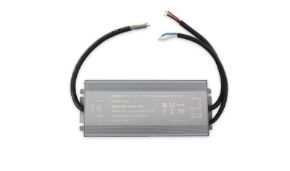
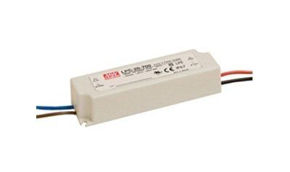
How to size the LED driver
12V vs 24V: which voltage to choose?
How does a 220 Volt LED strip work?
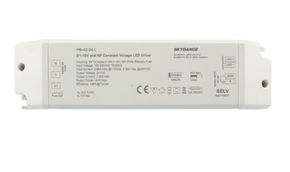
How to make an LED strip dimmable
How to increase LED brightness and how to increase power
How to make LEDs last longer
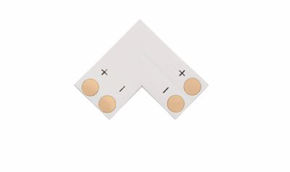
How to make a 90° angle with LED strips
Solution 1: quick angular connectors
Solution 2: 90° angular LED profile
Solution 3: junction with jumper (short bridge)
How to parallel LEDs (parallel connection)
How many LED strips can be joined and how many meters can be connected?
Waterproofing and outdoor installations: IP protection of LED profiles
The IP (Ingress Protection) classification according to IEC 60529 standard indicates the degree of protection offered by an electrical component's enclosure against penetration of solid objects (first number) and liquids (second number). For LED profiles used in humid environments or outdoors, choosing the correct IP protection level is a matter of safety as well as durability.
IP protection levels for LED profiles
| IP Classification | Solids protection | Liquids protection | Usage environment | Application example |
|---|---|---|---|---|
| IP20 | Fingers (>12mm) | None | Only dry indoor environments | Living room, bedroom, office |
| IP44 | Objects >1mm | Splashes from any direction | Humid indoors, bathroom zone 2 | Bathroom (outside shower), laundry |
| IP65 | Dust (total) | Water jets (low pressure) | Protected outdoors, bathroom zone 1 | Loggias, canopies, external stairs |
| IP67 | Dust (total) | Temporary immersion (1m/30min) | Exposed outdoors, fountains | Fountains, garden decorative elements |
| IP68 | Dust (total) | Prolonged immersion (>1m) | Underwater installations | Pools, aquariums, underwater installations |
How to waterproof an LED strip
For installations in humid environments or outdoors, the LED strip itself must have adequate IP classification. Waterproof LED strips are divided into three main categories:
- IP65 LED strip: covered with a layer of silicone resin over the entire top surface (where LED chips are mounted). Offers protection from splashes and humidity but not from immersion;
- IP67 LED strip: completely encapsulated in a silicone or PVC tube, which wraps the entire strip. Resists temporary immersion;
- IP68 LED strip: encapsulated in high-density silicone or epoxy resin, designed for prolonged immersion.
Even the aluminum profile must be chosen with adequate IP classification: for outdoor installations, profiles with glued/sealed diffuser and gasketed end caps offer IP65 or higher protection as a complete system.
How to mount LED strips outdoors
For outdoor installations, in addition to choosing waterproof materials, it is fundamental to pay attention to:
- profile orientation: avoid positions that collect stagnant water in the channel; prefer installations with channel facing downward or inclined;
- sealing all cable passages with IP65 cable glands and neutral silicone;
- choosing an LED driver with IP65 classification or higher, or installing the driver in a protected electrical box;
- stainless steel or nylon mounting materials to avoid corrosion.
Prices, installation costs, and quality/price ratio of LED profiles
Evaluating the cost of an LED profile system must take into account not only component costs, but also installation, maintenance costs, and energy savings over time. A higher-quality LED profile may cost twice as much as an economy profile, but if this translates into greater LED longevity (thanks to better thermal dissipation) and superior aesthetic performance, the cost differential amortizes quickly.
How much does an aluminum LED profile cost?
| Profile type | Low range (€/m) | Medium range (€/m) | High range (€/m) | Notes |
|---|---|---|---|---|
| Standard 45° angular | 2.00–3.50 | 3.50–6.00 | 6.00–12.00 | More economical with natural finish |
| Standard surface-mount U | 1.50–2.50 | 2.50–4.50 | 4.50–9.00 | Among the most economical on the market |
| Recessed U | 3.00–5.00 | 5.00–8.00 | 8.00–18.00 | More expensive due to complex geometry |
| Ultra-slim flat | 2.00–3.50 | 3.50–6.00 | 6.00–14.00 | Price increases with diffuser quality |
| Stair nosings | 4.00–7.00 | 7.00–12.00 | 12.00–25.00 | Greater mechanical resistance required |
| Special profiles (curved, custom) | — | 15.00–35.00 | 35.00–80.00+ | Custom-made, one-off pieces |
How to evaluate the quality/price ratio of LED profiles
The main criteria for evaluating the quality/price ratio of an LED profile are:
- profile wall thickness: a professional profile has walls of at least 1 mm thickness (thin walls increase deformation risk and reduce thermal dissipation);
- diffuser quality: a quality PMMA diffuser does not yellow over time; economy PVC or PS diffusers tend to lose transparency and uniformity within a few years;
- dimensional precision: a quality profile has very tight dimensional tolerances (<0.1 mm), which ensure proper diffuser closure without play or deformation;
- surface finishes: quality anodizing is recognized by color uniformity and absence of spots or streaks; quality powder coating has a minimum thickness of 60-80 μm.
Comparison tables: angular vs U-shaped vs flat LED profiles
The choice between angular, U-shaped, and flat LED profiles is not a matter of arbitrary preference, but depends on a series of objective factors related to the specific application, desired aesthetics, and installation environment characteristics. This section provides a systematic comparison between the three main types, organized by technical and application parameters.
| Parameter | Angular LED profiles | U-shaped profiles | Flat profiles |
|---|---|---|---|
| Cross-section | L-shaped (45° or 90°) | U-shaped (channel) | Flat rectangular |
| Mounting surface | Corner between two surfaces | Flat surface (exposed or recessed) | Flat surface (minimal height) |
| Light emission angle | 120-140° at 45° relative to corner | 120-180° perpendicular to surface | 140-160° perpendicular to surface |
| Main aesthetic effect | Grazing / border illumination | Direct / indirect illumination | Discreet linear light |
| Thermal dissipation | Good (double dissipating flange) | Good / excellent (flat bottom) | Limited (low aluminum mass) |
| Recommended max strip power | Up to 15-20 W/m | Up to 20-30 W/m | Up to 8-12 W/m |
| Total profile height | 10-25 mm | 6-20 mm | 2-8 mm |
| Architectural integration | Excellent in corners | Excellent on flat surfaces | Maximum discretion |
| Installation ease | Medium (requires precise angle) | High | High |
| Relative cost | Medium-high | Low-Medium | Low-Medium |
| Typical applications | Stairs, edges, moldings, borders | Light coves, suspended ceilings, under-cabinets | Under furniture, baseboards, gaps |
Selection guide: which LED profile for each situation
Below is a concise guide to help choose the most suitable profile for each situation:
| Situation / Need | Recommended profile | Notes |
|---|---|---|
| Illuminate wall-ceiling corner | 45° Angular | Mounted on corner, light toward ceiling and wall |
| Drywall light cove | Recessed U (cove profile) | Requires advance planning |
| Under kitchen cabinets | Surface-mount U (12 mm) or angular | Recommended CRI90+ 3000K strip |
| Perimeter bathroom mirror | Surface-mount slim U or flat IP65 | IP44-IP65 waterproofing necessary |
| Stair step edge | Angular nosing IP65 | Mechanical resistance to foot traffic |
| TV backlighting | Flat or slim U | Low power, RGBW recommended |
| Outdoor lighting (canopy) | U or angular IP65-IP67 | Anodized or outdoor-painted finish |
| Under baseboard / 3mm gap | Ultra-slim flat (h. 2-3mm) | Only solution for minimal space |
| Bookshelf / illuminated shelf | Surface-mount U 10-12mm or angular | Opal diffuser for homogeneous effect |
| Handrail or luminous railing | Recessed U or special angular | Verify mechanical resistance |
Trends, innovations, and the future of LED profiles for strips
The LED profile market is continuously evolving: new production technologies, new materials, and new market needs push manufacturers to develop increasingly sophisticated and high-performing solutions. Understanding current trends allows designers and installers to anticipate client requests and propose innovative solutions.
New generation ultra-slim profiles
Demand for LED profiles with ever-reduced thickness is constantly growing, driven by the trend toward minimalism in interior design. New second-generation ultra-slim profiles reach heights of 2 mm with construction quality and dissipative capacity notably superior to previous versions, thanks to the use of high thermal conductivity aluminum alloys and precision extrusion processes.
LED profiles with microprismatic diffuser
New generation microprismatic diffusers (PMMA with microprism pattern structure) offer a combination of high light uniformity (hot spot elimination) and high transmittance (losses <15%) that was not possible to achieve until a few years ago. These diffusers are rapidly gaining market share at the expense of traditional opal diffusers in professional lighting applications.
LED profiles with improved integrated heat sink
For very high-power LED strips (>25 W/m), manufacturers are developing profiles with integrated cooling fins on the rear, which significantly increase heat exchange surface area without increasing visible front footprint. These profiles allow the use of high-power LED strips in installations where traditional passive thermal dissipation would not be sufficient.
Native integration with smart systems
New "smart-ready" LED profiles already integrate DALI or DMX control wiring internally, eliminating the need for additional wiring and simplifying installation of controlled lighting systems. Some manufacturers are developing profiles with integrated WiFi/Zigbee controller directly in the profile body.
Circadian-friendly LED profiles
In response to growing attention for Human-Centric Lighting and Well Building Standard certification, LED profiles specifically designed to house high-efficiency Dual White LED strips for circadian lighting applications are spreading. These profiles have diffusers optimized to maximize the melanopic component of light, which is the one that most influences human sleep-wake rhythms.
Statistics and market data
The global LED profile market is growing strongly. According to the most recent market data:
- The global aluminum LED profile market reached an estimated value of approximately $2.8 billion in 2023, with a CAGR (compound annual growth rate) of 7.5% forecast through 2030;
- Europe represents approximately 28% of the global market, with Germany, Italy, and France as main markets;
- The residential segment represents approximately 55% of total demand in Europe, followed by commercial/retail sector (30%) and industrial sector (15%);
- U-shaped profiles remain the best-selling type (~45% of volume), followed by angular profiles (~30%) and flat profiles (~20%);
- Penetration of COB LED strips in the residential segment has grown from 5% in 2019 to 28% in 2023, with forecasts of reaching 50% by 2027;
- In Italy, estimates indicate that over 60% of new residential constructions include at least one LED profile installation, compared to 15% in 2015.
Future innovations
LED profiles with integrated LEDs (custom linear luminaires)
The most innovative trend sees the fusion between LED profile and light source in a single integrated system, where LED chips are mounted directly on the aluminum profile body (eliminating the LED strip as a separate component). These "all-in-one" systems offer superior optical performance and maximum compactness, but reduce installation flexibility.
Composite materials and new alloys
Research on new materials for LED profiles focuses on high thermal conductivity aluminum alloys (superior to standard 6063), aluminum-graphite composites, and profiles with nanotechnology coatings that further improve thermal dissipation without increasing mass.
On-demand personalized production
The spread of digital extrusion and CNC laser cutting technologies is making economically accessible the production of custom LED profiles in small quantities: not only personalized lengths, but also cross-sections designed specifically for a single project. This trend will have a significant impact on the contract and luxury interior design market.
Your questions...
There are questions that are frequently asked of us by architects, installers, interior designers, and private users about aluminum LED profiles. Below we answer the most frequent...
What are angular LED profiles for?
Angular LED profiles serve mainly three functions: protect the LED strip from mechanical impacts, dissipate heat generated by LED chips (extending their useful life), and optically guide light through the diffuser, creating a uniform, continuous line of light along the mounting angle. From an aesthetic point of view, they create a luminous bordering effect on the edges of furniture, stairs, suspended ceilings, and architectural surfaces, a highly appreciated design element in contemporary interior design.
How to mount the LED profile to wall or ceiling?
LED profile mounting depends on the surface: on masonry use drill + expansion anchors + screws, on drywall use cavity expansion anchors, on wood use self-tapping screws, on smooth surfaces (glass, metal, ceramic) use 3M VHB double-sided tape. Recommended mounting spacing is 50-80 cm. For outdoor installations use stainless steel screws and seal all holes with neutral silicone.
How to connect two LED profiles in sequence?
To connect two LED profiles in sequence you can use internal pressure connectors, side screw joints, or more simply bring the two profiles together so they touch and run the wiring inside the channel as if it were a single profile. To ensure visual continuity of the diffuser, it is important that the two profiles are cut at precise 90° and perfectly aligned.
How can I waterproof an already installed LED strip?
If the LED strip is already installed and needs to be waterproofed afterward, it is possible to apply a thin layer of transparent silicone resin (available in spray or syringe) over the entire surface of the LED chips. This solution is less effective than a strip with native IP rating, but can offer sufficient protection from occasional drops and humidity. For truly humid environments (e.g., showers, fountains), replacement with a native IP65-IP67 strip is the correct solution.
How to dim or lower LED light?
To lower the brightness of an LED strip without a dimmer, the immediate solution is to replace the transparent diffuser with one of greater opacity (opal 50-60%). This operation reduces outgoing flux by 30-40% without additional hardware. For fine, continuous adjustment, it is necessary to install an LED dimmer compatible with the driver in use. For a very soft light effect (e.g., night light), it is also possible to use two layers of overlaid diffuser.
How is aluminum used in the kitchen?
This question generally concerns the use of aluminum profiles for kitchen furniture construction. In this context, anodized or painted aluminum profiles do not present food safety issues, provided the surface finish is intact and does not have scratches or chips. Direct contact with food should be avoided; for food-contact surfaces (cutting boards, worktops), specifically certified food-grade alloys and finishes are used.
How to clean aluminum LED profiles?
Anodized aluminum profiles are cleaned with a soft cloth slightly dampened with water or with a solution of water and neutral detergent. Do not use abrasive products, aggressive solvents, or acids that would damage the anodization. For painted profiles, avoid any abrasive product; neutral detergents are fine. The PMMA diffuser is cleaned with a soft cloth and water; to remove stubborn streaks, diluted isopropyl alcohol can be used (not pure).
How do you tell if a piece is aluminum?
To verify if a material is aluminum: aluminum is very light (density 2.7 g/cm³ vs 7.8 g/cm³ for steel), is gray-silver with metallic appearance, is non-magnetic (unlike steel); it emits a dull sound when struck (not ringing like steel), it oxidizes rapidly on the surface with a thin white layer of aluminum oxide (natural passivation). A magnet that does not attract the material is the simplest test to distinguish aluminum from steel.
How is an aluminum profile obtained?
Aluminum profiles are obtained mainly through the hot extrusion process: a heated aluminum alloy billet (approximately 450-500°C) is forced through a shaped die under pressure of hundreds of tons. The material exits the die with the desired profile cross-section, and is then cooled, straightened, and cut to commercial length. This process is extremely flexible: by changing the extrusion die, profiles of any cross-section can be produced at relatively contained costs.
What to use to attach LEDs to the profile?
Most quality LED strips already have 3M adhesive on the back that is sufficient for bonding inside the profile channel. If the adhesive is not present or is no longer effective, it is possible to use 3M VHB double-sided tape 1 mm thick. For installations in very hot (>50°C) or humid environments, it is recommended to also add transparent silicone at the edges to ensure long-term fixation.
Choosing angular, U-shaped, or flat LED profiles based on the project
After reviewing the main LED profiles, we can affirm that there is no universally better LED profile: the optimal choice always depends on the specific application, environment, desired aesthetics, power of the LED strip to be housed, and available budget. 45° angular LED profiles are perfect for illuminating a wall-ceiling corner, but would be unsuitable for drywall coves. An ultra-slim flat profile is ideal under a baseboard, but inadequate for high-power LED strips. The key is to know the characteristics of each type and match them correctly to the specific need.
And if you cannot orient yourself in choosing the profile, the assistance service is always available: Ledpoint S.r.l. | Contacts