


How to replace neon signs with LEDs
Neon signs have dominated the landscape of commercial and decorative luminous signage for decades, becoming a recognizable visual icon worldwide. Today they are being replaced by LED technology (particularly with neon flex solutions), as these are a superior alternative in every respect: lower energy consumption, greater durability, ease of installation, and virtually no maintenance.
If you have a neon sign that has broken, consumes too much energy, or that you simply want to modernize, you can use this guide as inspiration: today we will address the topic by considering both technical aspects and regulations, component selection, and installation procedures for replacing neon signs with the most advanced LED systems available.
Neon signs: an outdated technology
Neon signs have a fascinating history dating back to the early twentieth century. It was the French chemist and inventor Georges Claude who first presented a working neon lamp in 1910 at the Exposition des Arts et Métiers in Paris. A few years later, in 1923, Claude sold his patents in the United States, and thus neon signs conquered the streets of Los Angeles, Las Vegas, and then the entire Western world. In Italy, neon luminous signs spread starting in the 1930s, becoming synonymous with modernity, commercial prosperity, and nightlife.
For decades, bars, restaurants, hotels, shops of all kinds, cinemas, and theaters have used neon signs to attract the attention of passersby and identify their business. The characteristic continuous and enveloping light of neon, with its warm and saturated colors, created an unmistakable aesthetic that is still associated today with a certain historical period — the fifties, sixties, and seventies — and with a sense of nostalgia and urban romance. It is no coincidence that vintage neon signs are now cult and collectible objects, and that the neon aesthetic has experienced a true renaissance in the worlds of design, photography, interior decorating, and social media.
However, despite their undeniable charm, traditional neon tubes have numerous technical and economic disadvantages that have led to their progressive decline: high energy consumption, structural fragility, presence of potentially hazardous gases and substances, need for high-voltage transformers, and specialized maintenance. With the advent and refinement of LED technology (particularly with the development of neon flex, LED strips that perfectly simulate the visual appearance of classic neon), replacing neon signs has become not only possible, but strongly recommended from both an economic and environmental standpoint.
Technological evolution: from gas to LED
The transition from traditional neon signs to modern LED systems did not happen overnight, but was the result of a progressive technological evolution lasting about twenty years. In the early 2000s, the first LED strips were not able to compete with the luminous output and uniformity of neon. LEDs had visible bright spots, visual discontinuities, and limited flexibility that made them unsuitable for the decorative applications typical of signs.
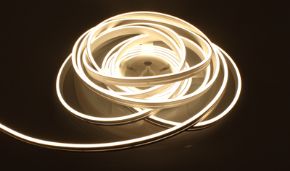
The situation changed radically with the introduction of neon flex, which combine high-density LED chips with flexible silicone housings capable of diffusing light uniformly, completely eliminating the problem of visible bright spots. Today, a quality neon flex is practically indistinguishable from a traditional neon tube to the naked eye, but offers enormously superior performance: it consumes less than half the energy, lasts 5-10 times longer, contains no hazardous gases, can be dimmed, dynamically change color, and installed without any high-voltage transformer.
The Italian market for luminous signs
In Italy, the market for neon luminous signs is still very active, with thousands of commercial establishments, hospitality structures, nightlife venues, and artisanal activities that each year must decide whether to repair their old neon signs or replace them with LED systems. The main cities, Rome, Milan, Turin, Naples, Bologna, still have numerous functioning neon signs, some of which represent true pieces of local history.
Growing environmental awareness, combined with continuously rising energy costs and tax incentives for energy efficiency, is pushing more and more businesses and individuals toward replacing neon signs with LEDs. Even local regulations on luminous signs, which in some cities impose restrictions on consumption and nighttime light emissions, are accelerating this transition. The cities of Rome, Milan, and Ravenna — to name just a few realities with a consolidated tradition in the signage sector — are recording growing interest in LED solutions from installers and clients.
What are neon signs and how do they work
To fully understand the process of replacing neon signs, it is essential to start with a clear understanding of how traditional neon tubes work. Only by knowing the operating principle of the original sign is it possible to correctly design the replacement and choose the most suitable LED components. In this section we will analyze in detail the physical structure of the neon tube, the principle of gas ionization, and the fundamental role of the high-voltage transformer.
How is a neon tube made?
A traditional neon tube is essentially composed of a hand-blown glass envelope, filled with a noble gas (neon, argon, krypton, or xenon) at very low pressure (generally between 3 and 20 millibars). The ends of the tube contain metallic electrodes, typically iron coated with barium oxide, which serve to initiate and maintain the electrical discharge inside the tube.
The complete structure of a neon sign includes:
- the glass tube: hand-blown and hand-bent by glass artisans, it can be transparent, colored, or internally coated with fluorescent powders to obtain different light shades;
- the filling gas: pure neon produces orange-red light, argon with mercury vapor produces ultraviolet light which, combined with different fluorescent coatings, generates white, blue, green, pink, and many other colors;
- the electrodes: mounted at the ends of the tube, they conduct the high voltage necessary to initiate gas ionization;
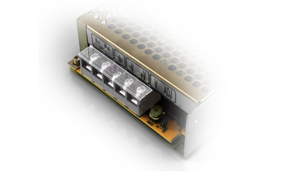
- the high-voltage transformer: converts mains voltage (230V) into high voltage (typically 2,000-15,000V) necessary to power the tube. It is the most expensive and bulky component of the sign;
- the support frame: metal or plastic structure on which the tubes and transformers are fixed.
How do neon signs work?
The operating principle of a neon sign is based on gas electrical discharge. When a sufficiently high voltage is applied between the two electrodes, electrons are accelerated toward the anode and collide with gas atoms inside the tube. These collisions excite the gas atoms, raising them to a higher energy level. When the atoms return to their normal energy state, they release the accumulated energy in the form of photons, i.e., they emit light.
The nature and color of the emitted light depend on the type of gas used: pure neon emits in the red-orange band (from 580 to 700nm), while argon, which alone would emit in the ultraviolet and blue-violet band, is combined with mercury vapor and fluorescent coatings to produce a wider range of colors. It is precisely thanks to this combination that neon signs can be produced in virtually any color shade.
To maintain a stable discharge, a transformer for neon signs is required which, in addition to stepping up the voltage, acts as a current limiter to prevent the discharge from becoming uncontrolled. Traditional neon transformers are heavy, bulky, and expensive devices, with output voltages ranging from 2,000V for small tubes up to 15,000V for large installations. This need for high voltage represents one of the main safety risks for neon installations and one of the reasons why replacement with LEDs is highly recommended.
Types of neon signs and their applications
Over the decades, several types of neon signs have been developed, each with specific characteristics and applications. Knowing the differences between these types is important because it influences the most appropriate replacement strategy.
| Type of sign | Characteristics | Typical applications | LED replacement strategy |
|---|---|---|---|
| Single free-form neon tubes | Hand-blown glass, high customization | Bars, venues, artistic decoration | Molded silicone neon flex |
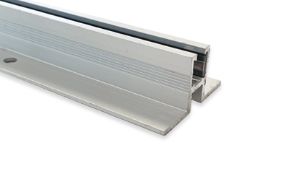
| Channel signs with neon | Aluminum or plastic structure with internal tubes | Shops, offices, shopping centers | LED strips or neon flex in profiles |
| Neon ceiling fixtures (T5, T8) | Standard linear fluorescent tubes | Offices, warehouses, parking lots | T8 LED tubes or direct LED fixtures |
| Circular neon | Annular-shaped neon tubes | Service lighting, spotlights | Circular LEDs or round LED panels |
| Box signs with neon | Illuminated box with internal tubes | Outdoor advertising, fast food | Diffused LED strips or LED modules |
What kind of light does neon produce?
One of the most frequent questions asked when addressing the replacement of a neon sign concerns the nature of the light produced: what kind of light does neon produce? This is a fundamental question because it directly influences the choice of the correct LED replacement, in terms of color temperature, color rendering index (CRI), and luminous intensity. Understanding the optical properties of neon light allows selection of the neon flex or LED tube most faithful to the original, ensuring aesthetic and functional continuity of the installation.
Optical properties of neon light
The light produced by neon tubes has very particular optical characteristics that clearly distinguish it from other light sources. Unlike incandescent lamps, which produce a continuous spectrum, and white LEDs, which produce a relatively broad spectrum, neon tubes emit a line spectrum characteristic of the ionized gas. This means that the light is concentrated at precise wavelengths, which gives colors that saturation and chromatic purity that make neon signs so visually impactful.
Pure neon emits mainly in the red (640nm) and orange (585nm) wavelengths, producing that characteristic warm and enveloping light that everyone associates with the "neon red" color. Argon, on the other hand, emits mainly in blue and violet, producing a cold and penetrating light often used in blue or green signs (when combined with yellowish-green coatings).
Color temperatures and CRI in the neon vs. LED comparison
When talking about neon luminous signs in white light (as commonly used in interior lighting or in some commercial signs), the tube is made with argon and mercury vapor combined with white fluorescent powders. The result is a white light with a color temperature varying between 3,000K (warm white) and 6,500K (cool white) and a color rendering index (CRI) that in the basic version is around Ra 70-75.
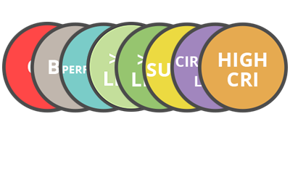
Modern LED neon flex (such as the 2700K model) achieve a CRI Ra>93, far exceeding the color rendering of traditional neon. This means that colors illuminated by neon flex appear more natural, vivid, and faithful to reality compared to those illuminated by classic neon. For applications where color rendering is critical (showrooms, jewelry store windows, art galleries, or luxury restaurants), this advantage is particularly relevant.
Light diffusion: uniform vs. point source
One of the most appreciated characteristics of neon tubes is the perfect uniformity of the emitted light: there are no distinct emission points, but a continuous and uninterrupted luminous line. This property, fundamental for the aesthetics of signs, was for a long time impossible to replicate with standard LEDs, which inevitably produce a sequence of more or less spaced bright points.
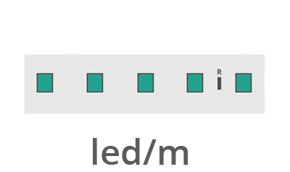
Neon flex elegantly solve this problem through two complementary mechanisms: high LED density up to 120-125 LEDs per meter and the diffuser silicone housing that mixes and distributes the light uniformly before it reaches the observer's eye. The result is a continuous line of light practically indistinguishable from that of a traditional neon tube, even when observed up close and from different angles.
What happens if a neon or fluorescent lamp breaks
The breakage of a neon tube or fluorescent lamp is an event that sooner or later happens to anyone managing traditional lighting systems. Knowing what happens in these cases, what risks are involved, and how to intervene correctly is fundamental both for people's safety and for environmental protection. In this section we will analyze the consequences of neon breakage and the correct procedures to follow for disposal.
What happens if a neon tube breaks?
When a neon tube breaks, the immediate consequences depend on the type of tube and the circumstances of the breakage. In the case of pure neon tubes (noble gas), breakage mainly causes the dispersion of gas into the surrounding environment: neon and argon are inert and non-toxic gases, so the breakage of these tubes does not pose direct chemical health risks. However, the breakage of the glass tube can cause cuts and injuries from sharp fragments, as well as potential electric shock risks if the tube was under tension at the time of breakage.
More serious is the situation with traditional fluorescent tubes (often improperly called neon) which contain mercury vapor. Mercury is a highly toxic heavy metal, and the breakage of a fluorescent tube causes the dispersion of a small amount of mercury into the environment in the form of vapors and microscopic particles. Although the amounts of mercury in modern fluorescent tubes are greatly reduced compared to the past (generally 3-5mg per tube), it is important to follow precise procedures to minimize exposure.
Safety procedure in case of fluorescent lamp breakage
If a fluorescent lamp breaks, it is essential to follow these steps in the correct sequence:
- do not approach immediately: move people present away from the room or affected area for at least 15 minutes, opening windows and doors to ventilate the space;
- do not use a vacuum cleaner: the vacuum cleaner would disperse mercury particles into the air and filtration system. Collect glass fragments with gloves, damp paper towels, or adhesive tape;
- seal fragments in an airtight container: use a sealable resistant plastic bag or a rigid container with a lid;
- do not dispose in regular trash: broken fluorescent tubes must be disposed of as special hazardous waste, taken to the municipal recycling center;
- ventilate further: leave the room open and ventilated for several hours after cleaning.
This breakage management procedure, certainly inconvenient and potentially risky, represents one of the strongest arguments in favor of immediately replacing fluorescent tubes with LEDs: LEDs contain no mercury, emit no UV radiation, and in case of accidental breakage present no chemical risks.
Breakage as an opportunity for upgrade
In professional lighting practice, the breakage of a neon or fluorescent tube is increasingly treated not as a problem to be solved by simply replacing the same tube, but as an opportunity to make the definitive switch to LED technology. The cost of a replacement LED tube is now comparable or even lower than that of an equivalent quality fluorescent tube, while the long-term benefits in terms of energy savings and reduced maintenance are significantly greater.
In particular, for commercial neon signs, the breakage of a tube almost always represents the moment when the decision is made to proceed with complete replacement of the sign with an LED neon flex system. The advantages are immediate: no risk of new breakages in the short term, drastic reduction in energy costs, aesthetic improvement (neon flex are brighter and more uniform than old, worn neon) and elimination of expensive high-voltage transformers.
Which consumes more: neon or LED?
The energy comparison between traditional neon signs and modern LED systems is one of the determining factors in the decision to proceed with replacement. Understanding exactly how much is saved in terms of electrical consumption and electricity bill costs allows calculation of the return on investment. In this section we will analyze in detail the consumption of the two technologies, with data and figures that will immediately clarify the economic advantage of switching to LED.
Consumption of traditional neon tubes
A traditional neon tube for commercial use, of the type found in shop and venue signs, has an energy consumption that depends on the tube length, type of gas, and transformer used. On average, one meter of neon tube absorbs between 15W and 25W, to which must be added the transformer consumption which in older models can represent even 20-30% of total consumption.
For a medium-sized sign with 10 meters of neon tube, total consumption can easily exceed 300-350W. Considering usage of 12 hours per day for 365 days per year and an energy cost of €0.25/kWh (average value for commercial users in Italy in 2025), the annual management cost of such a sign amounts to approximately €330-385 for electricity alone.
Consumption of LED neon flex
LED neon flex, thanks to the high efficiency of modern LED chips, drastically reduces consumption compared to traditional neon. Available models have the following consumption characteristics:
| Neon flex model | Voltage | Consumption | Color temperature | LED density |
|---|---|---|---|---|
| NS04-270-1258Z2-5F3 (Warm White) | 24V DC | 11W/m | 2700K | 120 LEDs/m (2835 chip) |
| Colored neon flex (e.g., Yellow) | 24V DC | 9.6W/m | Fixed color | 125 LEDs/m (2835 chip) |
| Outdoor IP67 neon flex | 24V DC | 10-12W/m | Variable | 120 LEDs/m (2835 chip) |
For the same 10-meter sign mentioned above, total consumption with LED neon flex is around 100-120W (at 11W/m), compared to 300-350W for traditional neon. The energy saving is therefore approximately 65-70%.
Annual savings calculation and ROI
| Parameter | Traditional neon sign | LED neon flex sign | Savings |
|---|---|---|---|
| Total consumption (10m) | 330W | 110W | 220W (-67%) |
| Hours of use/year | 4,380h | 4,380h | - |
| kWh/year | 1,445 kWh | 482 kWh | 963 kWh |
| Energy cost (€0.25/kWh) | €361/year | €120/year | €241/year |
| Estimated maintenance | €150/year | €15/year | €135/year |
| Total annual cost | €511/year | €135/year | €376/year |
| Average lifespan | 8,000-15,000h | 50,000h+ | +3-6x |
With annual savings of approximately €376 and an average investment for replacing a 10-meter sign of €400-600 (including labor), the return on investment (ROI) is achieved in less than 18 months. After this period, each year of LED neon flex use generates net savings exceeding €350, projected over a product lifespan of 10-15 years.
How to dispose of old neon tubes
Proper disposal of discarded neon and fluorescent tubes is a legal obligation in Italy and the European Union, dictated by the presence of potentially hazardous substances such as mercury and fluorinated gases. Ignoring regulations regarding disposal can result in significant administrative penalties, environmental damage, and public health risks. Let us therefore see what are the correct procedures for disposing of old neon tubes, the reference regulations, and the channels through which this can be done legally and free of charge.
Reference regulations for neon disposal
In Italy, the disposal of neon and fluorescent lamps is mainly regulated by Legislative Decree 49/2014, which implements the European Directive 2012/19/EU on Waste Electrical and Electronic Equipment (WEEE). Fluorescent and neon tubes are classified as WEEE and belong to category 5 (lighting equipment) and as such must be managed through the separate collection channels provided by law.
The main points of the WEEE regulations applicable to neon signs are:
- producers and importers are obliged to finance the collection and recycling of WEEE through authorized consortia (e.g., CdC RAEE, Ecolamp, Re.Media);
- distributors, if authorized, are obliged to provide free "one-for-one" collection of old lamps at the time of purchasing new lamps of the same type;
- private individuals can deliver old fluorescent tubes free of charge to municipal recycling centers or authorized collection points in large retail stores;
- businesses and professionals (electrical installers, maintenance companies) are required to register with the National Register of Environmental Managers and use waste identification forms (FIR) for transport and delivery to authorized centers.
Neon signs: signs to be replaced responsibly
For a private individual who has replaced their neon sign or office fluorescent lamps, disposal methods are relatively simple. Old neon tubes can be taken directly to the municipal recycling center (ecocenter), where there is a section dedicated to WEEE. In many municipalities it is also possible to request home pickup for quantities exceeding a certain number of pieces.
For companies carrying out mass replacements (as in the case of a complete renovation of an office or factory lighting system), it is necessary to rely on a company specialized in the transport and disposal of special hazardous waste, possessing the authorizations required by law. The cost of this service varies depending on the quantity and weight of materials, but is generally included or deductible within energy efficiency projects.
Recoverable materials from old neon signs
Old neon signs are not just waste: they contain valuable materials recoverable through recycling. The glass from tubes can be melted and reused in the glass industry. The frame metals (aluminum, steel) are separated and sent to the metal recovery supply chain. Transformers contain recoverable copper and other metals, and even mercury, when properly extracted during the recycling process, can be recovered and reused in controlled industrial applications.
According to data from Italian WEEE consortia, the recycling rate for fluorescent and neon tubes has exceeded 90% in recent years, demonstrating the effectiveness of the management system established by European regulations. This figure should be encouraging for those preparing to replace their neon sign: not only will they get a good deal economically, but they will actively contribute to environmental sustainability.
LED neon flex: the solution to old neon signs
LED neon flex today represents the most technologically advanced and practically convenient solution for replacing traditional neon signs. This is a product that in just a few years has revolutionized the decorative and commercial lighting market, offering an alternative that combines the aesthetics of classic neon with all the advantages of LED technology. In this section we will present in detail the characteristics, types, and advantages of available neon flex, illustrating why this technology is the preferred choice of installers, designers, and clients throughout Italy.
What is LED neon flex?
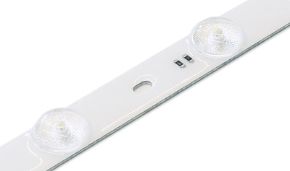
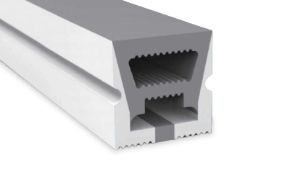
As already anticipated, LED neon flex is a high-density LED strip enclosed within a flexible silicone housing that serves both as mechanical support and optical diffuser. The silicone housing is designed to distribute the light emitted by individual LED chips uniformly along the entire length of the strip, eliminating the typical dotted effect of standard LEDs and creating a continuous line of light that faithfully resembles that of the traditional neon tube.
The flexibility of the silicone allows the neon flex to be bent and shaped into any two-dimensional form, making it ideal for creating lettering, logos, geometric shapes, and custom decorations. The same result that was achieved with hand-blown glass in traditional neon can be obtained, but without the typical fragility of glass and without the need for a specialized glassblowing artisan.
Advantages of neon flex
| Characteristic | Traditional neon | LED neon flex |
|---|---|---|
| Energy consumption | 15-25W/m + transformer losses | 9.6-11W/m |
| Average lifespan | 8,000-15,000 hours | 50,000+ hours |
| Operating voltage | 2,000-15,000V (high voltage) | 12V or 24V (extra-low voltage) |
| Electrical risk | High (high voltage) | Very low (SELV) |
| Fragility | High (hand-blown glass) | Very low (flexible silicone) |
| Hazardous substances | Mercury (in fluorescents), gas | None |
| Dimming capability | Limited, with dimmable ballast | Full (0-100% with dimmable driver) |
| RGB/Dynamic colors | Not possible | Possible with RGB/RGBW models |
| Installation | Requires specialized artisan | Simple, DIY possible |
| Maintenance | High, specialized | Virtually none |
| Disposal | Hazardous special waste | Non-hazardous WEEE |
| IP Rating | Generally IP20-IP40 | Up to IP65/IP67 |
Types of available neon flex
The neon flex market today offers a wide range of products differentiated by size, power, color temperature, protection rating, and control type; let's look at some of them.
Indoor neon flex (IP20-IP44)
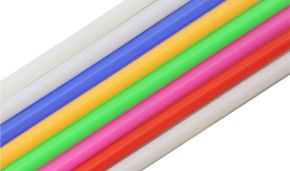
Intended for indoor installations, in environments protected from moisture. These are the lightest and most flexible products, ideal for creating home neon signs, venue decorations, luminous frames, and custom lettering for indoor use. Available in warm white, neutral white, cool white, and fixed colors (red, green, blue, yellow, pink).
Outdoor neon flex (IP65-IP67)
Designed to withstand water, dust, and adverse weather conditions. IP65 protection rating guarantees resistance to water jets, while IP67 ensures tightness even in case of temporary immersion. These are the ideal products for outdoor commercial neon signs, facade signs, architectural decorations, and any application exposed to the elements.
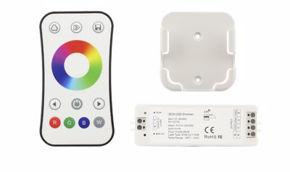
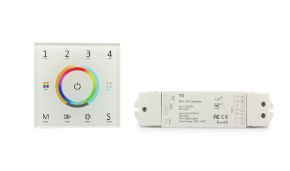
RGB and RGBW neon flex
Allow dynamic color variation of light through a dedicated controller; RGB models produce any color from the combination of red, green, and blue while RGBW models add a white channel for more natural white mode performance and a wider color gamut. They are ideal for dynamic decorative applications, temporary installations, scenic lighting, and all situations where you want to be able to change the sign color based on occasion or time of day.
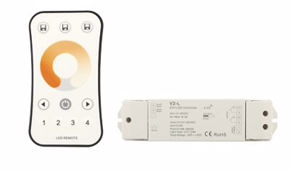
Dim-to-Warm (DTW) neon flex
An innovative technology that allows simultaneous variation of light intensity and color temperature, simulating the natural behavior of an incandescent lamp: as you dim, the light becomes not only less intense but also warmer and more amber. Ideal for hospitality applications, restaurants, and residential environments where a particularly welcoming and natural atmosphere is desired.
How to choose an LED neon flex
Choosing the right neon flex for a specific application requires in-depth knowledge of the product's technical characteristics. Relying on precise and detailed technical data is fundamental to ensure correct system design, driver sizing, and cost estimation.
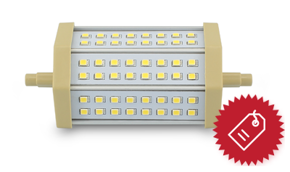
Example: 6x12 neon flex
Let's take as an example one of the most requested models, the 6x12, to review the parameters that should be considered before making a purchase
| Parameter | Value |
|---|---|
| Cross-section | 6x12mm |
| Housing material | Solid silicone (transparent or white) |
| LED chip | 2835 series |
| LED density (white) | 120 LEDs/m |
| LED density (colored) | 125 LEDs/m |
| Operating voltage | 24V DC |
| Consumption (white 2700K) | 11W/m |
| Consumption (colored version) | 9.6W/m |
| Color temperature (white) | 2700K |
| Color rendering index | CRI Ra>93 |
| Protection rating | IP65 / IP67 (depending on model) |
| Standard reel length | 5 meters |
| Cutting point | Every 25mm (indicated by cut line) |
Luminous output and emission angle
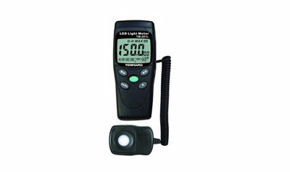
One of the most important aspects in choosing a neon flex for signs is luminous output, expressed in lumens per meter (lm/m). Models with 2835 chips at 120 LEDs/m and 11W/m achieve a luminous output of approximately 800-1,000 lm/m in the warm white 2700K version, which is absolutely comparable to that of a traditional neon tube of equal length.
The emission angle depends on the geometry of the silicone housing: "top bend" models (horizontal curvature) emit mainly upward/front with an angle of approximately 160°, while "side bend" models (vertical curvature) have lateral emission with a similar angle. There are also 360° models that emit in all directions, simulating even more faithfully the omnidirectional emission of the neon tube; these can be supplied by reservation for substantial volumes.
Second-generation installation accessories and tools
For second-generation neon flex, there are specific accessories that make installation precise and professional; let's see what they are.
- NE6-TOOL (specialized cutter): a cutter specifically designed to make clean and precise cuts on the 6mm section of neon flex without crushing or deforming the silicone housing. Precise cutting is fundamental to ensure reliable electrical connection and impeccable aesthetic appearance.
- NE6-CUT (6mm milling bit): a dedicated tool for shaping neon flex ends, used to prepare ends for connector insertion and for working on pronounced curves. Allows creation of custom profiles with millimeter precision.
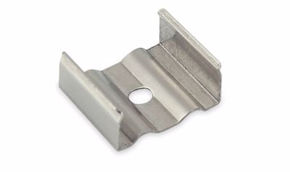
- Mounting clips: plastic or metal supports that allow fixing neon flex to installation surfaces without drilling or damaging the silicone housing.
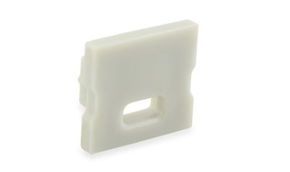
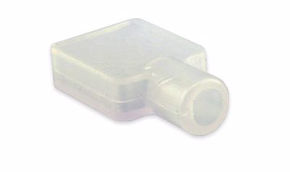
- End caps: silicone or resin closures to seal cut ends of neon flex and prevent moisture infiltration.
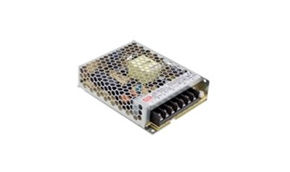
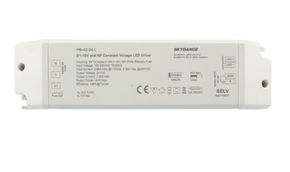
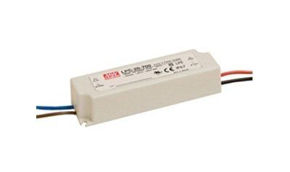
Power supplies and electrical sizing
Correct power supply sizing is a critical aspect to ensure optimal performance and long life of neon flex. The fundamental rule is to use a power supply with nominal power 20% higher than the calculated total load. This safety margin serves to prevent the power supply from constantly operating at its limits, a condition that significantly reduces lifespan over time and can cause luminous instability (flickering).
For an installation of 5 meters of white neon flex at 11W/m, the total power of the neon flex is 55W. The correct power supply will therefore be at least 55W × 1.2 = 66W, rounding up to the nearest commercial model (typically 75W or 100W at 24V DC).
For installations longer than 5-7 meters with single-end power supply, voltage drop along the strip can cause a perceptible difference in brightness between the input point and the end. In these cases it is necessary to power the neon flex from both ends, or segment it into shorter sections each with its own power supply.
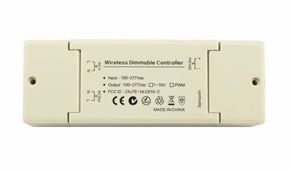
Control systems and dimming
Being constant voltage devices (12V or 24V DC), neon flex are compatible with the entire range of Skydance controllers, which represent one of the most complete and reliable LED control systems on the market. Available control options include:
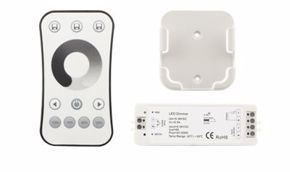
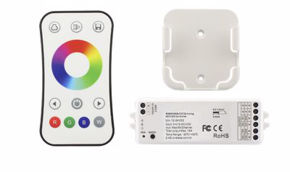
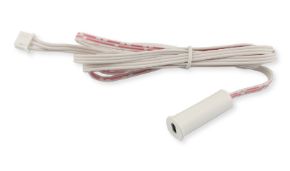
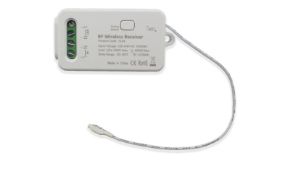
- RF controllers (V series): radio frequency control with remote, without need for WiFi connection. Ideal for simple installations where only light intensity adjustment is desired.
- DMX controllers: professional control protocol used in theatrical, architectural, and large installation contexts. Allows precise control of hundreds of LED channels with programmed sequences.
- WiFi/Zigbee controllers (WT/WZ series): smart systems integrable with major home automation platforms (Amazon Alexa, Google Home, Apple HomeKit). Allow control from smartphone, tablet, or voice assistants.
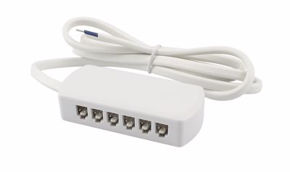
- Wireless synchronization: for installations using multiple neon flex segments, Skydance controllers allow wireless signal synchronization up to 30 meters distance, ensuring visual uniformity and consistency among all sign segments.
How to replace an old neon with an LED neon
Let's now move to the practical part by applying a safe, orderly, and professional procedure. Whether it's a small indoor decorative sign or a large outdoor commercial sign, the basic principles are the same. The procedure we will illustrate is applicable both by professional installers and by users with good basic knowledge of electricity, always in compliance with current safety regulations.
Before starting any work on electrical systems, ensure that power has been completely disconnected and that absence of voltage has been verified with a tester. For installations on fixed systems and commercial signs, it is always advisable to rely on a qualified electrician in accordance with Italian Ministerial Decree 37/2008.
Tools and materials needed
Before starting the replacement, it is important to gather all necessary tools and materials:
| Tool/Material | Notes |
|---|---|
| LED neon flex (appropriate length) | Calculate required length + 10% margin |
| 24V LED power supply | Power = length × W/m × 1.2 |
| NE6-TOOL (neon flex cutter) | For precise cuts without damaging silicone |
| NE6-CUT (6mm milling bit) | For shaping and end preparation |
| IP67 waterproof connectors | For outdoor or humid environments |
| End caps | To seal neon flex ends |
| Mounting clips | One every 25-30cm for optimal support |
| Voltage tester | To verify absence of voltage before working |
| Screwdriver, pliers, wire strippers | Standard electrician tools |
| Insulated gloves | For safety during work |
| WEEE waste container | For proper disposal of old neon |
Phase 1: Safety and removal of the neon sign
Step 1 – Turn off and disconnect power: Before touching any sign component, turn off the system switch and unplug the power cable from the outlet or terminal block. Verify absence of voltage on all conductors with a tester. Neon signs operate at very high voltage (up to 15,000V) and transformer capacitors can retain dangerous residual charge even after shutdown: wait at least 5 minutes before proceeding.
Step 2 – Photograph the original installation: Before disassembling any components, take several photographs of the sign from the outside and, if possible, of the inside of the frame with all wiring visible. These photographs will be valuable in case of doubts during reassembly and to document the original system condition.
Step 3 – Remove the neon tube: Neon tubes are generally fixed to the sign structure through rubber or silicone supports that grip the glass tube. Unscrew or open these supports delicately, holding the tube with both hands and being careful not to excessively flex the glass. Place the tube horizontally in a secure container for subsequent WEEE disposal.
Step 4 – Remove the transformer: The neon sign transformer is usually fixed to the frame with screws. After verifying absence of residual voltage, disconnect cables from the transformer (noting or photographing connections) and remove the transformer from the frame. The transformer must also be disposed of as WEEE.
Phase 2: Preparation and installation of neon flex
Step 5 – Measure and cut the neon flex: measure precisely the total length of the path that the neon flex must follow inside the sign. Cut the neon flex to the required length using the NE6-TOOL cutter: the cut must be made exactly at the cut lines marked on the silicone (every 25mm). An imprecise cut can compromise LED operation at the cut point and make connection difficult.
Step 6 – Prepare the ends: use the 6mm NE6-CUT milling bit to prepare neon flex ends, removing silicone to expose electrical terminals. The removal depth depends on the type of connector used (typically 8-10mm). Verify that terminals are clean, without silicone residue that could prevent electrical contact.
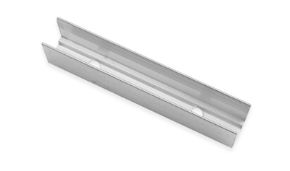
Step 7 – Install the neon flex in the frame: insert the neon flex into the sign frame, fixing it with appropriate clips every 25-30cm. For curves, leverage the flexibility of the silicone: good quality neon flex like those from ledPoint can be bent with a minimum radius of approximately 3-5cm without problems. For tighter curves, use specific models for tight bending.
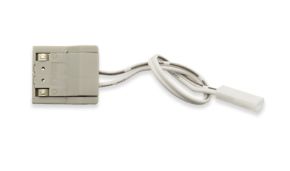
Step 8 – Connect the power supply: install the 24V LED power supply inside the sign frame or in an external junction box, in a position easily accessible for any future maintenance. Connect the DC output of the power supply to the neon flex terminals respecting polarity (red = +24V, black = GND). Connect the AC input of the power supply to the electrical grid through a correctly sized circuit breaker.
Phase 3: Testing and commissioning
Step 9 – Initial low-power test: before sealing and closing the sign, perform a full-power functionality test. Verify that the entire length of neon flex illuminates uniformly, without dark zones, flickering, or obvious brightness differences between the beginning and end of the strip. If irregularities are found, check electrical connections and power supply output voltage with a multimeter.
Step 10 – Sealing and finishing: once correct operation is verified, apply end caps to unconnected neon flex ends, seal cable passages with appropriate cable glands, and close the sign frame. For outdoor installations, verify that all IP seals are intact and correctly applied to ensure water protection.
How to replace a neon lamp with an LED one in a standard ceiling fixture
Replacing neon lamps (T8 or T5 fluorescent tubes) in standard ceiling fixtures is slightly different from replacement in custom signs, but follows the same basic principles. There are essentially three possible approaches:
Direct replacement (Plug and Play)
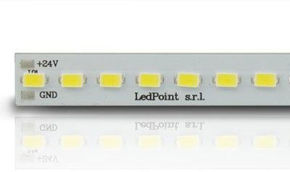
Some T8 LED tubes are designed to be directly compatible with old electromagnetic or electronic ballasts, without need for system modifications. This solution is the fastest and simplest, but is not always available for all ballast types and does not always guarantee maximum energy efficiency.
Replacement with ballast bypass
The most common and most efficient method involves removing the old starter and bypassing the ballast: the LED tube is powered directly from the 230V mains through a dedicated internal circuit. Requires a small modification of the fixture wiring but guarantees maximum energy performance and maximum LED tube lifespan.
Complete fixture replacement
In many cases, especially when the fixture is old or damaged, the most convenient solution is complete replacement of the fixture with a modern LED ceiling fixture. Today's LED ceiling fixtures integrate light source and driver in a single body, are more efficient, lighter, and completely free of service components to replace during the product's life.
Custom neon signs: creating lettering and logos with LEDs
Among the most fascinating and rapidly growing applications of neon flex are certainly custom neon signs: luminous lettering, company logos, decorative quotes, and artistic shapes made with LED neon flex. This product category has experienced extraordinary boom in recent years, driven by the spread of social media and growing demand for original and customizable decorative elements for shops, restaurants, offices, and private homes. In this section we will explain how the process of creating a custom LED neon sign works, what techniques are available, and how one can create one even independently.
How custom neon signs work
The creation of a custom neon sign with LED technology follows a production process that can be carried out in an artisanal or industrial manner, depending on volumes and project complexity.
The artisanal production process involves the following main phases:
- Design and vectorization: the desired logo, lettering, or shape is drawn on computer in vector format (SVG or DXF). In this phase, the drawing lines that will then be followed by the neon flex are defined, optimizing the path to minimize interruptions and cuts.
- Template printing: the full-scale drawing is printed on paper or acetate and used as a guide template for neon flex positioning.
- Backboard fixing: the neon flex is fixed to a support panel — typically transparent acrylic, white PVC, or painted wood — using clips or silicone adhesive, following the template path.
- Curve creation: the drawing curves are replicated by bending the neon flex by hand or using appropriate cable benders. For tight curves, the neon flex is slightly heated with an industrial heat gun to increase flexibility.
- Cutting and connection: the neon flex is cut with the NE6-TOOL and connected at strategic points along the path. For more complex signs, multiple neon flex segments connected in parallel to the power supply may be necessary.
- Power supply installation and wiring: the power supply is installed inside or on the back of the support panel, and cables are organized and fixed.
- Final testing and packaging: the completed sign is tested and then packaged for shipment or delivery to the client.
How to make lettering with LED neon: advanced techniques
Creating professional-quality LED neon lettering requires specific technical skills that distinguish a professional's final result from that of an amateur. Here are the most important techniques to know:
Managing closed letters (O, B, D, P, Q, etc.)
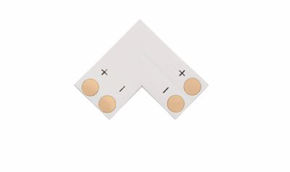
Closed letters require building the closed outline with neon flex without visible interruptions. The professional solution involves cutting the neon flex to the exact perimeter length of the letter, leaving a small 2-3mm gap at the closure point and inserting an invisible connector at that point that also serves as an electrical connection joint. When viewed from the front, the sign appears perfectly continuous.
Managing invisible connections
In a quality sign, all cables and connectors must be completely hidden on the back of the support panel. This is achieved by drilling the panel at strategic points with a drill bit and passing connection cables on the back, where they are neatly fixed with cable ties and conduits.
Uniformity of curvature
Neon flex curves must be uniform and free of sharp bends that could damage the strip or create zones of non-uniform light. The professional technique involves using cardboard or PVC curvature templates with the correct radius to guide the neon flex during fixing.
Custom neon signs: prices and production times
The cost of a custom LED neon sign depends on several factors: size, design complexity, type of neon flex used, backboard material, and quantity produced. Indicatively, the Italian market offers the following price ranges:
| Type of sign | Indicative dimensions | Indicative price | Production times |
|---|---|---|---|
| Simple lettering (name, motto) | 30x15cm | €80-150 | 3-7 working days |
| Logo + lettering | 50x30cm | €200-400 | 7-14 working days |
| Medium commercial sign | 100x50cm | €500-1,000 | 10-21 working days |
| Large commercial sign | 200x80cm+ | €1,500-5,000 | 21-45 working days |
| Complex artistic installation | Custom size | On quote | On quote |
Vintage neon signs
The charm of vintage neon signs is undeniable: these visual icons of the twentieth century have shaped the aesthetics of entire generations and continue to exert extraordinary evocative power. In recent years there has been a true revival of the neon aesthetic, which has contaminated the world of interior design, fashion, photography, and social media, where images of vintage neon signs collect millions of likes and views. But how can this aesthetic be replicated without resorting to the dangerous and expensive technology of gas tubes? The answer lies in LED neon flex, which allow creation of signs with the authentic appearance of classic neon but with the practicality and safety of modern technology.
What is vintage neon style and why is it so popular
Vintage neon signs evoke a precise era (forties, fifties, and sixties) when the streets of American and European cities were illuminated by a profusion of neon lights in every color. These signs were not just commercial communication tools, but true works of art created by hand by glass artisans. The "neonist" was a highly specialized professional figure who blew glass, shaped it with manual skill, and transformed it into luminous letters and shapes.
The vintage neon aesthetic is characterized by some very recognizable visual specificities: warm and saturated colors (red, pink, azure, yellow), soft and fluid letter lines (often in cursive or high-contrast fonts), the slight diffused glow around the light source, and the characteristic intermittent flicker that in old neon was caused by transformer or gas wear. All these elements contribute to creating an atmosphere of nostalgia and urban romance highly appreciated in venues, hotels, restaurants, and homes.
How to reproduce the aesthetic of vintage neon signs with LEDs
Neon flex allow faithful reproduction of the appearance of vintage neon signs through specific technical and stylistic choices:
- color choice: for vintage signs, the most authentic colors are red, warm pink (classic neon effect), bright azure, and warm yellow. Colored neon flex in colored silicone (not just the LED but also the housing) produce a more authentic visual effect compared to models with transparent silicone;
- fonts and design: typography style is fundamental. The fonts most associated with vintage aesthetic are fluid scripts (type "neon script"), uppercase serif characters, and art deco fonts. Avoid modern geometric or overly aseptic sans-serif fonts;
- backboard: for an authentic vintage effect, use backboards in dark wood, black mirror, exposed brick, or oxidized metal. Avoid glossy white plexiglass, which gives a too modern effect;
- low dimming: it is recommended to dim the neon flex to 70-80% of maximum brightness. Slightly dimmed light is more consistent with vintage aesthetic and further reduces consumption;
- flicker effect: some smart controllers allow programming a slight periodic flicker that simulates the behavior of old neon with worn transformers. Used sparingly (so as not to strain the eyes), this effect adds authenticity to the sign.
Decorative neon signs for the home
Neon signs for the home represent one of the strongest decorative trends in recent years. What was once the exclusive domain of commercial establishments has become a beloved and sought-after decorative element for residential spaces: living rooms, bedrooms, kitchens, dens, home offices, and hobby spaces are increasingly enriched with custom LED neon signs that add personality, atmosphere, and a touch of originality to the environment. Let us therefore discover how to integrate LED neon signs into home furnishing, with advice on styles, positioning, and products.
Why home neon signs are so popular
The success of decorative neon signs for the home is explained by several converging factors. First, the spread of social media (Instagram in particular) has made LED neon signs true "Instagram-friendly objects": bright, colorful, and photogenic, they lend themselves perfectly to photography and generate engagement on social media. Secondly, the price of LED neon flex has dropped significantly in recent years, making quality custom signs accessible even to private individuals. Thirdly, the ease of installation (hangs like a picture and plugs into a standard outlet) has lowered the technical threshold for purchase.
Where to position a neon sign at home
Positioning a neon sign inside the home must take into account both aesthetics and ergonomics. Here are the most appreciated contexts:
- living room: above the sofa, on the back wall, or in correspondence with a bookshelf. A sign with a quote, a symbol, or the family name creates a high-impact visual focal point;
- bedroom: as a luminous headboard, on a side wall, or in a niche. The most suitable colors for the bedroom are warm and soft tones: pink, orange, warm white;
- kitchen/bar area: a themed sign (e.g., "Eat", "Bar", a Martini glass) adds character and humor to the most convivial area of the home;
- home office: a motivational quote or your personal business logo transforms the domestic workplace into a space that is both professional and personal;
- children's room: with bright and cheerful colors, animal or character shapes, safe low-voltage LED neon signs are perfect even for children's rooms.
2026 trends for decorative neon signs
The landscape of home neon signs in 2026 is characterized by some dominant stylistic trends worth knowing to make modern and trendy choices; let's see what they are:
| Trend | Characteristics | Colors | Environments |
|---|---|---|---|
| Luminous minimalism | Simple geometric shapes, clean lines | Warm white, gold, silver | Modern living, home office |
| Retro/vintage neon | Cursive fonts, saturated colors, dark backboard | Neon pink, red, azure | Den, home bar, adult bedroom |
| Nature & Botanical | Floral shapes, leaves, stylized animals | Green, pink, white | Living room, bedroom |
| Positivity Quotes | Motivational quotes, keywords | Warm white, pastel | Home office, home gym |
| Dynamic RGB | Variable colors, programmable light effects | Multicolor | Gaming room, home cinema |
How to build DIY LED luminous signs
Creating a DIY luminous sign with LED neon flex is a project that combines creativity, manual skills, and technology, within reach of anyone with minimal familiarity with DIY and domestic electricity. The final result can be a highly effective custom decoration, created at a significantly lower cost than purchasing a finished product. In this section we will provide all the instructions necessary to build a DIY neon sign from scratch, from required materials to processing techniques, to final installation.
Materials needed for DIY sign
- LED neon flex of appropriate section (6x12mm for indoor use, larger section for outdoor)
- Support panel (backboard) in expanded PVC, acrylic, plywood, or MDF
- 24V LED power supply of appropriate power
- NE6-TOOL cutter and NE6-CUT milling bit
- Mounting clips (one every 25cm approximately)
- Screws, wall anchors, and wall hooks
- 2x1mm² two-core electrical cable
- Schuko plug connector (or cable with prefabricated plug)
- On/off switch (optional)
- Multimeter for electrical checks
- Drill, bits, screwdrivers
- Transfer paper or adhesive for printing template
Procedure
Step 1 – Design the drawing: create the sign drawing in a vector program (Inkscape, free and open-source, works great) or simply by hand on paper. The drawing must take into account the flexibility of neon flex: avoid sharp 90° angles, preferring gentle curves. Print the drawing at 1:1 scale on one or more A4 or A3 sheets joined with adhesive tape.
Step 2 – Backboard preparation: cut the support panel to desired dimensions (leave at least 5cm margin around the drawing). Fix the printed template to the backboard with masking tape. Drill the backboard at points where it is necessary to pass cables to the back.
Step 3 – Fixing the neon flex: follow the template path, fixing the neon flex with clips every 25cm approximately. For curves, slowly bend the neon flex by hand, following the drawn path. Never force beyond the minimum bending radius indicated by the manufacturer.
Step 4 – Cutting and connection: once the required length is reached, cut the neon flex with the NE6-TOOL cutter. Prepare the ends with the NE6-CUT milling bit and insert connectors. Pass cables through backboard holes and connect them to the power supply on the back.
Step 5 – Power supply installation: fix the power supply to the back of the backboard with screws or double-sided tape. Connect the DC output to the sign and the AC input to the plug or cable. Verify all connections before proceeding to power on.
Step 6 – Testing and finishing: turn on the sign and verify operation. Adjust any neon flex misalignments, remove the template, and clean the backboard surface. Optionally add a hook or feet for wall mounting.
How to illuminate lettering with neon flex
To achieve maximum luminous effect from neon flex lettering, it is important to also consider the lighting context. Some complementary techniques can significantly increase the visual impact of the sign:
- Halo effect: mount the sign slightly spaced from the wall (2-3cm) with spacers, so that the light emitted by the neon flex projects a diffused halo on the rear surface. This effect is visually very attractive and amplifies the sign's luminous perception.
- Backlit backboard: add a hidden LED strip on the rear perimeter of the backboard to create backlighting that outlines the sign and increases contrast;
- Scenic dimming: connect the power supply to a WiFi or RF dimmer to be able to adjust the sign light intensity according to time of day or desired atmosphere.
How to convert a neon ceiling fixture to LED
Replacing neon ceiling fixtures with LED fixtures is one of the most common retrofit operations in work environments: offices, laboratories, warehouses, parking lots, schools, and hospitals still have millions of fluorescent fixtures that could be updated with great energy and economic advantage. Converting a neon ceiling fixture to LED is a relatively simple operation that can be performed in several ways, depending on the characteristics of the original fixture and the desired result.
Available options for ceiling fixture retrofit
There are substantially three options for converting a neon ceiling fixture to LED:
Option A: replacing the fluorescent tube with a compatible LED tube
The fastest and least invasive solution. LED tubes are available in various compatibility versions: with electromagnetic ballast, with electronic ballast, or with ballast bypass (direct 230V power supply). Before purchasing the LED tube, it is essential to verify the type of ballast present in the fixture to choose the correct compatible tube.
Option B: retrofit with ballast bypass
This option involves modifying the fixture wiring to eliminate the ballast and starter, and connecting the LED tube directly to the 230V mains. The procedure is slightly more complex but guarantees maximum energy efficiency and maximum LED tube lifespan, since it eliminates energy losses in the ballast (which in older magnetic models can reach 15-20% of total consumption).
Option C: complete fixture replacement
Often the most convenient solution in the long term. Modern integrated LED ceiling fixtures (with LED source and built-in drivers) offer efficiencies exceeding 100 lm/W, guaranteed lifespan of 50,000 hours, and constructional simplicity that minimizes the risk of failures. Installation cost is slightly higher than options A and B, but energy savings and reduced maintenance repay the investment in a short time.
Practical procedure for ballast bypass
Ballast bypass in fixtures with neon flex tubes is the most common procedure and the one that guarantees the best energy results. Here's how to proceed:
- Turn off power: deactivate the circuit from the electrical panel and verify absence of voltage with the tester.
- Open the fixture: remove the transparent or frosted panel of the fixture and identify the ballast (box-shaped black or gray component fixed to the fixture body).
- Remove fluorescent tubes and starter: extract the tubes and starter from the appropriate housing.
- Modify wiring: according to the bypass diagram provided by the LED tube manufacturer, connect neutral and phase directly to the tube holders, bypassing the ballast. The ballast can be left in place (disconnected) or physically removed from the fixture.
- Insert the LED tube: mount the LED tube in its seat, ensuring it is correctly inserted in the holders.
- Close and test: close the fixture, restore power, and verify operation.
The ballast bypass procedure structurally modifies the original fixture. If the fixture is still under warranty or subject to certification, bypassing may invalidate it. For fixtures in production environments subject to periodic inspections, consider complete replacement of the fixture with a CE-certified LED product.
How to replace a circular neon with an LED one
Circular neon tubes (also called ring neon or Circline) have been widely used for decades as service lighting sources in domestic and commercial environments. They are easily recognizable by their circular or annular shape and were mainly mounted in ceiling fixtures for bathrooms, corridors, kitchens, and waiting rooms. Replacing these tubes with equivalent LED neon flex is now simple and economical thanks to the availability of specific circular LEDs designed as drop-in replacements for original neon.
Identification of the circular neon to be replaced
Before purchasing the LED replacement, it is necessary to precisely identify the characteristics of the original circular neon. The fundamental parameters to verify are:
- diameter: standard circular neon are available in diameters of 16cm, 20cm, 24cm, 30cm, and 40cm. Measure the outer diameter of the tube with a tape measure or caliper.
- power: indicated in watts, usually 22W, 32W, or 40W for the most common models.
- type of base: circular neon can have different base types (2GX13, G10q, etc.). Verify the base type present on the fixture.
- color temperature: available in warm white (2700-3000K), neutral white (4000K), and cool white (6500K).
Replacement options for circular neon
Replacement options for circular neon are analogous to those for T8 tubes:
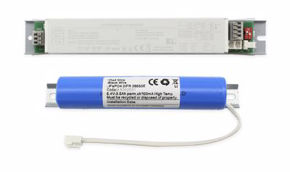
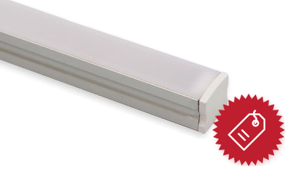
Side view neon flex: designed to directly replace the circular neon tube in the original fixture, compatible with existing ballasts or with direct mains power. They are the fastest solution and require no fixture modifications. The power of equivalent circular LEDs is generally half that of the original neon with the same luminous output.
Round LED panels (LED ceiling fixtures): for a more modern and efficient result, it is possible to replace the entire fixture with an LED disk ceiling fixture (circular LED panel), available in standard diameters and various color temperatures. These modern fixtures are equipped with integrated LED driver, have efficiencies exceeding 100 lm/W, and a lifespan of 50,000 hours.
Transformers for neon signs: what to do when they fail
The transformer for neon signs is the most critical component of the system: it is the most expensive, the bulkiest, and the one with the highest probability of failing during the sign's life. When a transformer fails, one faces a crossroads: repair or replace the original transformer, or take the opportunity to convert the sign to LED. In this section we will analyze the available options and illustrate why, in most cases, LED conversion is the economically and technically most advantageous choice.
How the neon sign transformer works
The transformer for neon signs is an electrical device tasked with stepping up the mains voltage from 230V to the much higher voltages necessary to initiate and maintain discharge in neon tubes (from 2,000V up to 15,000V). Neon transformers are of two main types:
- magnetic transformers (or gap-core): these are the oldest, heaviest, and most robust. They function like a normal power transformer with an iron core and copper windings. They have a natural current-limiting characteristic thanks to the magnetic gap that stabilizes the tube discharge. They are very reliable but heavy and noisy (they produce a characteristic 50Hz hum).
- electronic transformers: more modern, lighter, and silent. They convert mains voltage to high frequency (20-100kHz) before stepping it up, eliminating hum and increasing efficiency. They are more sensitive to overload failures and extreme environmental conditions.
When and why a neon transformer fails
Neon sign transformers generally have a long useful life (10-20 years for magnetic models), but are subject to failures for several reasons:
- Prolonged overload (installations with tube longer than maximum recommended)
- Overheating due to installation in non-ventilated position
- Moisture infiltration in non-sealed models
- Lightning strikes or mains voltage surges
- Natural wear of windings after years of continuous operation
- Breakage or wear of neon tube causing abnormal current spikes
Repair or replace?
When a neon sign transformer fails, the cost of a new transformer (magnetic or electronic) is generally in the order of €60-300 depending on power and type, to which must be added labor cost for replacement. If one considers that a refurbished transformer will likely have a shorter residual useful life than a new one, and that the total cost of LED conversion (neon flex + 24V power supply) is often comparable or only slightly higher, LED conversion becomes in the vast majority of cases the economically most rational choice.
The advantages of LED conversion compared to simple transformer replacement are multiple and significant: elimination of high voltage from the system with increased safety, 60-70% reduction in consumption, increase in system lifespan from 10,000 to 50,000+ hours, possibility of adding dimming and smart control, drastic reduction of future maintenance costs.
Regulations on neon signs and sign tax
Anyone managing or installing commercial neon luminous signs must know the regulatory framework governing this matter in Italy: these are subject to specific building and urban planning regulations, to tax provisions and, in the case of luminous signs, to regulations on light pollution. Understanding this regulatory framework is fundamental to avoid penalties and to exploit any available exemptions or incentives. In this section we will analyze the main regulatory and fiscal aspects concerning luminous signs in Italy.
The sign tax (TOSAP/COSAP/IMU)
In Italy, the display of advertising signs on public land or visible from public thoroughfares is subject to taxation. Fiscal discipline varies depending on the municipality and type of sign:
- TOSAP (Tax for occupation of public spaces and areas): applies to signs that physically occupy public land (e.g., blade signs protruding over the sidewalk). Calculation is based on occupied surface area in m².
- COSAP (Fee for occupation of public spaces and areas): in many municipalities has replaced TOSAP. It applies with the same criteria but through a concessionary rather than tax regime.
- Municipal advertising tax (ICP): applies to signs with surface area exceeding 5m². Signs smaller than 5m² total surface are generally exempt.
How to avoid paying the sign tax
The main exemptions from the sign tax in Italy concern specific categories of signs and specific installation conditions. The most relevant exemptions are:
- business signs within 5m²: signs that advertise the activity carried out in the building where they are installed, with total surface area not exceeding 5m², are generally exempt from advertising tax in municipalities that apply this criterion;
- signs in historic centers subject to restrictions: in some historic areas, signs are subject to special regulations that may provide for favorable tax regimes in exchange for compliance with specific aesthetic and formal criteria;
- signs of non-profit associations: non-profit associations may benefit from specific exemptions for signs that identify the entity's headquarters or activities.
To know with precision the exemptions applicable in one's city, it is necessary to consult the municipal advertising regulations or contact directly the tax office of the competent Municipality. In cities like Rome, Milan, and Ravenna specific regulations may present significant variations compared to the general discipline.
Building regulations and authorizations for signs
Installation of luminous signs, particularly large ones or in areas subject to landscape or monumental restrictions, may require specific municipal authorizations. In general:
- signs up to 1.5m² in non-restricted areas generally do not require building authorization, but may be subject to prior notification to the SUAP (Single Window for Productive Activities);
- signs of larger dimensions generally require an installation permit or landscape authorization if the building is in a restricted zone;
- luminous signs must comply with regional regulations on light pollution, which in some regions (such as Lombardy, Veneto, and Emilia-Romagna) impose limits on sign luminance during nighttime hours.
The use of LED neon signs with automatic nighttime dimming is a particularly effective solution for complying with light pollution regulations, as it allows automatic reduction of sign brightness during scheduled nighttime hours.
Replacing neon signs: the right choice
Replacing neon signs with modern LED neon flex is not only convenient, but is the right choice from an economic, energy, aesthetic, and environmental standpoint. LED technologies available today are mature, reliable, and sufficiently versatile to replicate any visual effect of traditional neon, surpassing it in safety, durability, and efficiency.
When undertaking this transition, the most important element is to orient toward products with documented quality construction, preferring solutions with high-density LED chips, solid silicone housings certified IP65/IP67, and correctly sized power supplies with the recommended 20% safety margin. A technically aware choice (based on technical specifications, manufacturer reputation, and availability of installation accessories) guarantees lasting results and a measurable return on investment within the first 18 months.
Whether it's a small decorative sign for domestic use or a complex commercial installation, in-depth knowledge of the technologies involved is the true added value that allows tackling any replacement project with confidence and competence. This guide aims to be a concrete tool in this journey: a technical reference to consult during the design, sizing, and installation phases, with the awareness that every good replacement always starts with good information.