


Direct lighting with LED strips: a complete guide
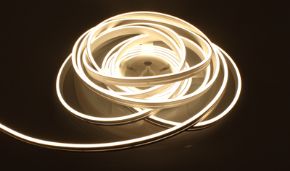
Imagine walking into a room and being immediately enveloped by a direct, precise, powerful, and dramatic light that enhances every detail of the furnishings, guides you along a path, or allows you to work with absolute concentration. This is no longer just a dream for architects or interior designers, but a reality accessible to everyone, thanks to LED strips and, above all, to direct light profiles. If you are looking for the ultimate solution for direct lighting that is also elegant, durable, and professional, you are in the right place. In this hyper-detailed guide, the result of years of experience by Ledpoint.it in the sector, we will dissect every aspect, every technical detail, and every secret to get the most out of direct light. We will show you how to transform a simple light strip into a signature lighting system, answering all your questions with concrete data, comparative tables, and direct links to the products that suit your needs. Get ready to discover a world of possibilities that will revolutionize your way of thinking about light. Before diving into the "how," it is essential to understand the "what" and the "why." Direct light is not just a technical term; it is a lighting philosophy. In this chapter, we will demystify the concept, compare technologies, and demonstrate, with hard numbers, why LED strips represent the absolutely winning, economical, and flexible choice for anyone who desires total control over lighting. Direct lighting occurs when over 90% of the luminous flux emitted by a source is directed straight towards the surface or area to be illuminated, without intermediate reflections off walls or ceilings. Think of a flashlight beam, the light on your kitchen countertop, or the spotlights framing a painting. The result is intense, precise lighting with no waste. The advantages are immediate and tangible: maximum energy efficiency (all light goes where needed), millimeter-perfect control over what you want to highlight, absence of indirect glare, and often superior color rendering because the light is not altered by differently colored reflective surfaces. For an e-commerce like ours, it means that the products we sell, such as high-efficiency LED strips, perform to their maximum potential. Let's make a ruthless comparison. Take a classic 50W halogen downlight, often used for direct lighting on tables or work surfaces. Now compare it to a high-quality 14.4W/m LED strip (like our 24V CRI90 series). The numbers speak clearly and shout an undeniable truth: LED strips are not an alternative; they are an inevitable upgrade. With the same watts, you get a cascade of lumens that traditional sources can't even dream of. And the lifespan? 50,000 hours mean, with average use of 8 hours a day, over 17 years of uninterrupted service. It's an investment that pays for itself in a few months just on electricity bill savings. But the advantages don't end with efficiency. The true revolution of LED strips lies in their form and flexibility. A very thin strip, often just a few millimeters thick, can be installed anywhere: inside slim profiles that disappear from view, along curved paths, in tight spaces where no other spotlight or surface light could ever fit. This, combined with the ability to cut them to size (on the marked points!) and connect them together, makes them the perfect building material for custom lighting. You can literally "draw with light." And when we talk about direct light, the possibility of pairing them with profiles with specific lenses or optics is the icing on the cake: you can decide the beam angle (30°, 60°, 90°), making it a precision tool for the most demanding lighting designer or DIY enthusiast. It's the shift from generic lighting to designed lighting. Choosing the wrong LED strip for a direct lighting application is like putting an economy car engine in a Ferrari: the result will be disappointing and dangerous. In this chapter, we get to the technical heart of the matter. We will provide you with all the information, tables, and selection criteria needed to confidently choose the perfect LED strip for your project, guaranteeing professional results from the start. Don't be fooled by watts. In the LED world, watts mainly indicate consumption, not brightness. The key parameter is luminous flux, measured in Lumens (lm). For effective and impactful direct lighting, you need to aim high. Here is a guide table based on our wide range of products, from classic to top-of-the-line. * Approximate values. Exact values are specified in the product datasheets. Now let's focus on two concepts that make the difference between "acceptable" and "breathtaking" lighting: CRI and Color Temperature. CRI (Color Rendering Index) measures how faithfully light reveals the true colors of objects. A CRI >90 is excellent, but a CRI >95 (like in our premium strips) is what separates the professional from the amateur. In a clothing store, with direct light at CRI95, the red of a shirt will be a vivid, true red, not dull and tending towards orange. Color Temperature, measured in Kelvin (K), defines the "tint" of the light: from 2700K (warm like a halogen bulb) to 6500K (cool and similar to daylight). For atmospheric direct lighting at home, 3000K-4000K (warm neutral) is perfect. For functional direct lighting in a garage or workshop, 4000K-6000K (neutral/cool) is ideal. Internal Ledpoint.it data on B2B sales (architects, electricians, installers) reveal undeniable trends: Over 75% of professional buyers, for direct light projects, choose LED strips with power over 14W/meter and CRI greater than 90. Why? Because they know that light quality is paid for once, but client compliments and the absence of callbacks for malfunctions or wrong colors pay off every day. The remaining 25% is split between low-cost decorative applications and the use of special technologies like COB for top-tier results. The choice is clear: if you want a professional result, you must use professional products. There is no shortcut. Here is the true game-changer, the element that transforms a simple LED strip into a direct lighting system worthy of the name: the profile. Installing an LED strip without a profile is like putting a Formula 1 engine on a wooden chassis: the potential is there, but the final result will be dangerous, unstable, and completely inadequate. In this chapter, we will explore in depth the world of profiles, materials, shapes, accessories, and provide you with decision-making tables to never make a wrong purchase. The profile fulfills at least five fundamental functions that amply justify its cost, which is minimal compared to the added value: 1. Heat dissipation: LEDs last for decades, but only if their junction temperature is kept low. An extruded aluminum profile (like all of ours on Ledpoint.it) acts as a radiator, drawing heat away from the chips and exponentially extending their life. Without a profile, the strip's life can be reduced by up to 70%; 2. Mechanical protection: protects the delicate components of the strip from impacts, dust, moisture, and accidental touch; 3. Optical definition and directionality: this is the crucial point for direct light. Profiles can be equipped with opal diffusers (for soft but diffused light) or, and this is where the magic happens, with primary lenses made of polycarbonate. These lenses, available in angles like 30°, 45°, 60°, concentrate the strip LED's light beam into a precise, sharp cone of light. This is how you achieve professional direct lighting, capable of framing a dining table or a display case without wasting a single lumen; 4. Aesthetic finish: a profile with a diffuser provides a linear, continuous finish integrated into the furniture, eliminating the unsightly "dotty light" effect of exposed strips. 5. Ease of Installation: Many profiles come with clips, tabs, or holes for quick and precise mounting. The choice of material is dictated by application and budget. Let's analyze them scientifically. The conclusion is obvious: for any direct light installation with ambitions of longevity, efficiency, and quality, extruded aluminum is the only rational choice. Plastic is a false economy that is paid for with LED strips that degrade in a year. On Ledpoint.it you find a vast range of aluminum profiles, from the classic angular profile perfect for under-cabinet, to the sophisticated recessed ceiling profile that disappears from view, creating an effect of pure, magical direct light. The shape of the profile determines the type of installation and the final effect. Here is a visual guide (described) to help you navigate: The choice of accessories is crucial: primary lenses (30°, 45°, 60°) are MANDATORY if your goal is a direct, concentrated light beam. The opal diffuser softens the light and eliminates hotspots, but widens the beam. End caps and snap connectors complete the system, ensuring a professional and finished look. On our site, for each profile, we indicate exactly which accessories are compatible. All you have to do is click and add to cart. Now that you've chosen the best components, it's time to put them together. This chapter is your ultimate assembly manual. We will guide you through every single step, from the necessary tools to trade secrets, to transform you from a beginner to an expert installer of your own personal direct lighting. Follow these instructions to the letter and the result will be impeccable. Don't start without having everything at hand. In addition to LED strips, profiles, power supply, and connectors, prepare: - Measuring and Cutting Tools: Laser or tape measure, pencil, fine-tooth hacksaw for metal (to cut the profile), scissors to cut the strip on the marked points. - Fixing Tools: Drill, suitable wall plugs and screws (for walls or wood), self-tapping metal screws (if the profile allows), high-quality double-sided tape (3M VHB) for quick installations on smooth, clean surfaces. - Wiring Tools: Soldering iron and solder wire, wire strippers, screwdrivers. Alternatively, you can use solderless snap connectors, a revolution we recommend to everyone. They are fast, safe, and reversible. - Consumables: Thermal conductive paste (to apply between the strip and the profile to maximize dissipation), isopropyl alcohol to clean surfaces before applying adhesive. Here is the professional workflow, orderly and error-free: Remember: the current powering the LED strips is low voltage (12V or 24V), so it is safe to handle. However, the power supply is connected to the 220V mains: for that part of the installation, if you are not sure, always consult a qualified electrician. Your direct light system is installed and shining. How do you keep it that way for the next 17 years? What to do if something doesn't work? In this final chapter, we address everything that comes after assembly, ensuring you long-term peace of mind and solutions to any possible problem, however rare it may be with quality Ledpoint.it products. LED systems require almost no maintenance, but a minimum of attention can prevent 99% of problems. The golden rule is: Check the temperature. After a few hours of operation, place your hand on the aluminum profile. It should be warm, never hot. If it's hot, you might have a dissipation problem (strip too powerful for that profile, or unventilated environment). Cleaning is simple: turn off the power supply and wipe the diffuser or lens with a soft, slightly damp cloth. Never use aggressive or abrasive chemicals that could cloud the plastic. For dust inside the channel, a can of compressed air is ideal. Here is a quick diagnosis for the most common problems: The good news is that if you have purchased quality products like those in our catalog, the likelihood of encountering these problems is very low. Most failures come from poor-quality power supplies or installation errors. We at Ledpoint.it only provide brand-name power supplies with certified efficiency and all the components needed for a top-notch job. Q: can I connect 15 meters of LED strip in a row to a single power supply? A: Absolutely NOT. LED strips experience voltage drop. Beyond 5 meters for 12V strips and 10 meters for 24V strips, the far end of the strip will appear dimmer. The professional solution is to power the strip from both ends (dual-end feed) or, for very long runs, use multiple power supplies strategically placed along the path. Q: can I use LED strips for direct lighting outdoors? A: Yes, but you must choose specific products: waterproof LED strips with IP65, IP67 or IP68 rating, profiles with silicone diffusers and adequate IP rating, and outdoor-rated power supplies (IP67). On our site, filter products for "IP67" or "Outdoor" to find what you need. Q: which lens angle should I choose for my direct light? A: It depends on the height of the source from the surface to be illuminated and the area you want to cover. - 30°: Very narrow, dramatic beam. Perfect for illuminating specific objects (a painting, a sculpture) from a medium/high height. - 45°: The ideal compromise. Good concentration with wider coverage. Perfect for direct lighting on dining tables or work surfaces from a height of 60-90 cm. - 60°: Wider beam. Suitable when the source is very close to the surface (e.g., under a very high cabinet) or when you want direct but less "spotlight-like" light. Q: how much do you really save with LED direct lighting? A: Let's do a real calculation. Replace 10 50W halogen spotlights (500W total) with 10 meters of 14.4W/m high-efficiency LED strip in a profile with a 45° lens (144W total). On for 5 hours a day, 365 days a year. With an energy cost of 0.25 €/kWh. - Annual cost halogens: (500W * 5h * 365) / 1000 = 912.5 kWh * 0.25 € = €228.13. - Annual cost LED: (144W * 5h * 365) / 1000 = 262.8 kWh * 0.25 € = €65.70. Annual savings: €162.43. In two years, you have more than paid back the initial investment in strips, profiles, and power supplies. And for the next 15 years, it's all profit and perfect light. We have journeyed together through the world of direct light, from the theoretical basics to the rawest technical data, from material selection to millimeter-perfect installation procedures. We hope you now have a clear understanding not only of the "how," but especially the "why" of choosing a direct lighting system based on quality LED strips and profiles. It's not an expense; it's an investment in comfort, aesthetics, savings, and the quality of your daily life or your clients' projects. Don't postpone. Don't settle for approximate solutions. Visit now the complete catalog of LED strips and LED profiles on Ledpoint.it. Use the filters to find exactly the power, color, length, and shape that suits your needs. Do you have specific technical questions about your project? Our technical customer service is available to help you select the perfect products. Click, choose, order. In a few days, you can install your perfect direct light and enjoy what, until yesterday, was just an idea. The time to light up your life the right way is now.Direct light: what it is and why achieve it with LEDs
Technical definition and practical advantages of direct light
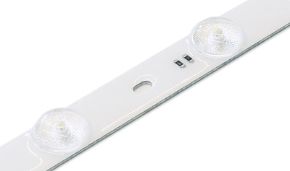
Lighting comparison: direct LED vs. traditional technologies
Parameter 50W Halogen Downlight 14.4W/m LED Strip (3m of strip) LED Advantage Energy Consumption 50W ~43W (for 3m) Immediate 14% Savings Luminous Flux (Lumens) Approx. 900 lm Over 3300 lm (at 3m, 1100 lm/m) Over 3.6 times brighter! Efficiency (lm/W) ~18 lm/W >76 lm/W 322% Higher Efficiency Average Lifetime (hours) 2,000 h >50,000 h 25 times longer lifespan Heat Emitted Very high (burn risk) Low (manageable with profile) Safety and Comfort Directional Control Fixed (depends on reflector) Maximum (with appropriate profile) Absolute Flexibility Why LED strips are the absolute choice for direct light
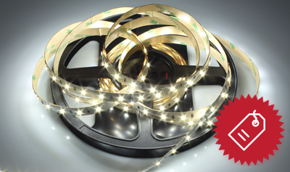
LED strips for direct light: some data...
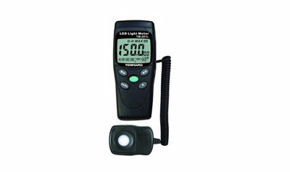
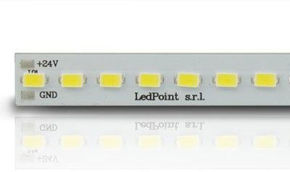
Fundamental selection parameters: power, lumens, CRI and color temperature
LED strip type Power (W/m) Luminous flux (lm/m)* CRI (Color Rendering Index) Ideal direct light application Recommended Ledpoint product Standard Density 7 - 10 W/m 700 - 900 lm/m >80 Decorative direct lighting, under-cabinet kitchen lighting, niches 3528 Standard LED Strip High Density / High Efficiency 14 - 19 W/m 1100 - 1800 lm/m >80 Main direct lighting, work surfaces, offices, retail 2835 High Efficiency LED Strip Premium High CRI 16 - 24 W/m 1200 - 2000 lm/m >95 Museum direct lighting, jewelry/ clothing retail, photographic studios CRI95 Premium LED Strip COB (Chip on Board) 18 - 28 W/m 1800 - 2500+ lm/m >80 Ultra-homogeneous direct lighting, no hotspots, luxury environments COB LED Strip Market statistical analysis: what do professionals choose?
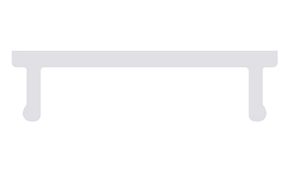
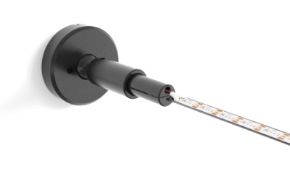
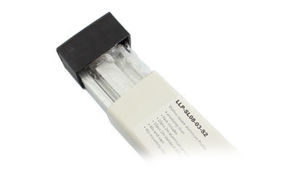
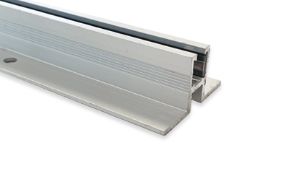
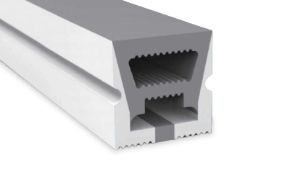
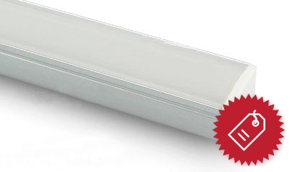
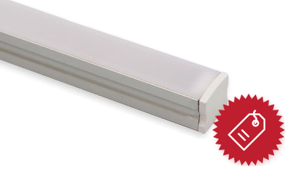
The heart of the system: direct light profiles
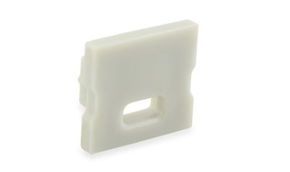
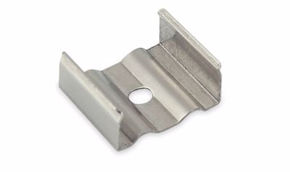
Critical functions of the profile: much more than just a support
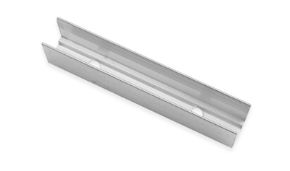
Material comparison: extruded aluminum vs. plastic vs. steel
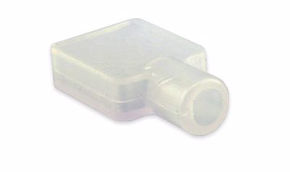
Material Thermal conductivity (W/m·K) Main advantages Disadvantages / Usage scenarios Indicative Cost Extruded Aluminum (anodized or painted) 160 - 220 Optimal Dissipation, extreme robustness, high-end finishes, lightweight, corrosion resistant. Higher cost than plastic. It is the reference material for professional direct light applications. Medium-High Plastic (PVC or PolyCarbonate) 0.2 - 0.5 Very low cost, easy to cut, electrical insulator. NON-EXISTENT Thermal Dissipation. Risk of overheating and premature LED degradation. Suitable only for very low-power strips (<5W/m) and temporary installations. Very Low Stainless Steel 15 - 20 Very high mechanical strength and corrosion resistance, industrial look. Mediocre thermal dissipation, high weight, very high cost. Used in humid or extreme industrial environments where aesthetics are secondary. Very High Guide to choosing the profile: shapes, dimensions, and accessories
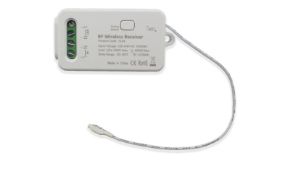
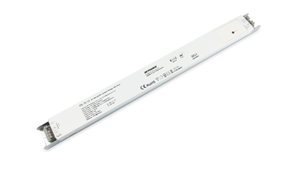
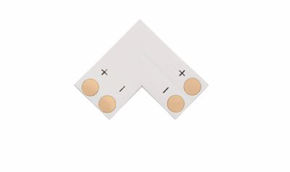
Step by step to professional installation
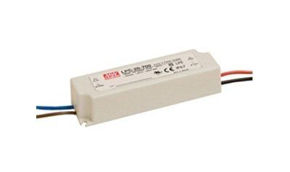
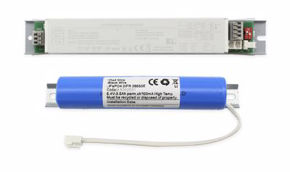
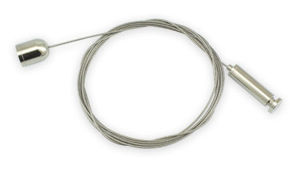
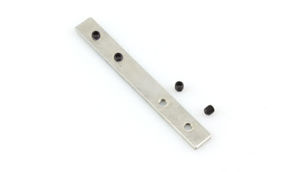
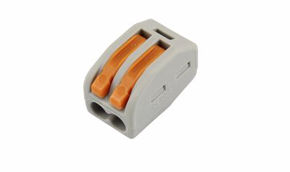
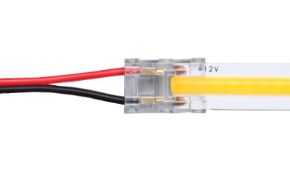
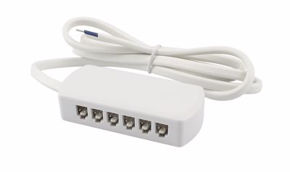
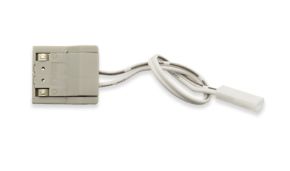
Essential toolkit: what you need before starting
Step-by-step procedure from unboxing to power-on
Beyond installation: maintenance and FAQs
Predictive maintenance and cleaning: the key to longevity
Guided troubleshooting: from symptoms to solution
Frequently asked questions (FAQ)
Direct light: it's time to act and transform your environment!