


Bookcases: how to light them?
Library lighting today represents a fundamental choice in interior design, going far beyond mere functionality. Correctly lighting a library means enhancing not only the volumes it holds but the entire environment, creating evocative atmospheres, highlighting textures and colors, and transforming a simple piece of furniture into an architectural element with great aesthetic impact.
This in-depth technical guide will explore every aspect of library lighting, from the underlying motivations to the latest international trends, down to practical and installation solutions, with a specific focus on innovative strip LED technologies and aluminum profiles available on Ledpoint.it. We will discover why investing in a good lighting project for your libraries is essential, what directions are indicated by the world's leading lighting and furniture trade shows, and how, with the right products and a bit of know-how, it's possible to achieve professional results in an accessible way.
Libraries and lighting: functional, aesthetic, and emotional value
Before delving into the "how" of lighting libraries, it is crucial to fully understand the "why". Dedicated library lighting is not an optional reserved for a few, but an integral component of a well-designed living or working space. The benefits unfold on three main levels: functional, aesthetic, and emotional. In this chapter, we will analyze each of these aspects in detail, exploring the reasons that make library lighting an intelligent and transformational investment for any environment.
Libraries and their functional value: finding, reading, protecting
The primary function of library lighting is, of course, making the books visible. But this simple statement hides important complexities. General, diffused light from the ceiling creates deep shadows on the shelves, especially the inner ones, making it difficult not only to read book titles but even to identify their spines.
Direct, dedicated lighting eliminates this problem, providing uniform light across the entire shelf surface. This has an immediate impact on usability: it reduces the time spent finding a volume, facilitates quick consultation even in the evening hours, and creates a perfect light point for direct reading without eye strain.
Furthermore, from a conservation point of view, LED light with low UV impact and without significant heat emissions (like high-quality LED strips) contributes to preserving papers, inks, and bindings over time, protecting the book collection from fading and deterioration.
Visual ergonomics and comfort
Visual ergonomics is often overlooked in home design. An environment with strong luminance contrasts – like a dark room with a single intense reading lamp – forces the eye into continuous adaptation work, causing fatigue. Library lighting, if integrated with the general ambient light, helps to "lift" the overall light level, reducing these contrasts and creating a more visually comfortable and relaxing environment. This is particularly important in spaces like studies or living areas, where many hours are spent.
Aesthetic value: light sculpture and architecture
Beyond pure function, lighting has immense aesthetic power. Lighted libraries cease to be simple containers and become protagonist furniture elements, true sculptures of light and matter. Light can be used to highlight textures: the grain of paper, the sheen of a cover, the weave of a nearby rug.
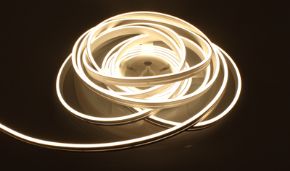
You can play with colors, saturating or muting them, and create chiaroscuro effects that give depth and dynamism to otherwise flat walls. Strip LED lighting, in particular, thanks to its flexibility and ability to be concealed, allows for "magical" effects, as if the light emanated from the library itself. Aluminum profiles with opal or microprismatic diffusers allow for a perfect, continuous light line without hot spots, an effect highly sought after in contemporary high-end design.
Defining space and guiding the gaze
In lighting design, light is a tool to define spaces and guide perception. A lighted library becomes a focal point in the room, naturally attracting the eye and defining the relaxation or work area. In open spaces, it can serve to delimit different zones without the need for physical walls. Light can also be used to enhance specific objects placed on the shelves – sculptures, vases, travel souvenirs – transforming the library into a personal, ever-evolving showcase.
Libraries and emotional value: atmosphere and space identity
Finally, and perhaps more subtly, library lighting has profound emotional value. The warm, enveloping light of a strip LED with a 2700K or 3000K color temperature invites relaxation, concentration, and reflection. It creates an intimate, cozy atmosphere, perfect for an evening of reading or a deep conversation. A library lit behind a desk, with a more neutral light (4000K), can instead foster concentration during work.
The ability to adjust intensity (dimming) and, with RGB or Tunable White LED strips, also the color tone, allows adapting the room's atmosphere to any time of day or mood: intense, cool light for the morning; warm and soft for the evening. In this sense, lighting the library means equipping the space with a dynamic, personalized light identity that responds to and shapes the emotions of those who live in it.
Libraries: latest trends at world trade shows
The world of lighting evolves rapidly, and the main international trade shows in the sector are the most reliable thermometer for catching future directions. Events like Euroluce at the Salone del Mobile in Milan, Light+Building in Frankfurt, and Maison&Objet in Paris set the agenda for global lighting design.
Observing the most recent editions, four macro-trends emerge strongly that are redefining the way interior lighting, and particularly library lighting, is conceived. These trends are not mere aesthetic issues, but concrete responses to needs for well-being, technology, and sustainability, and find in the latest generation strip LEDs and aluminum profiles the perfect vehicle for their realization. Let's analyze them in detail to understand how the future of library lighting is already available today.
Trend 1: invisible minimalism and pure light lines
The dominant trend is the search for essentiality and formal perfection. Bulky luminaires are abandoned in favor of pure, continuous light lines without interruption. The goal is for the light source to disappear, leaving only the lighting effect: a perfect blade of light that seems to materialize from nowhere.
This approach is particularly effective in libraries, where you want to enhance the books, not the device that lights them. Light becomes an integrated architectural element, defining lines, emphasizing volumes, and creating atmospheres without invading the visual space. LED strips are the ideal tool to realize this trend, thanks to their flexibility and the possibility of being cut to measure. The final effect is that of a library that "shines with its own light", with a clean, orderly, and high-design aesthetic.
The role of recessed extruded profiles
The real secret to achieving the "invisible minimalism" effect lies in recessed extruded aluminum profiles. These profiles, available in different shapes and sizes on Ledpoint.it, are designed to be embedded in the library structure itself. They are installed in specially made cuts or channels in the shelves or frames, so that only the edge of the diffuser remains flush with the surface.
Once the LED strip is installed inside and the diffuser (opal or microprismatic) is placed, the light source is completely hidden. The result is a perfect light line, without dark spots or discontinuities, that seems to emanate directly from the wood or wall. This solution has become a standard in high-end installations presented at trade shows, as it combines maximum aesthetic cleanliness with uniform, professional lighting. For libraries, recessed profiles are the prime choice for perfect architectural integration.
Trend 2: human centric lighting (HCL) and well-being
The second great revolution underway is the shift from purely quantitative to qualitative lighting, centered on human well-being. Human Centric Lighting (HCL) is a design philosophy that aims to replicate the natural progression of sunlight inside buildings, with its variations in intensity and color tone (color temperature) throughout the day.
Numerous neuroscientific studies demonstrate that light affects our circadian rhythms, mood, concentration levels, and sleep quality. Applying HCL to libraries means transforming them from simple furniture elements into active tools for our well-being. Imagine a fresh, intense light (around 5000K) in the morning, helping you wake up and concentrate while choosing a book; a neutral light (4000K) during work; and a warm, soft light (2700K) in the evening, preparing the body for rest and creating a relaxing atmosphere for evening reading.
Tunable white LED strips and circadian rhythm
The technology that makes HCL possible is Tunable White LED strips (also called Variable CCT or Dim-to-Warm). These special LED strips integrate two types of LED chips on a single strip: warm white chips and cool white chips. Through a dedicated controller, it is possible to adjust not only the light intensity (dimming) but also the color temperature of the emitted light, ranging across the entire spectrum from warm white (2700K) to cool white (6500K).
By installing a Tunable White LED strip in the libraries and connecting it to a home automation system (smart home), you can program lighting scenes that change automatically during the day, aligning with the natural circadian rhythm. This trend, awarded at Light+Building, represents the highest level of customization and sophistication in library lighting, transforming it into a sensory and health-conscious experience. Tunable White products are available in the Ledpoint.it catalog with different LED densities and control options.
Trend 3: smart integration and voice/app control
Lighting is now an integral part of the smart home ecosystem. The third trend involves perfect integration between LED strips, control systems, and home automation platforms. It's no longer just about turning on and off, but about creating complex scenes, controlling groups of lights in different rooms, synchronizing library lighting with the rest of the environment, and commanding everything by voice or smartphone.
At trade shows, every new lighting product is presented with its smart compatibility. For the end user, this means incredibly convenient, flexible, and personalized lighting management. You can turn on the library light while on the couch with a voice command, turn everything off when you leave the room with a tap on your smartphone, or create a "Cinema" scene that lowers the general lights and activates only a delicate pin-spot lighting effect on objects in the library.
LED strips compatible with HomeKit, Alexa, Google Home
Standardization is a key element. The most cutting-edge manufacturers, including those whose LED strips are distributed by Ledpoint.it, develop products and controllers that communicate natively with the main smart ecosystems. You can therefore find LED strips and controllers compatible with Apple HomeKit (for perfect integration into the iPhone/iPad universe), with Amazon Alexa (for voice control via Echo devices), with Google Home/Assistant and with universal platforms like SmartThings or Home Assistant.
Some use wireless protocols like Wi-Fi, Zigbee, or Bluetooth Mesh, which guarantee stability and fast response times. Choosing smart-ready LED strips for your library means investing in the future, ensuring that your lighting system can evolve and integrate with the technologies you will adopt in the years to come, always guaranteeing maximum ease of control and customization.
Trend 4: maximum efficiency and sustainability
In a context of growing attention to environmental impact and energy costs, the fourth trend is an obsession with efficiency and sustainability. The focus is no longer only on the savings offered by LED technology compared to traditional lamps, but on further maximizing this advantage. The search is for LEDs with extremely high luminous efficacy, expressed in lumens per watt (lm/W). The higher this value, the more light you get for the same energy consumed.
At trade shows, solutions exceeding 200 lm/W are presented, a value unthinkable until a few years ago. In parallel, extreme durability is targeted: LED strips with a declared useful life of 30,000 hours or more, which means over 10 years of normal use. This drastically reduces electronic waste (WEEE) and the need for maintenance. For library lighting that is often installed in hard-to-reach places, long life is a crucial parameter.
Ultra-High efficiency LEDs (lm/W) and long lifespan
State-of-the-art products in this sense use latest-generation LED chips mounted on high-quality circuits (PCBs) with excellent heat dissipation. Heat is the number one enemy of LED life and efficiency. High-end LED strips have a thick substrate made of copper or aluminum that quickly dissipates the generated heat, keeping the LED chips at an optimal operating temperature. This not only extends the strip's life (L70 > 50,000h) but also maintains its high efficiency and prevents luminous flux degradation over time.
Choosing these strips to light your library therefore means obtaining maximum light with minimum consumption, ensuring that the brightness and uniformity of the lighting remain unchanged for decades. On Ledpoint.it, you can select LED strips based on these advanced technical specifications, guaranteeing a conscious choice oriented toward maximum economic and environmental sustainability.
How to light libraries: techniques compared
Once the "why" and industry trends are understood, it's time to delve into the practical "how". Lighting a library is not a single method: there are different techniques, each with specific characteristics, advantages, disadvantages, and ideal applications. The choice of the right technique depends on many factors: the type of library (open, closed with glass, wall-integrated), the desired style (modern, classic, dramatic), budget, and installation skills.
In this chapter, we will analyze in detail the main techniques of library lighting, comparing them to help you identify the perfect solution for your project. Whether you want soft ambient lighting, dramatic accentuation, or perfect functional light for reading, there is a technique and a combination of LED strip and profile products that is right for you.
Top lighting vs. uplighting
One of the first design choices concerns the main direction of the light: should the shelves be lit from top to bottom or from bottom to top? This decision has a huge aesthetic and functional impact.
Top lighting is the most common and natural, as it simulates sunlight or light from a chandelier. It is realized by installing LED strips in the upper part of the library, often inside an angled or recessed profile fixed under the top shelf or on the crown molding. The light travels downward, uniformly illuminating the spines of books on the shelves below. This technique is excellent for functionality, because it minimizes shadows on titles and creates a very practical light distribution. It tends to give a tidy and clean look to the library.
Uplighting, on the other hand, is more dramatic and scenic. LED strips are installed in the lower part of the library, on the floor or on the first low shelf, and project light upward. This technique creates long vertical shadows and enhances the texture of the ceiling or the top of the library. It is particularly effective for libraries that reach the ceiling, creating a majestic and high-impact effect. However, it can be less functional for reading titles on the highest shelves, as the light is grazing and can create glare.
Often, the best solution is a compromise or a combination of the two techniques. For example, you can use top lighting as the main light for consultation, and add very soft (dimmed) uplighting as an atmosphere light for the evening. The use of separate dimmable LED strips allows managing the two effects independently.
Analysis of pros and cons, created visual effects
Let's deepen the comparative analysis:
Top lighting:
PRO: maximum functionality and title legibility. Natural and tidy effect. Easy to install (wiring often comes from above). Minimizes visible dust on the LED strip.
CON: can be a bit "flat" aesthetically if not well designed. Can create a strong contrast between the lit top and the shadowed bottom in very tall libraries.
VISUAL EFFECT: uniform, practical, modern light. Emphasizes the horizontal planes of the shelves.
Uplighting:
PRO: dramatic, scenic, and high-impact effect. Increases the perception of room height. Great for creating an intimate, cozy atmosphere.
CON: less functional for reading titles. The LED strip at floor level is more subject to dust and bumps. Can highlight dust on low shelves. More complex electrical installation (cables to bring to the ground).
VISUAL EFFECT: grazing light, creates long shadow plays. Emphasizes verticality and vertical textures.
The choice is often based on the library style and primary use. For a library in a study, top lighting is almost mandatory. For a library in a formal living room, uplighting can be the winning artistic choice.
Frontal (undershelf) lighting vs. internal (recessed) lighting
Another fundamental dichotomy concerns the position of the light source relative to the shelf plane.
Frontal or undershelf lighting involves the LED strip being installed on the underside of a shelf and projecting light downward, illuminating the shelf immediately below. It's a very common technique in kitchens but applies perfectly to libraries. The source is often visible (or slightly hidden in an angled profile) when standing in front of the library. It is an extremely practical and effective solution, because it fully lights the books on the shelf in question. However, if the strip is not well shielded, it can cause direct glare when sitting or standing in front of the library.
Internal or recessed lighting represents the maximum of integration and refinement. In this technique, the LED strip is installed within the library structure itself, in a specially milled channel. Typically, a thin groove (e.g., 10x10mm) is milled on the front lower edge of each shelf. The strip is laid in this groove and covered with an opal or polycarbonate diffuser. The result is that, looking at the library frontally, no light source is seen: only a perfect, continuous light line that seems to emanate from the wood itself. This technique completely eliminates the glare problem and offers a minimalist, high-design aesthetic. It is the preferred technique for luxury projects and for those wanting a "custom," perfectly integrated result.
How to choose based on library type (open/closed)
The choice between these two techniques depends heavily on the type of library you are dealing with.
For open libraries (without doors): both techniques are feasible. Undershelf lighting with angled profiles is simpler to install, even as a retrofit. Recessed lighting requires carpentry work or preparation during the library's construction phase but offers a superior aesthetic result. For existing libraries, you can opt for angled profiles with a diffuser which, while not fully recessed, offer good glare protection.
For closed libraries (with glass doors): in this case, the goal is often to illuminate the inside of the display case. The best technique is almost always recessed lighting installed in the upper internal part of the compartment, so that the light floods the books from above without the source being visible through the glass. Attention must be paid to reflections on the glass: position the strip as high and as close to the back wall as possible to minimize them. The use of LED strips with a narrow emission angle (e.g., 30°) can help direct light mainly toward the books and not toward the front glass. For very large doors, lateral lighting integrated into the uprights can also be considered.
Accent lighting for objects and niches
Beyond general shelf lighting, a very powerful technique is accent lighting. This does not serve to uniformly light books, but to selectively highlight specific objects placed on the library: a sculpture, a precious vase, a photo frame, or a mineral collection. The goal is to create focal points, attract attention, and add visual depth to the composition.
Accent lighting plays with contrast, creating small "islands" of light in a sea of half-light. This technique is widely used in visual merchandising and museum display, and can be applied with great effect in the home, transforming your library into a personal art gallery.
Use of high-density LED strips and narrow optics
To achieve effective accentuation, a normal LED strip is not enough; specific products are needed.
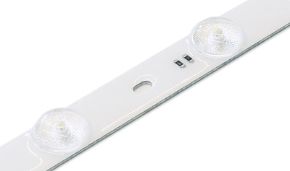
- High LED density: To have an intense and defined light beam, a high concentration of light points is needed. LED strips with 120, 144, or even 240 LEDs per meter are used. This ensures the beam is full and without "gaps" of light.
- Secondary optics (lenses): The most important element is the lenses. Normal LED strips have a wide emission angle (120°-140°). For accent lighting, narrow angles are needed (30°, 15°, 10°, or even 5°). These lenses, mounted on each LED chip, concentrate the luminous flux into a very narrow cone, creating a precise and dramatic "pool of light" on the object. On Ledpoint.it, you can find LED strips with pre-applied narrow lenses, or lenses separately to apply to standard strips.
- Strategic positioning: Accent is achieved by placing the strip with narrow lenses above or in front of the object to be highlighted, at a calculated distance to achieve the desired beam size. Small extruded profiles or magnetic supports are often used to precisely position LED strips in specific points of the library, not necessarily along the entire shelf.
Combining general shelf lighting (with diffused light strips) with strategic accent points (with narrow-beam strips) creates a dynamic, professional, and highly characterful lighting composition that radically transforms the perception of your library.
Technical product guide: LED strips and profiles for libraries
With a clear understanding of the available techniques, we can now immerse ourselves in the technological heart of the project: choosing the right products. On Ledpoint.it you will find a vast range of LED strips, aluminum profiles, power supplies, and controllers. Knowing how to navigate these options and select the optimal combinations for various libraries is the key to a professional, lasting, and satisfying result.
This chapter is a detailed technical guide to the decisive parameters, construction characteristics, and matching logic. It's not just about choosing a product, but about designing an integrated system where each component (strip, profile, power supply, control) works in perfect synergy with the others. Following these guidelines, you can make informed and technically sound choices.
Choosing the LED strip: decisive parameters
The LED strip is the soul of the system. Its characteristics determine the quantity, quality, and color of the light you will actually see on your library. Here are the parameters to evaluate carefully, explained in detail.
Color temperature (CCT): 2700K, 3000K, 4000K
The Correlated Color Temperature (CCT), measured in Kelvin (K), defines the tone of "white" light. It is the most perceptually evident parameter.
• 2700K (warm white, very warm): similar to the light of a traditional incandescent bulb or a fireplace fire. It is a yellow-amber, extremely warm, welcoming, and relaxing light. Perfect for living rooms, bedrooms, and libraries in environments where you want to create an intimate, traditional, or "vintage" atmosphere. Makes warm colors (reds, oranges, woods) particularly enveloping.
• 3000K (warm white): is the current standard for quality residential interiors. It is a warm white but more neutral than 2700K, less yellowish. Offers an excellent compromise between visual comfort and color accuracy. It is the recommended choice for most libraries in living and study environments, as it is welcoming but does not tire the eyes during prolonged reading. Works well with almost all materials and colors.
• 4000K (neutral white): similar to midday sunlight or "daylight" fluorescent lamps. It is a cooler, more energetic, and clinical light. Promotes concentration and alertness. It is ideal for libraries in offices, professional studies, or areas of the home dedicated to work and technical reading. In residential environments, it can feel a bit cold and unwelcoming if used as the main light in the evening. It is often paired with warmer lights in the surrounding environment.
Advice: for libraries, the 2700K-3000K range is the most popular. If you opt for Tunable White technologies, you have the freedom to range across all these values at will.
Color rendering index (CRI and Ra): why CRI>90 is essential for books
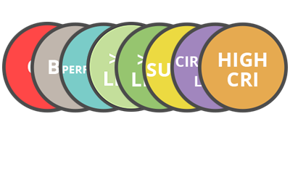
The Color Rendering Index (CRI or Ra) is a number from 0 to 100 that measures how faithfully a light source reveals the real colors of objects compared to an ideal reference source (like sunlight). A CRI of 100 means perfect reproduction.
For library lighting, a CRI ≥ 90 is absolutely recommended, and a CRI ≥ 95 (or high R9) is ideal. Why?
Books are objects rich in color: covers have vibrant hues, prints are detailed, photos have complex shades.
An LED strip with low CRI (e.g., 80) will "flatten" these colors, making them dull, less saturated, and unnatural. Differences between similar tones will be less perceptible. Under low-CRI light, a red book will appear less red, an image will lose depth.
High CRI (>90) LED strips use superior quality phosphors that emit a more complete light spectrum, rich in all wavelengths, especially in red (R9 parameter).
This makes the colors of books, wood, and decorative objects "come to life", resulting vibrant, natural, and pleasant to the eye. It's a clearly visible and perceptible difference, which fully justifies the small extra cost. On Ledpoint.it, high-end LED strips have CRI 95+ specifications.
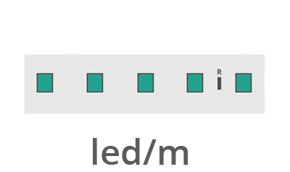
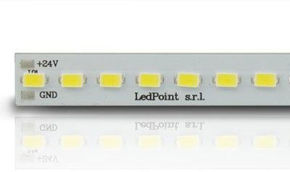
LED density and lumens: amount of light per linear meter
These two correlated parameters determine how bright your installation will be.
• LED density: indicates how many LED chips are mounted on one linear meter of strip. Common densities are 30, 60, 120, 144, 240 LEDs/m. The more LEDs there are, the more uniform the light line will be, without "dark spots" between chips. For libraries, where uniform lighting is aimed for, 60 LEDs/m is the minimum recommended, while 120 LEDs/m is the optimal choice for a very full and continuous effect. Higher densities (240 LEDs/m) are for special applications or where extreme brightness is required.
• Luminous flux (lumens): measures the total amount of light emitted. Expressed in lumens per meter (lm/m). It depends on LED density, but especially on the efficiency of the individual chips. A high-quality 120 LEDs/m LED strip can deliver from 1200 to over 2000 lm/m. For a library, a good rule is to aim for products that provide at least 800-1000 lm/m. This ensures sufficient light even for deep libraries or books with dark spines. A precise calculation requires considering the total length to be lit and the desired illuminance (lux) on the book surface.
PCB type: rigid, flexible, high flexibility
The PCB (Printed Circuit Board) is the support on which the LED chips and electronic components are soldered.
• Standard flexible PCB: the most common type. It is a tape of flexible material (generally fiberglass or similar) that bends easily on two axes (like rolling a tape) but has some torsional rigidity. Perfect for most library installations, where paths are generally straight or with wide curves. It is cut at the marked points (usually every 3-5 cm).
• High flexibility PCB: made with special materials (like polycarbonate) that make it extremely soft and flexible. It can be bent, twisted, and adapted to very tight curves or irregular surfaces. Ideal for libraries with organic shapes, curves, or installations on non-flat surfaces. They cost slightly more.
• Rigid PCB (LED bars): these are rigid segments of a certain length (e.g., 10cm, 30cm). They do not bend. They offer greater heat dissipation and a more structured appearance. They are less used for libraries, unless you want a very geometric and "technical" effect, perhaps paired with suspended profiles.
Protection class (IP): IP20 for interiors, IP65/67 for humid environments
The IP (Ingress Protection) rating indicates the LED strip's resistance to dust and liquids.
• IP20: for dry interiors. The standard and most economical choice for lighting libraries in living rooms, studies, bedrooms. Offers no protection against water. Must be installed inside aluminum profiles (which provide mechanical protection and improve dissipation) or in areas absolutely not subject to splashes or humidity.
• IP65/IP67: waterproof/immersible resistant. The strip is coated with a thick layer of transparent silicone or epoxy resin. Protects it from dust and water jets. For libraries, it is needed only in particular environments, such as a library in a very large bathroom (water vapor), in a kitchen very close to the sink (splashes), or in a non-climate-controlled cellar/garage where condensation may form. Aesthetically, the resin tends to yellow slightly over time and the strip appears "chunkier". For the vast majority of applications in dry interiors, IP20 + aluminum profile is the best, high-performance, and durable combination.
Aluminum profiles: aesthetics, dissipation, and diffusion
The aluminum profile is not just a "frame" for the LED strip. It is a crucial technical component that performs three essential functions:
1) heat dissipation (prolongs LED life);
2) mechanical protection of the strip;
3) optical control and light quality (thanks to the diffuser). Choosing the right profile is fundamental for the final result and installation durability.
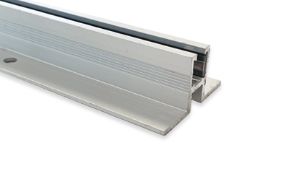
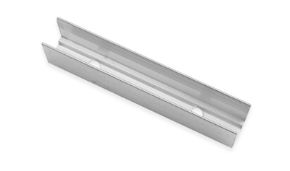
Angled profiles for undershelf lighting
Angled profiles, typically at 45° or 90°, are designed to be easily mounted under a shelf, a wall cabinet, or the crown molding of a library. They have a flat side for fixing (with screws or double-sided tape) and an inclined or curved side that houses the LED strip and diffuser.
They are the simplest and fastest retrofit solution for adding lighting to an existing library. The diffuser (usually opal) distributes light uniformly and eliminates the annoying "dotty" effect of individual LEDs, creating a continuous, soft light line. The extruded aluminum effectively dissipates heat, allowing the strip to operate at full power without overheating. On Ledpoint.it you find angled profiles of various sizes, suitable for single or double LED strips.
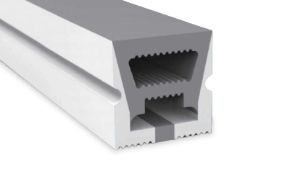
Recessed profiles for embedding in wood/wall
These profiles represent the top of the range for luxury and minimalist installations. They are designed to be completely embedded in a groove milled into a wooden shelf, in a drywall (plasterboard) wall, or in a metal structure. Once the profile is installed, the LED strip laid, and closed with the diffuser (which can be flush or slightly recessed), the effect is that of an invisible light source: only the light line coming from the groove is seen.
They require careful planning and carpentry/woodworking, but the aesthetic result is unparalleled: clean, integrated, professional. There are recessed profiles for floor, ceiling, or vertical installation, but for libraries the most used models are those for horizontal embedding in shelves (e.g., "V" or "U" type embed profiles).
Suspended and Plug&Play profiles
For a more industrial, modern look or for non-wall-mounted libraries, there are suspended profiles. These profiles are designed to be hung from the ceiling with cables or supports, and contain the LED strip inside. They can be used to light an island library from above or to create suspended luminous elements over reading areas.
Plug&Play profiles, on the other hand, are complete pre-assembled or easy-to-assemble solutions, often already equipped with connectors, which greatly simplify installation for the non-expert end user. They are a good middle ground between advanced DIY and professional solutions.
Diffusers: transparent, opal, microprismatic - Effects compared
The diffuser is the final "lens" of the profile. Its choice determines the quality of the light that comes out.
• Transparent/clear: lets light pass through almost without diffusion. Individual LED points will be clearly visible. Very technical and "hard" effect. For libraries, it is not recommended because it creates discontinuous lighting and can cause glare.
• Opal (opal/milky white): the most common and versatile. Diffuses light uniformly, completely hiding the LED points and creating a soft, continuous light line free from flicker. Reduces glare. It is the ideal choice for general library lighting. Offers the best compromise between luminous efficiency (minimal losses) and light quality.
• Microprismatic: has an internally structured surface with micro-prisms. Offers an even wider and more uniform diffusion than opal, almost perfect. It is often used in high-end commercial applications where absolute absence of hot spots and impeccable light distribution are required. May have slightly higher light losses than opal, but light quality is excellent. Recommended for projects where the perfection of the lighting effect is the absolute priority.
Power supplies, dimmers, and controllers: the heart of the system
An LED strip cannot work by connecting it directly to the 230V mains. It needs electronic components that convert, regulate, and control the power supply. Choosing the right components is fundamental for the safety, stability, and functionality of the system.
How to correctly size the power supply (wattage)
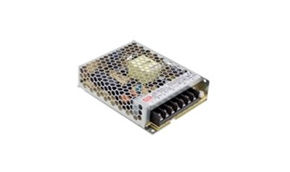
The power supply (or LED driver) is the most critical component. It must provide the correct voltage (usually 12V or 24V DC) and sufficient current to your installation. The power supply's power (Watt) must be at least 20% higher than the total consumption of the connected LED strips. You can find instructions on how to choose the correct power supply and calculate its power in the article Power Supply: How to Choose It
Choosing the dimmer
To adjust light intensity (dimming), compatible components are needed and you can choose between:
• Dimming on the power supply (TRIAC/Leading Edge): The power supply itself has an input for a traditional wall dimmer (for incandescent). It's a simple system but not very precise with LEDs and can cause buzzing at low levels.
• 0-10V/PWM dimming: professional analog system. A wall dimmer sends a 0-10V signal to the power supply (or a separate controller), which adjusts the strip's brightness. Very stable and precise.
• DALI dimming: professional digital protocol for commercial lighting. Allows very advanced control, addressing of individual light groups, and integration with BMS (Building Management Systems). For complex residential projects.
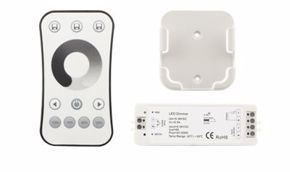
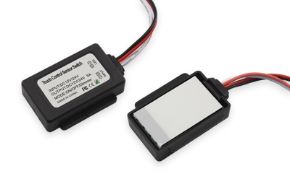
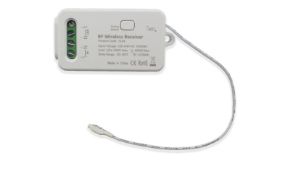
• RF (radio frequency) wireless dimming: the most common system for smart DIY. An RF dimmer module is connected between the power supply and the LED strip. Controlled with an RF remote or, if the module is "smart", via app/Wi-Fi. Offers maximum installation flexibility (no control cables to run). Quality RF dimmers on Ledpoint.it guarantee smooth, flicker-free adjustment.
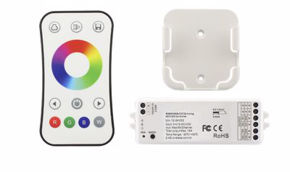
RGB, RGBW, and tunable white controllers: scenes and programming
For color-variable LED strips (RGB, RGBW, RGBWW, Tunable White), a controller is needed.
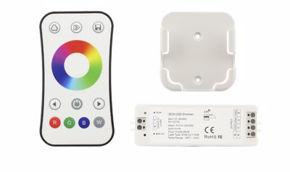
• Basic RGB controller: controls RGB strips (Red, Green, Blue). Allows choosing any rainbow color and dynamic effects (fading, flash, etc.). For color play on libraries in party environments or for very creative accents.
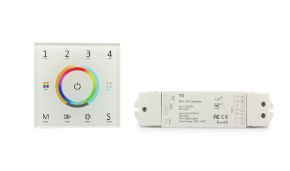
• RGBW and RGBWW controllers: in addition to RGB channels, they control a dedicated white channel (W for cool white, WW for warm white). This allows obtaining purer, more natural whites compared to the RGB mix, fundamental for the functional lighting of a library. You can switch from a vibrant color to a perfect white light for reading.
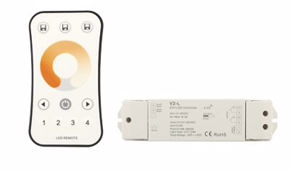
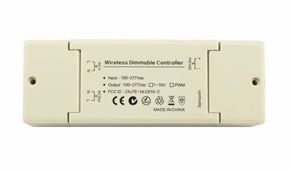
• Tunable white controller (Variable CCT): specific for Tunable White LED strips. Controls the warm white (Warm) and cool white (Cool) channels independently, allowing precise adjustment of color temperature from 2700K to 6500K. Often includes time programming functions to simulate the daylight progression (Human Centric Lighting). It is the most sophisticated controller for library lighting oriented toward well-being.
Modern controllers are often combined with RF dimmers and Wi-Fi/Zigbee connectivity, becoming a single device that manages on/off, intensity, color, and smart integration. The choice on Ledpoint.it is vast and suitable for every need and budget.
Library project and step-by-step installation
Now that we have explored theory, trends, and products, it's time to get hands-on. This chapter is a practical step-by-step guide that will take you from the ideation phase to the final testing of your library lighting system. Following an orderly method is essential to avoid costly mistakes, ensure electrical safety, and achieve the desired result. Whether you are a DIY enthusiast or simply supervising a job, understanding these phases will give you complete control over the project.
Phase 1: measurement and layout planning
The design phase is the most important. Take the necessary time.
1. Library map: draw a sketch of your library with all measurements: height, width, depth, shelf thickness, distance between shelves.
2. Goal definition: decide what you want to light. All shelves? Only some? Do you also want accents on objects? Do you want light from above, below, or both?
3. Choice of installation points: mark on the drawing where the LED strips will go. Remember: for top lighting, the strip should be placed on the front underside of each shelf (or on the crown molding). For recessed lighting, mark where the groove will be milled.
4. Cable path: think about how to get power and control cables to each strip. Where to hide them? Where is the nearest power outlet? Where is the best location for the power supply (preferably hidden but ventilated)? Also plan the path of cables between strips if they are in series.
5. Materials list: from this plan, create a detailed list: how many meters of LED strip, how many profiles and of what type, how many meters of cable, connectors, the power supply of adequate power, the controller/dimmer, screws, double-sided tape, etc. Use the calculations illustrated in the previous chapter.
Phase 2: calculating lighting needs and product choice
Starting from the layout, make conscious product choices.
1. Total lumen calculation: estimate the needed light. For ambient lighting, 100-150 lux on the book surface may be enough. For reading/consultation lighting, 200-300 lux are needed. The simplified formula: Desired Lux x Surface area to illuminate (m²) = Required Lumens. Divide total lumens by linear meters of strip to find the required lm/m.
2. LED strip choice: based on calculations, choose the strip: CCT (e.g., 3000K), CRI (>90), density (e.g., 120 LEDs/m), power (e.g., 14.4 W/m, 1500 lm/m). Decide if IP20 or IP65 is needed.
3. Profile choice: based on the chosen technique (angled, recessed), select the suitable model. Consider the LED strip width to ensure it fits in the profile. Choose the diffuser (preferably Opal).
4. Power supply and controller sizing: as explained before, calculate the total wattage of the strips and add 20%. Choose a power supply with higher power. Choose the controller/dimmer based on the functions you desire (dim only, color, tunable white, smart).
Purchase all material before starting work.
Phase 3: surface preparation and profile mounting
Let's move to the operational part.
1. Surface preparation: thoroughly clean the surfaces where profiles will be fixed (under shelves, inside grooves). Remove grease, dust, and residues to guarantee perfect adhesion of the double-sided tape or profile adhesive.
2. Possible milling: if you are installing recessed profiles, this is the most delicate phase. Use a router with a guide to create a straight groove of the exact size of the profile. Measure and mark precisely. Do tests on a scrap piece.
3. Cutting and mounting profiles: cut aluminum profiles to the desired length using a hand saw with a metal blade or a circular saw. File off burrs. Fix the profiles in their positions. For fixing under shelves, high-tack double-sided tape (often supplied) is great, but for added security add a few small self-tapping screws. For recessed profiles, you can use silicone or hot glue to fix them firmly in the groove.
4. Power and control cabling: run the power cables (230V) from the outlet to the point where the power supply will be hidden. Run the low-voltage cables (12/24V) from the power supply point to near the first strip, hiding them in the wall, baseboards, or external conduits.
Phase 4: LED strip installation, connections, and soldering
The heart of the installation.
1. Cutting LED strips: cut the strips ONLY at the marked points (usually a line with scissors symbol). Cutting elsewhere would damage the circuits.
2. Placement in guides: peel off the protective film from the back double-sided tape of the LED strip and carefully position it inside the aluminum profile, making sure the LEDs are oriented in the correct direction (toward the diffuser). Press firmly along the entire length.
3. Electrical connections: this is a crucial technical point.
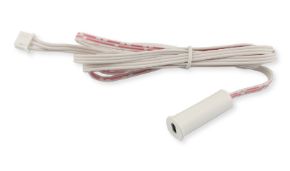
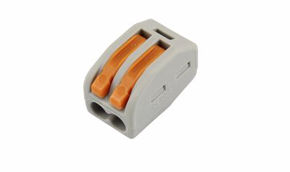
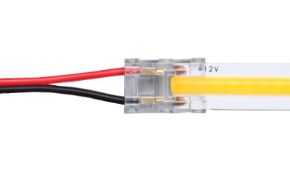
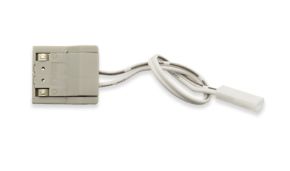
- Clip connectors: the simplest and fastest method for those who don't know how to solder. There are solderless connectors specific for the type of LED strip (e.g., 10mm, with 4 pins for RGBW). Insert the strip end into the connector and close the lever. Verify that the metal pins make good contact with the strip pads.
- Soldering: the most professional and reliable method over time. Use a fine-tip soldering iron (max 60W), electronics-grade solder, and a fume extractor. Lightly tin the contact pads on the strip. Then solder the cables (preferably silicone, flexible) of adequate gauge (e.g., 0.75mm²) to the pads. Use heat-shrink tubing to insulate each connection. This is an operation that requires practice.
4. Series/parallel connection: LED strips have a maximum series length (usually 5m for 12V, 10m for 24V) beyond which voltage drop makes the last part much dimmer. For greater lengths, make parallel connections: bring separate power cables from the power supply to each 5m (or 10m) segment.
5. Connection to Power Supply and Controller: Connect the output of the LED strip (or first segment) to the controller/dimmer. Connect the controller output to the low-voltage side of the power supply. Finally, connect the power supply to the 230V mains.
Phase 5: testing and control system configuration
Before closing everything, test!
1. Pre-diffuser electrical test: do not mount the diffusers on the profiles before testing. Turn on the power supply. Check that all sections of LED strip light up and are of the expected brightness and color (if RGB). Verify there are no points overheating abnormally.
2. Diffusion check: now temporarily place the diffusers on the profiles (without locking them definitively) and turn on again. Verify that the light line is uniform, without dark spots or stains, and that the diffuser does not show hot spots or visibility of individual LEDs. If necessary, adjust the strip position inside the profile.
3. Smart/controller configuration: if you have a smart system, follow instructions to pair the controller with your Wi-Fi network and app (e.g., Ledpoint Smart, Tuya, etc.). Create rooms, assign lights, program scenes (e.g., "Reading", "Atmosphere", "Party" for RGB). Set any automations (e.g., turn on at sunset).
4. Dimming and color test: test all functions: intensity variations, color changes (for RGB/Tunable White). Verify that adjustment is smooth and without flickering at any level.
5. Final locking and cleaning: once sure everything works perfectly, fix the diffusers definitively on the profiles (with the closing clip or silicone strip). Clean the diffusers of fingerprints. Hide and secure remaining cables.
Mistakes to avoid: advice from installers
Here are the most common mistakes that compromise an installation, gathered from the experience of professional installers:
1. Undersizing the power supply: the number one cause of premature failures and poor performance. Don't skimp on this component.
2. Exceeding maximum series length: connecting 8 meters of 12V LED strip in series? The last 3 meters will be much dimmer. Use parallel connections or switch to 24V LED strips (which support double the length).
3. Not using aluminum profiles: installing IP20 LED strips "bare" under a wooden shelf. Wood does not dissipate heat, LEDs overheat, rapidly lose brightness, and die prematurely. Always, always use an aluminum profile.
4. Poor connections: electrical tape that dries and comes off, low-quality clip connectors that oxidize, cold solder joints. They are the main cause of intermittent malfunctions ("sometimes it works, sometimes not"). Invest in good connectors or learn to solder well.
5. Incorrect placement relative to diffuser: if the LED strip is not perfectly centered in the profile or is too far from the diffuser, shadows or irregular light lines will be created. Pay attention during placement.
6. Neglecting glare control: installing an LED strip without a diffuser or at a wrong angle that directly hits the eyes of people sitting in the living room. Always think about people's posture in the environment.
Avoiding these traps, your installation will be robust, safe, and durable.
Case studies: solutions for various libraries
Theory is fundamental, but nothing is more clarifying than concrete examples. In this chapter, we will explore five distinct case studies, each representative of a common library type and specific needs. For each case, we will describe the context, client objectives, technical choices made (product, technique, control), and final result. These examples will help you visualize how the learned concepts apply in reality and find inspiration for your personal project.
Classic solid wood library
Context: large cherry wood solid wood library in a classic style, in a living room with traditional furnishings. The client wants to enhance the beauty of the wood and antique books, without distorting the aesthetics. Desires a warm, enveloping light, perfect for evening reading.
Technical solution:
• Technique: recessed top lighting. Milling of a thin groove (8x8mm) on the front lower edge of each shelf.
• LED strip: 24V LED, 120 LEDs/m, CRI 95, 2700K (very warm white), 1500 lm/m, IP20.
• Profile/diffuser: recessed profile for 8mm wood embed, with flush opal diffuser. Profile color is bronze anodized to blend with cherry.
• Control: 24V/200W power supply hidden behind the library. Wireless RF dimmer with classic-style wall switch (brass), adjusting intensity.
Result: by day, the library appears completely intact. At night, a warm, uniform golden light line defines each shelf, making the spines of antique books and wood grain shine. No source is visible, only the effect. The atmosphere is intimate, refined, and traditional.
Wall-integrated recessed library / bookcases
Context: entire wall of a study room transformed into a wall-integrated library, made of plasterboard and matte white lacquered MDF panels. The client is an avid reader using the space for work and study. Requires functional, uniform, modern, and low-maintenance lighting.
Technical solution:
• Technique: frontal undershelf lighting, for installation simplicity and maximum functional performance.
• LED strip: 24V LED, 120 LEDs/m, CRI 90, 4000K (neutral white), 1600 lm/m, IP20. The neutral temperature promotes concentration.
• Profile/diffuser: white aluminum angled profiles, fixed under each shelf with screws. Opal diffuser for diffused, anti-glare light.
• Control: centralized 24V/320W power supply. Tunable White controller (variable CCT 2700K-6500K) integrated with the home's KNX domotic system. User can choose preset scenes ("Study": 4000K at 100%; "Relax": 3000K at 40%).
Result: powerful, sharp, uniform light that floods each shelf, making every title easily readable even from a distance. Neutral light during the day reduces eye strain during prolonged reading. The possibility to switch to warmer light in the evening makes the space versatile. The aesthetic is clean and modern, with the profile lines integrating into the library design.
Modern metal and glass libraries
Context: design column library, with matte black metal structure and transparent tempered glass shelves. The environment is an industrial loft. The goal is to accentuate the library's sculptural design, create light plays and reflections on the glass, and transform it into a luminous object in itself.
Technical solution:
• Technique: uplighting and accent lighting on objects. A main strip is placed at the base of the column, inside a profile with a slit oriented upward. Small strips with narrow lenses are strategically placed to illuminate objects on glass shelves.
• LED strip: main: 24V LED, 60 LEDs/m, RGBW (for creative flexibility), IP20. Accents: 12V LED, 144 LEDs/m with 15° lenses, 3000K warm white, CRI>90.
• Profile/diffuser: at the base, recessed floor profile with protective glass. For accents, small rectangular self-adhesive profiles hidden under glass shelf edges.
• Control: RGBW + WiFi dimmer controller. Integrated with Google Home. User can change the base light color (e.g., electric blue for a party, warm white for the evening) and turn accent lights on/off independently.
Result: at night, the library becomes a luminous sculpture. Uplighting creates a "floating" effect and draws long shadows on the ceiling. Accents on glass shelves create small circles of light that enhance objects and are reflected multiplied on the glass, creating a magical and futuristic effect. It's a perfect example of lighting as art.
Children's libraries and bedrooms
Context: colorful, playful library in a child's room. Besides books, it holds stuffed animals and toys. Parents want functional light for bedtime stories, but also the possibility to create a magical and reassuring atmosphere with soft colors, and a very soft night light.
Technical solution:
• Technique: general top lighting + accent lighting in the favorite stuffed animal's niche.
• LED strip: general: 24V LED, 60 LEDs/m, Tunable White (2700K-4000K), IP20. Accent in niche: short segment of low-power RGB LED strip.
• Profile/diffuser: colored angled profiles (red, blue, yellow) fixed under shelves. Opal diffusers for soft, glare-free light.
• Control: Tunable White + RGB controller compatible with Alexa. Parents created voice routines: "Alexa, bedtime story" -> library light sets to 3000K, 70%. "Alexa, night light" -> RGB light in stuffed animal niche turns on with a soft red (which doesn't disturb circadian rhythm) at 5%, and general lights turn off.
Result: the library is a functional and magical space. The warm, adjustable light is perfect for evening reading without straining children's eyes. The colored light in the niche and the ability to control everything with simple voice commands make the environment playful and reassuring, helping the bedtime ritual. Safety is maximum: low voltage, profiles protecting from direct view of LEDs, no accessible hot parts.
Libraries in offices and professional environments
Context: large library in an executive office, in walnut burl. Houses technical books, valuable volumes, and design objects. Requires lighting that combines prestige, functionality for quick consultation, and integration with the office's general lighting system (DALI).
Technical solution:
• Technique: top-level recessed lighting. Millimetric milling in shelves.
• LED strip: 24V LED, 120 LEDs/m, CRI 98 (maximum color rendering), Tunable White adjustable 2700K-5000K. Maximum density and quality for impeccable lighting.
• Profile/Diffuser: custom recessed profiles in walnut-colored anodized aluminum. Microprismatic diffusers for absolutely uniform light distribution, without any visible hot spots.
• Control: DALI power supply. Library lighting is a "light group" within the office's DALI lighting management system. It turns on/off and adjusts based on general scenes (e.g., "Meeting", "Work", "Public") and can also be controlled from a dedicated touch panel on the desk.
Result: magazine-architecture level lighting. By day, the library is a sober, prestigious furniture element. Lit, it emits perfect light, allowing appreciation of every detail of volumes and objects, with color quality comparable to an art gallery. Integration with the building automation system makes it an efficient and cutting-edge work tool, contributing to the professional image of the space.
Libraries: setting them up means understanding their value
We have taken a long journey through the world of library lighting, from the philosophy of lighting design to some case studies. We hope this complete guide has provided you with the inspiration to see libraries in a new light – literally and metaphorically.
Lighting a library is not an expense, but an investment in the value of your living space and your quality of life. It is an investment that makes a book collection usable and enjoyable, that transforms a piece of furniture into a work of art, that shapes the atmospheres of your evenings, and that, through technologies like Human Centric Lighting, can positively contribute to your well-being.
LED strips and aluminum profiles represent today the most flexible, efficient, and refined tool to realize this investment.
Take the sketch of your library, review the techniques, do your calculations, and start designing your personalized lighting. The result – a library that comes to life, that dialogues with the environment, that welcomes you with the right light at every moment – will repay you every day, transforming a corner of your home into a place of beauty, culture, and comfort.
Your project starts here. Illuminate your passion.